
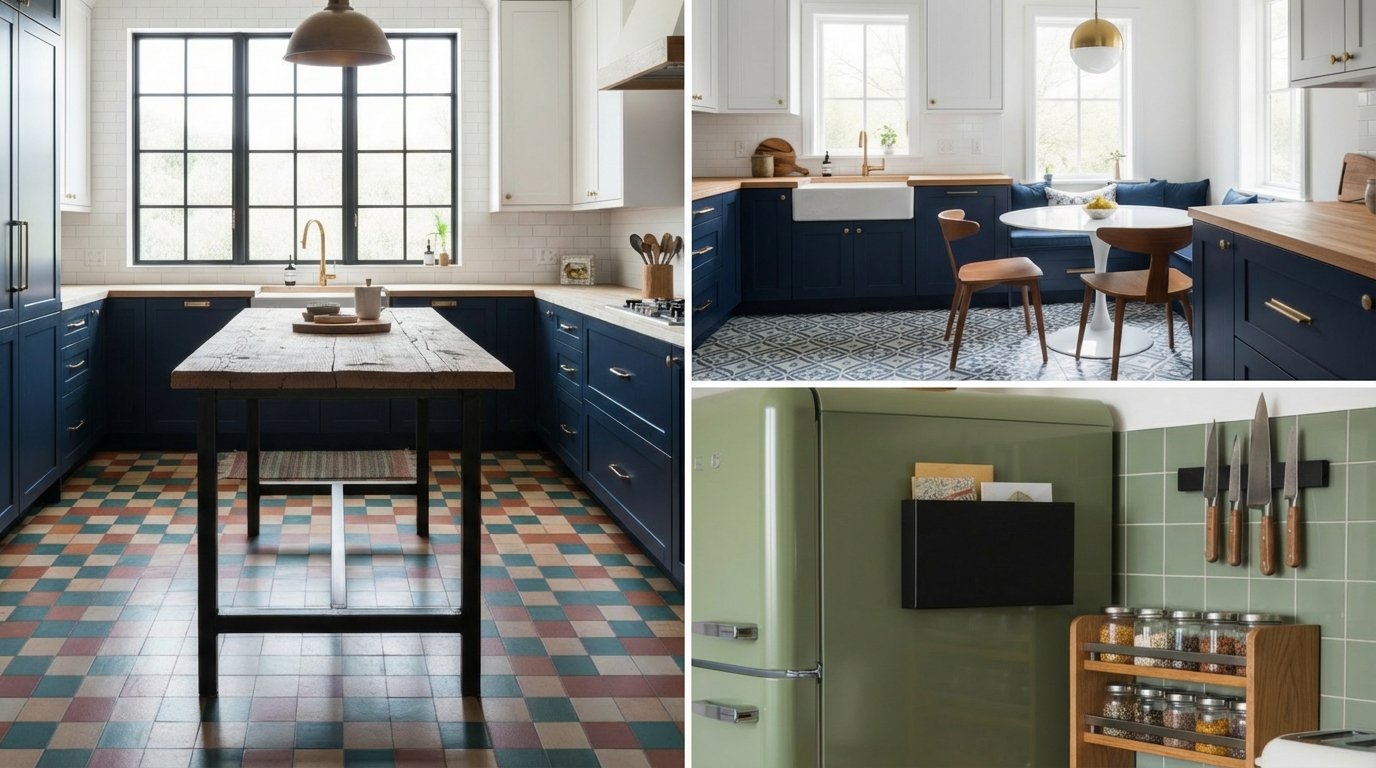
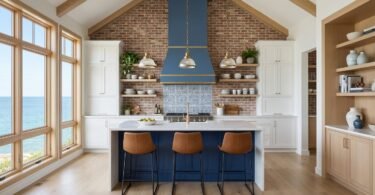
You love cooking but hate the clutter. A tiny kitchen often feels like a trap rather than a creative space. But limited square footage does not mean you sacrifice style. We found 20 strategic layout hacks and decor shifts that create the illusion of space while adding serious functionality. These ideas turn cramped corners into airy culinary zones.
Key Takeaways
- Verticality is King: Using walls up to the ceiling draws the eye upward and doubles storage potential.
- Light Manipulates Space: Reflective surfaces and under-cabinet lighting eliminate the shadows that make rooms feel small.
- Cohesion Creates Calm: Limiting your color palette reduces visual noise and makes the room feel expansive.
- Flow Over Fixity: Mobile islands and round tables improve movement patterns in tight grids.
Table of Contents
- Use a Round Table
- Opt for Small-Scale Appliances
- Use the Space Above Cabinets
- Remove Upper Cabinets
- Create Openness
- Build to the Ceiling
- Play with Color
- Use Hanging Storage
- Build a Plate Rack
- Find Storage Opportunities
- Achieve a Minimalist Kitchen
- Choose Complementary Lighting
- Find the Right Size Island
- Install a Peg Rail
- Try Stacking Appliances
- Use Wall-Mounted Bins for Storage
- Choose a Design Moment
- Stylish Storage Accessories
- Work within a Color Palette
- Create Movement
- Popular Asked Questions
Use a Round Table

Sharp corners in a tight kitchen stop the flow of traffic. A round table introduces soft curves that guide movement rather than blocking it. The absence of rigid angles allows you to tuck chairs in fully. This opens up floor space when the table is not in use. Visually, the curve breaks up the boxy nature of cabinetry and appliances. It adds a sculptural element to the room.
Choose a pedestal base rather than four legs. The single central support removes visual clutter near the floor. It creates more legroom for diners in a small nook. Materials like light oak or white marble reflect light and keep the eating area feeling airy. Style the center with a low profile vase. Tall centerpieces can make a small ceiling feel lower.
Pro Tip: Choose backless stools or ghost chairs (clear acrylic) to make the seating disappear visually.
Opt for Small-Scale Appliances

Standard American appliances often overwhelm a modest layout. They protrude past standard counter depth and eat up valuable walkway space. European-style or apartment-sized appliances offer the same functionality with a slimmer footprint. A 24-inch range or an 18-inch dishwasher saves nearly a foot of cabinetry space. This regained width allows for a pull-out spice rack or a tray divider cabinet.
These smaller units often feature retro or sleek designs that act as decor. Brands like Smeg or Galanz use color and chrome detailing. The appliance becomes a focal point rather than a bulky necessity. Integrated panel-ready fridges blend seamlessly with your cupboards. This creates a continuous wall of color that tricks the eye into seeing a larger room.
Save this idea to your Pinterest.
Use the Space Above Cabinets
The gap between the top of your upper cabinets and the ceiling is often a dust trap. It is actually prime real estate for long-term storage. Using this zone draws the eye upward. This makes the ceiling appear higher. The key is uniformity. Random items thrown up there look like clutter. Identical baskets, vintage tins, or matching ceramic pitchers create a deliberate design feature.
Woven textures like rattan or seagrass add warmth to a sterile kitchen. They conceal items you use once a year, like holiday cookie cutters or the turkey roaster. If you prefer a modern look, use wire bins with fabric liners. Ensure the items fit the scale of the gap. Too small, and they look lost. Too big, and they look jammed.
Pro Tip: Line the tops of your cabinets with wax paper before placing decor. You simply replace the paper when it gets dusty instead of scrubbing the wood.
Remove Upper Cabinets
Heavy upper cabinets can make a narrow kitchen feel like a tunnel. Removing them opens up the visual field immediately. The walls seem to push back. This allows natural light from windows to travel further into the room. You lose some closed storage, but you gain an immense sense of airiness. This forces you to edit your kitchenware down to the essentials you actually love and use.
Replace the cabinets with a single long shelf or nothing at all. A bare wall with a textured backsplash, such as beadboard or subway tile, acts as a canvas. You can hang art or install a statement sconce. If you need the storage, open shelving keeps the sightlines clear. The lack of heavy wooden doors removes the “looming” feeling that makes small kitchens stressful.
Create Openness

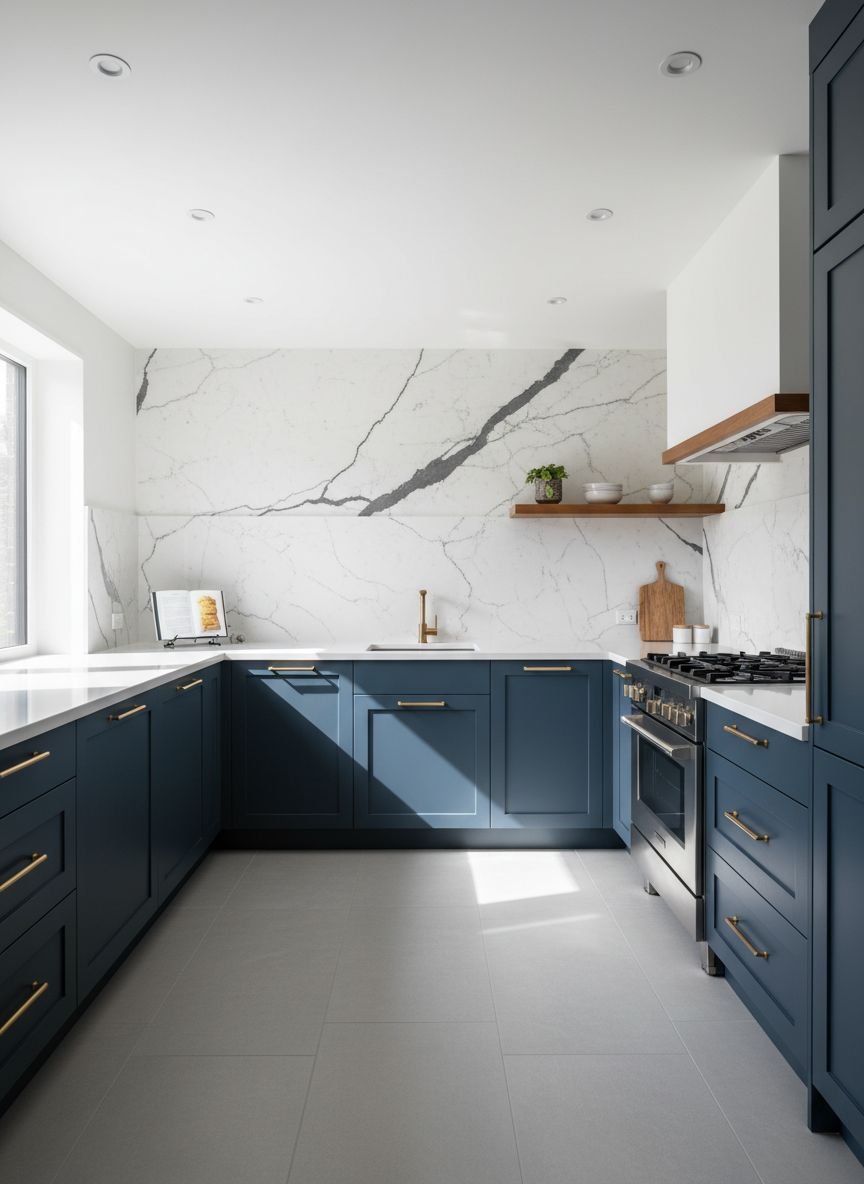
Openness is not just about removing things. It is about transparency. Replace solid cabinet doors with glass fronts. This allows the eye to travel through to the back of the cabinet. It adds depth to the room layout. Keep the interior of these cabinets organized with white dishes or clear glassware. Visual chaos behind the glass defeats the purpose.
Mirrors are another secret weapon. A mirrored backsplash reflects light and doubles the view. It mimics the effect of a window where there is none. If a full mirrored wall feels too bold, try an antique mirror with a patina. This creates a soft, diffused reflection that feels cozy rather than commercial. Glossy tiles also achieve a similar effect by bouncing light around the room.
Comparison: Open Shelving vs. Closed Cabinets
| Feature | Open Shelving | Closed Cabinets |
|---|---|---|
| Visual Impact | Airy, spacious, decorative | Clean, uniform, solid |
| Maintenance | Requires frequent dusting | Low maintenance, hides mess |
| Cost | Budget-friendly (DIY potential) | Higher investment |
| Best For | Aesthetic dishware, everyday items | Tupperware, mismatched items, food |
Build to the Ceiling
If you keep your upper cabinets, extend them all the way to the ceiling molding. Standard cabinets often stop a foot short. This creates a horizontal line that visually cuts the room height. Floor-to-ceiling cabinetry creates a vertical pillar effect. It emphasizes the height of the room rather than the small footprint.
You can achieve this look with custom joinery or by adding a “top box” to existing cabinets. Add trim and paint everything the same color to make it look like one unit. Use the highest shelves for non-essentials. A rolling library ladder adds a charming, functional element if you have the floor space. This maximizes every cubic inch of storage volume available.
Play with Color

Small spaces do not always require white paint. Deep, moody colors can actually blur the boundaries of a room. Painting the walls and the ceiling the same dark hue, like charcoal or forest green, creates an infinity effect. The corners disappear. If that feels too intense, try the “tuxedo” kitchen approach.
Paint lower cabinets a dark, grounding color and upper cabinets a bright white. The dark base anchors the room. The white uppers blend into the ceiling, making the room feel top-heavy and tall. This contrast adds architectural interest without shrinking the space. Keep the backsplash neutral to bridge the gap between the two tones.
Pro Tip: Use a satin or semi-gloss finish on cabinets. The slight sheen reflects light better than matte paint.
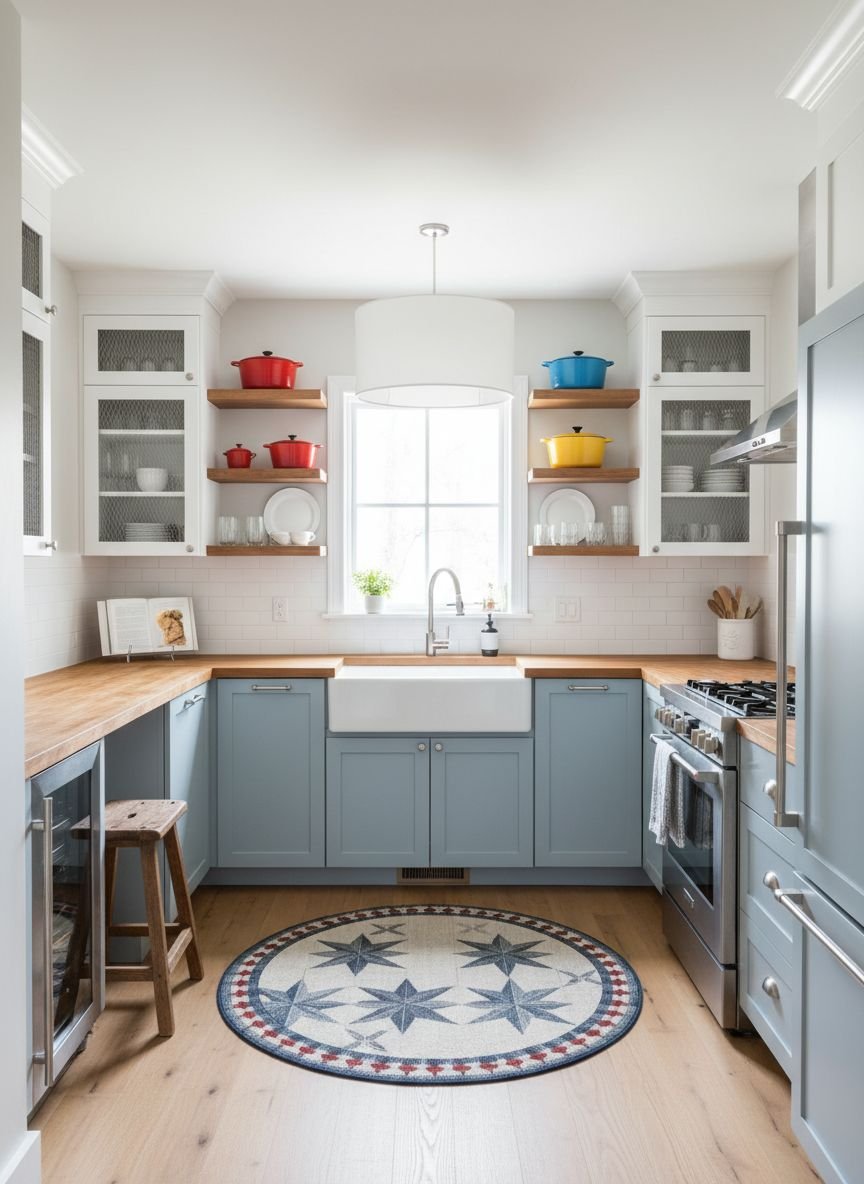
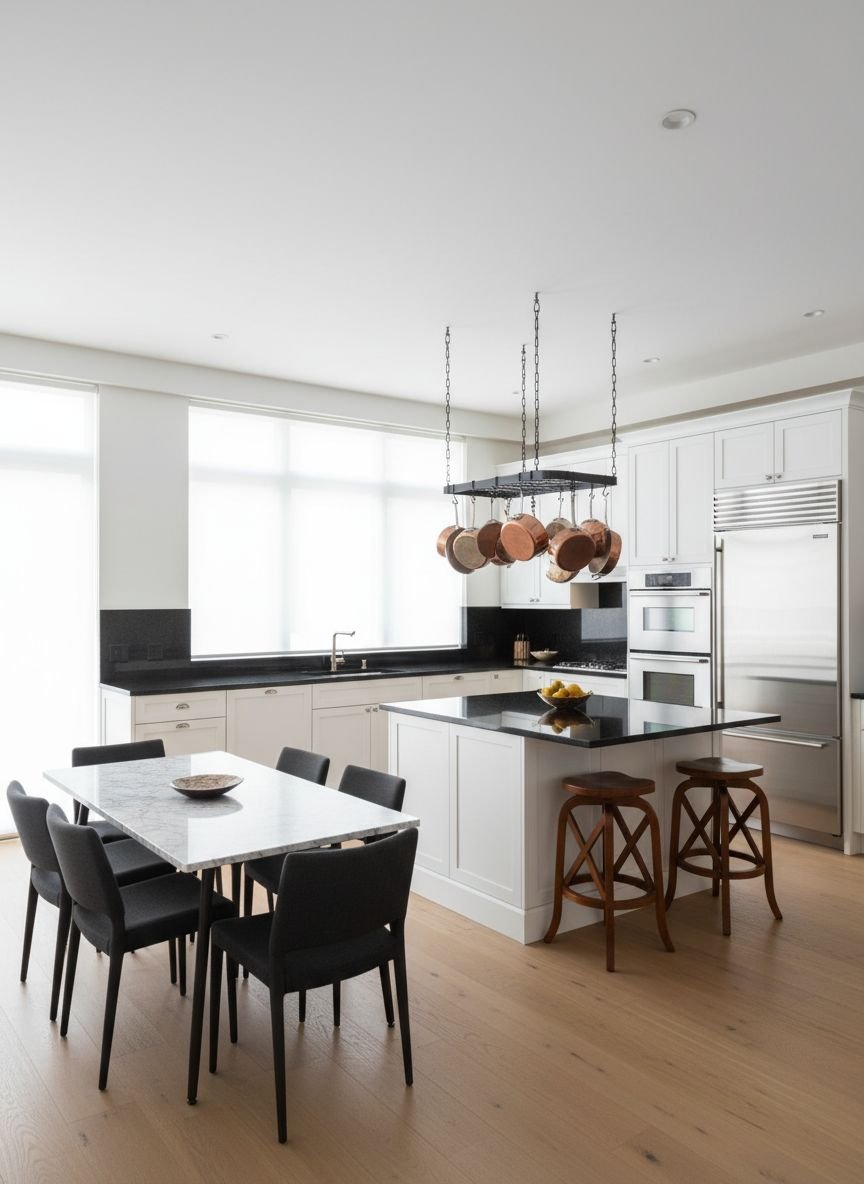
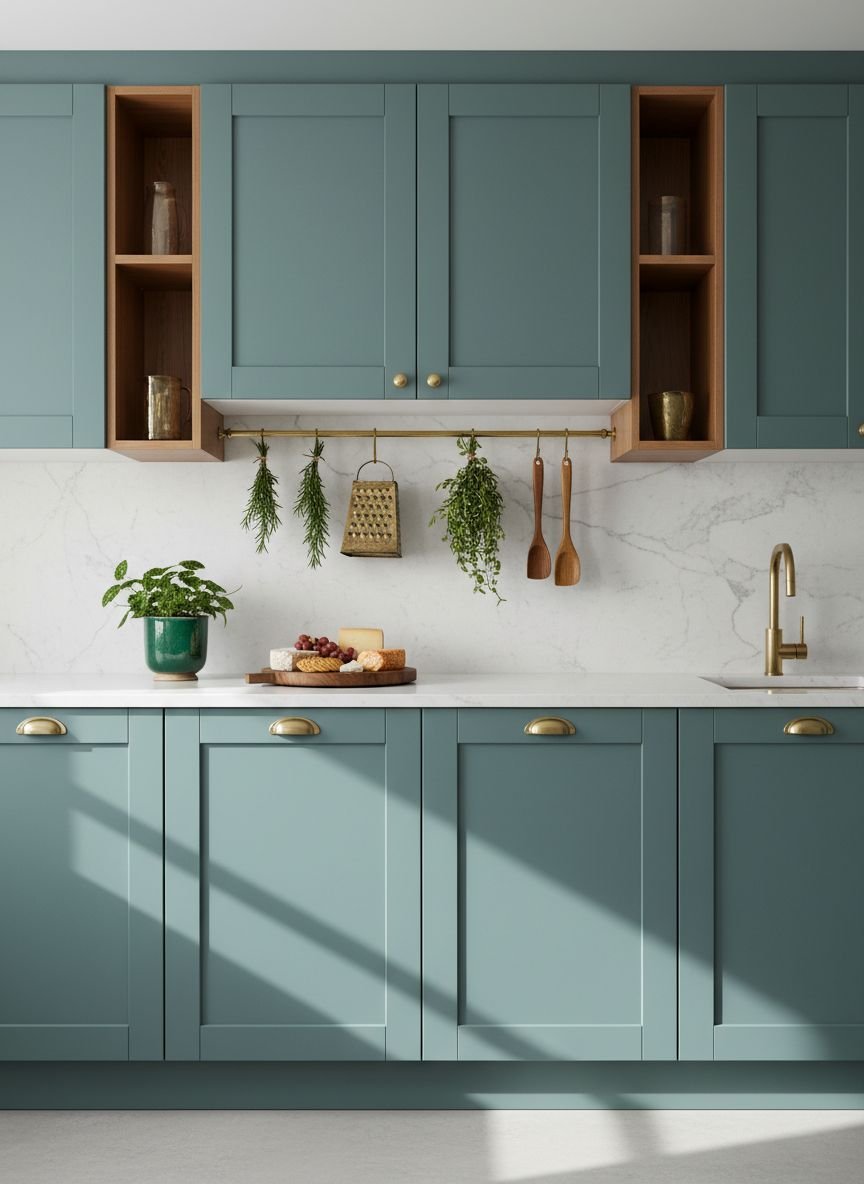
Use Hanging Storage
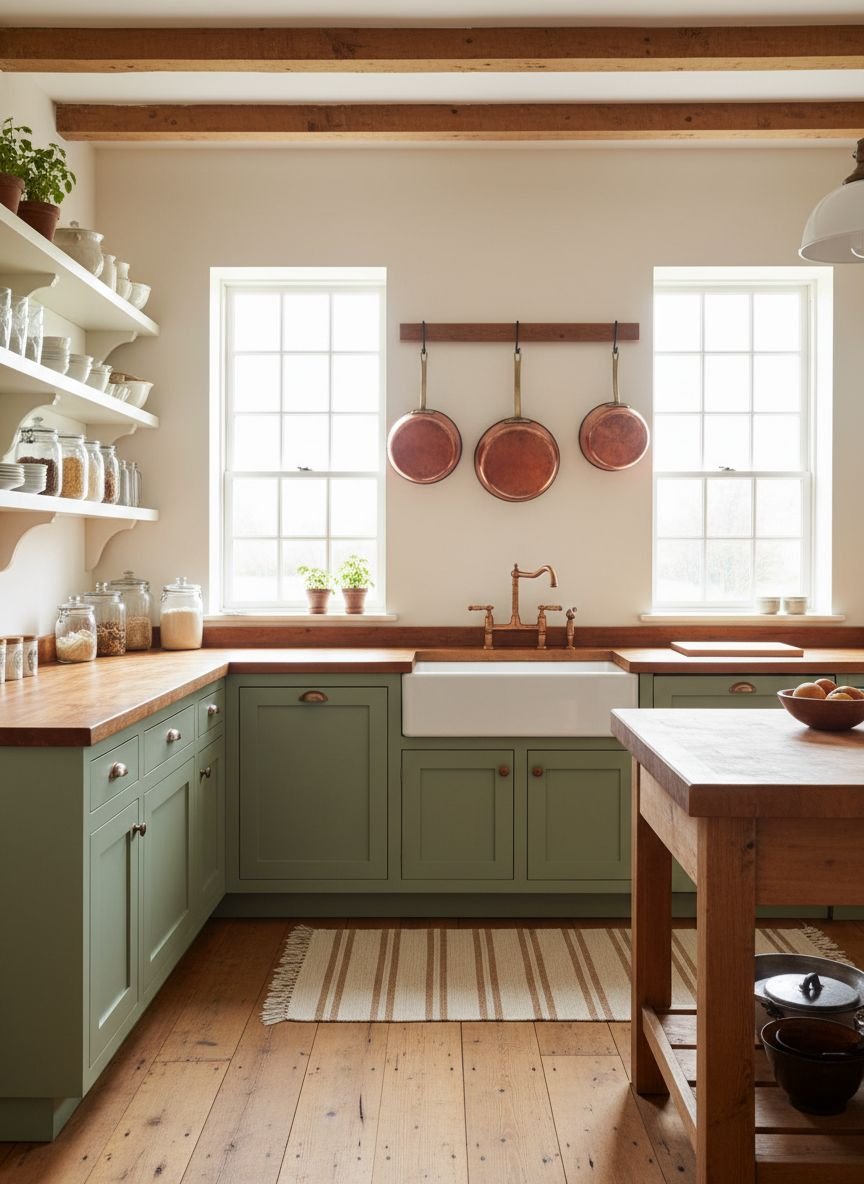
Counter space is the most precious currency in a small kitchen. Anything that sits on the counter reduces your prep area. Move these items to the vertical plane. Install a magnetic knife strip on the wall. Hang pots and pans from a ceiling rack or a wall-mounted rail system. This keeps tools within arm’s reach but off the work surface.
Copper or brass rails add a metallic shine that looks expensive. S-hooks allow you to hang mugs, colanders, and utensils. This utilitarian approach mimics the efficiency of a professional kitchen. It turns your tools into decor. Just ensure the items you hang are in good condition. Burnt pans or chipped mugs will make the space look neglected.
Build a Plate Rack

A wall-mounted plate rack is a classic feature of English cottage design. It is incredibly slim, often protruding only a few inches from the wall. This makes it perfect for narrow walkways where a full cabinet would block traffic. It displays your prettiest ceramics face-forward. This acts as changing art for your kitchen.
Plate racks free up massive amounts of cabinet space. Stacking plates in a cupboard is inefficient. Vertical storage allows you to grab a single dinner plate without lifting a heavy stack. You can build a simple DIY version with dowels and pine boards. Paint it to match your wall color for a built-in look, or stain it wood for a rustic contrast.
Save this idea to your Pinterest.
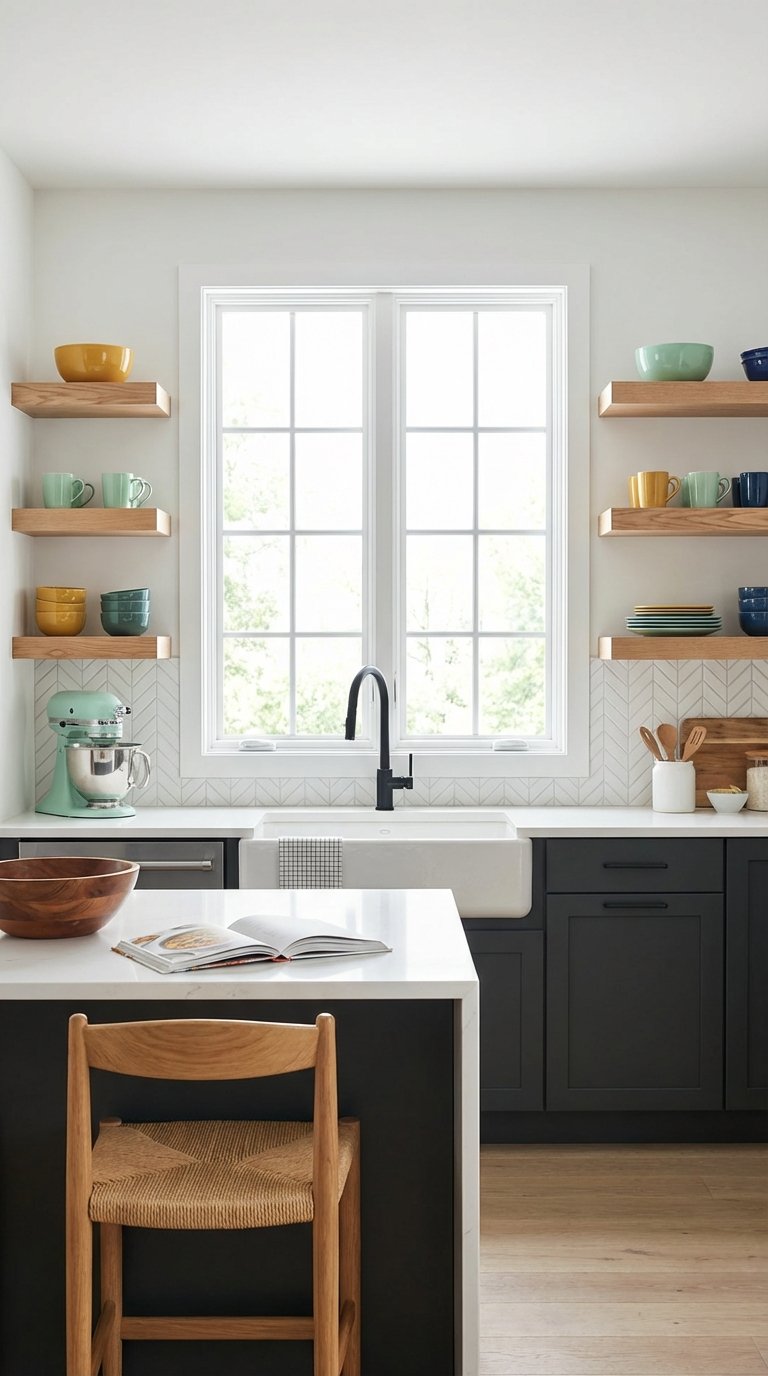
Find Storage Opportunities
Hidden storage exists in the most unexpected places. Look at the “dead” spaces in your kitchen structure. The toe-kick (the recessed space at the bottom of cabinets) can be converted into shallow drawers. These are perfect for baking sheets, placemats, or pet bowls.
The sides of a cabinet run or an island are often blank. Add hooks for tea towels or shallow floating shelves for spices. Even the inside of cabinet doors offers potential. Adhesive bins can hold pot lids, foil rolls, or cleaning sponges. Maximizing these hidden zones keeps the visible surfaces clear. A clutter-free surface always tricks the brain into perceiving more space.
Get The Look: Organization Essentials
- Under-Shelf Baskets: Slide onto existing shelves to use vertical gaps.
- Lazy Susans: perfect for deep corner cabinets to access blind spots.
- Tension Rods: Create vertical dividers for cutting boards in lower cabinets.
- Clear Risers: Double the capacity of a shelf for mugs and glasses.
Achieve a Minimalist Kitchen
Minimalism in a small kitchen is functional, not just aesthetic. Visual noise creates mental stress in tight quarters. Adopt a “one in, one out” policy for gadgets and decor. Keep the countertops strictly for items used daily, like the coffee maker. Everything else goes in a drawer or bin.
Choose flat-front cabinetry with push-to-open mechanisms. Removing hardware handles streamlines the visual lines of the room. It also prevents you from snagging clothing on knobs in a narrow galley. Choose materials with subtle textures rather than loud patterns. A smooth quartz countertop in a solid color reflects light and looks cleaner than a busy granite.
Choose Complementary Lighting

A single overhead light creates harsh shadows in the corners. This shrinks the room. Layered lighting expands it. Install task lighting under your upper cabinets. This illuminates the work surface and eliminates dark pockets. It creates a warm glow that makes the room feel wider.
Add a statement pendant over the sink or the small dining nook. The scale is important. A large, oversized pendant can actually make a small space feel grander by playing with proportion. Avoid tiny, dinky lights that look like an afterthought. Wall sconces with articulating arms are excellent for adding directed light without taking up table space.
Pro Tip: Use warm white bulbs (2700K-3000K). Cool white light can make a small kitchen feel like a sterile hospital room.
Find the Right Size Island
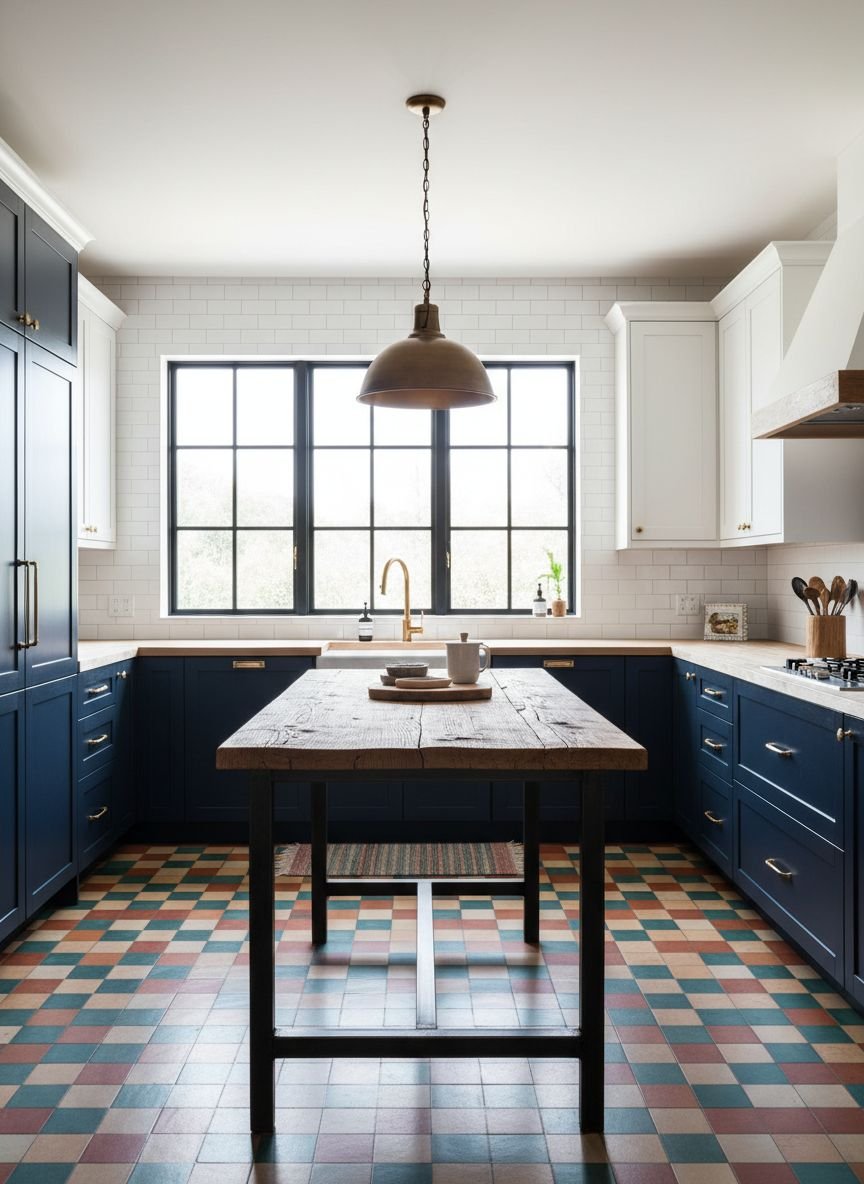
You might think an island is impossible in a small kitchen. You just need to rethink the scale. A massive built-in block won’t work. But a narrow console table, a butcher block cart, or a repurposed vintage dresser can serve as an island. It provides that crucial extra prep surface.
Look for an island on wheels. You can roll it into the center when chopping vegetables and push it against a wall when hosting a party. Open shelving on the island keeps it visually light. Ensure you have at least 36 inches of clearance around it for walking. If that is not possible, consider a fold-down table attached to the wall that serves as a temporary island.
Install a Peg Rail
The Shaker peg rail is the ultimate storage hack for small spaces. It is a strip of wood with evenly spaced pegs that runs along the wall. It can wrap around the entire perimeter of the kitchen. It provides endless flexible storage. Hang dried herbs, aprons, market bags, or a dustpan and brush.
Paint the rail the exact same color as the wall. This makes the structure blend in, so only the hanging objects stand out. It creates a gallery-like effect for your everyday items. You can also rest small framed art or cutting boards on top of the rail ledge. It adds architectural character to a plain drywall box.
Try Stacking Appliances

Floor space is limited, so go vertical with your heavy machinery. If you have a washer/dryer in the kitchen (common in apartments), stack them behind a tall cabinet door. Place the microwave in a built-in cubby above the wall oven rather than on the counter.
Create an “appliance garage” tower. This is a tall cabinet with pull-out shelves dedicated to the toaster, blender, and mixer. You open the door, pull out the shelf to use the item, and slide it back. It keeps the counters pristine. This vertical column of utility concentrates the heavy elements in one zone, leaving the rest of the kitchen open.
Comparison: Fixed Island vs. Rolling Cart
| Feature | Fixed Island | Rolling Cart |
|---|---|---|
| Stability | Rock solid for heavy prep | Can wobble slightly |
| Flexibility | Permanent structure | Moveable, versatile |
| Storage | Deep drawers/cabinets | Open shelves usually |
| Space Req. | Requires wide clearance | Fits in tight spots |
Related posts :
- 16 Genius Small Kitchen Ideas to Maximize & Organize Your Space Like a Pro
- 15 Stunning Modern Kitchen Design Inspiration Ideas for Sleek and Functional Spaces that Will Transform Your Home
- 14 Apartment Decor Inspiration Cozy Modern Ideas to Copy Now That Will Transform Your Space
Use Wall-Mounted Bins for Storage
Fruit bowls and vegetable baskets take up massive counter real estate. Move fresh produce to the wall. Wire wall bins or hanging mesh bags add an industrial or farmhouse vibe. They keep onions, garlic, and citrus aerated and accessible.
Mount them on the side of a cabinet or on a bare wall near the prep zone. You can also use rails with hanging cups for fresh herbs. Living plants add oxygen and vibrancy to a small kitchen. Vertical gardening on a sunny wall turns ingredients into decor. This frees up the counter for the actual work of cooking.
Save this idea to your Pinterest.
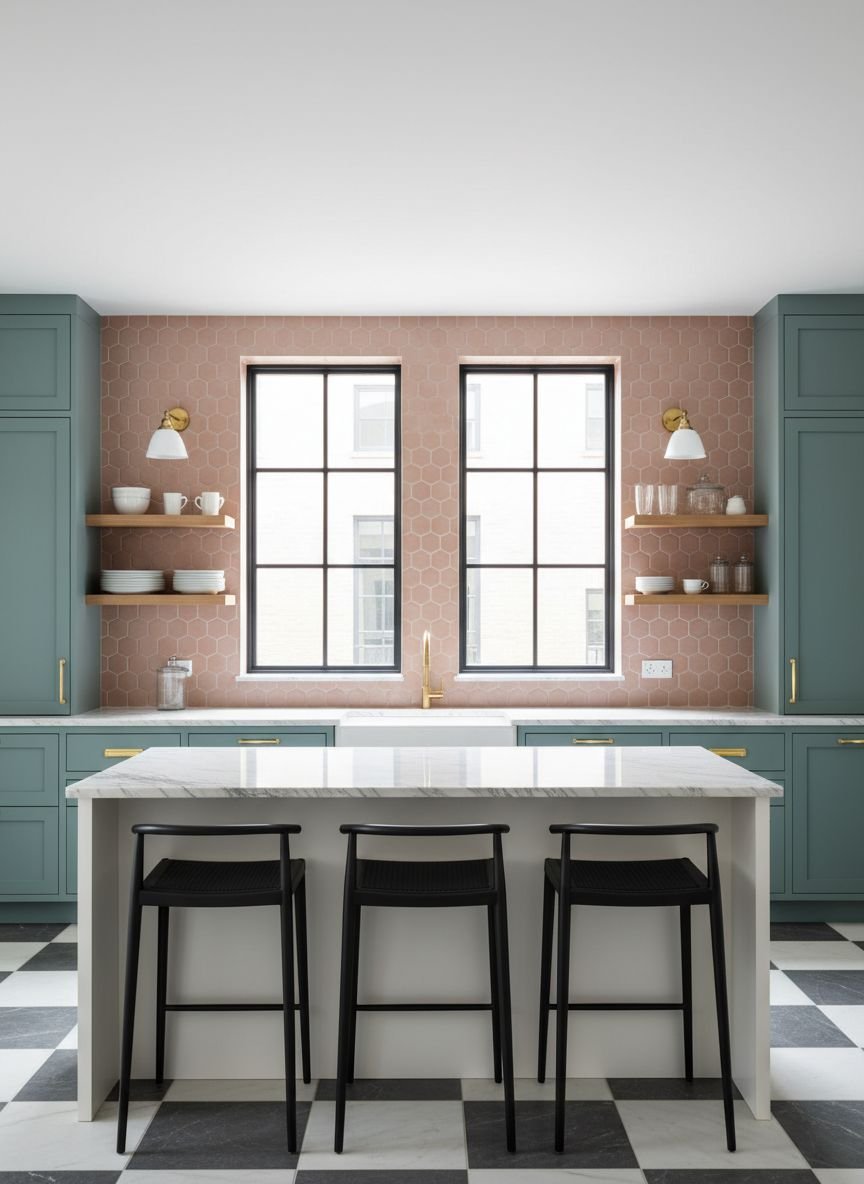
Choose a Design Moment
When a room is small, you cannot have ten different focal points. It becomes chaotic. Pick one “design moment” and let the rest of the room support it. This could be a bold, patterned tile floor. It could be a slab of dramatic marble for the backsplash. It could be a vintage rug.
This focal point draws the eye immediately. It distracts from the size of the room. If you choose a bold floor, keep the cabinets and walls neutral. If you choose a statement backsplash, keep the counters simple. This hierarchy of design makes the space feel curated and intentional, rather than cluttered and small.
Stylish Storage Accessories

In a small kitchen, your storage is often visible. The packaging of grocery store items creates visual noise. The bright red cereal box or the blue dish soap bottle clashes with your decor. Decanting is the solution. Pour dry goods into matching glass jars. Pour dish soap into a ceramic or amber glass dispenser.
Uniform containers create a sense of order. Wood, glass, and ceramic textures look pleasing to the eye. This allows you to store pasta or flour on an open shelf without it looking messy. It turns ingredients into a texture palette. It requires a little extra effort after grocery shopping, but the visual payoff is huge.
Work within a Color Palette
A cohesive color story makes a small room feel larger. Stick to the “Rule of Three.” Choose one main color (usually for walls/cabinets), one secondary color (for counters/floors), and one accent color (for hardware/accessories).
If you use too many colors, the eye stops at every shift. This chops up the space. A monochromatic palette allows the eye to glide across the room. If you love color, try different shades of the same hue. For example, pale blue walls, navy cabinets, and a slate blue rug. This layering adds depth without breaking the visual flow.
Create Movement
Static lines can make a small room feel stiff. Introduce patterns that create movement. Herringbone wood floors or chevron tiles have arrows that literally point the eye in a direction. This implies length and distance.
A runner rug with a linear pattern elongates a galley kitchen. Wallpaper with a vertical stripe raises the ceiling. Curved cabinet hardware or arched doorways soften the boxiness. These subtle cues keep the eye moving, which prevents the brain from registering the boundaries of the tight space immediately.
Popular Asked Questions
How can I make my small kitchen look expensive?
Upgrade the “touch points.” Swap out basic cabinet hardware for heavy brass or matte black handles. Replace a standard faucet with a high-neck, architectural pull-down faucet. Add a dimmer switch to your lighting. These small, tactile changes feel luxurious and distract from the small footprint.
What is the best layout for a small kitchen?
The “Galley” or “Corridor” layout is often the most efficient. It consists of two parallel runs of cabinets. This maximizes counter space on both sides and creates a tight, efficient work triangle. If the room is square, an L-shape layout works best to keep one corner open for a small dining table.
What colors make a small kitchen look bigger?
White and off-white are the classic choices because they reflect the most light. However, cool grays, soft sage greens, and pale blues also recede visually, making walls feel further away. The key is low contrast between the walls and the cabinets.
Where should I put the microwave in a small kitchen?
Get it off the counter. Options include:
- Over the range: Integrated with the vent hood.
- In a lower cabinet: A designated shelf in the island or base cabinets.
- On a shelf: Deep open shelving can hold a microwave if there is an outlet nearby.
Conclusion
Small kitchens require big creativity. By focusing on vertical storage, light manipulation, and cohesive design, you can transform a cramped cooking space into a functional jewel box. It is not about the square footage you lack; it is about how you use the square footage you have.

Leave a Comment