
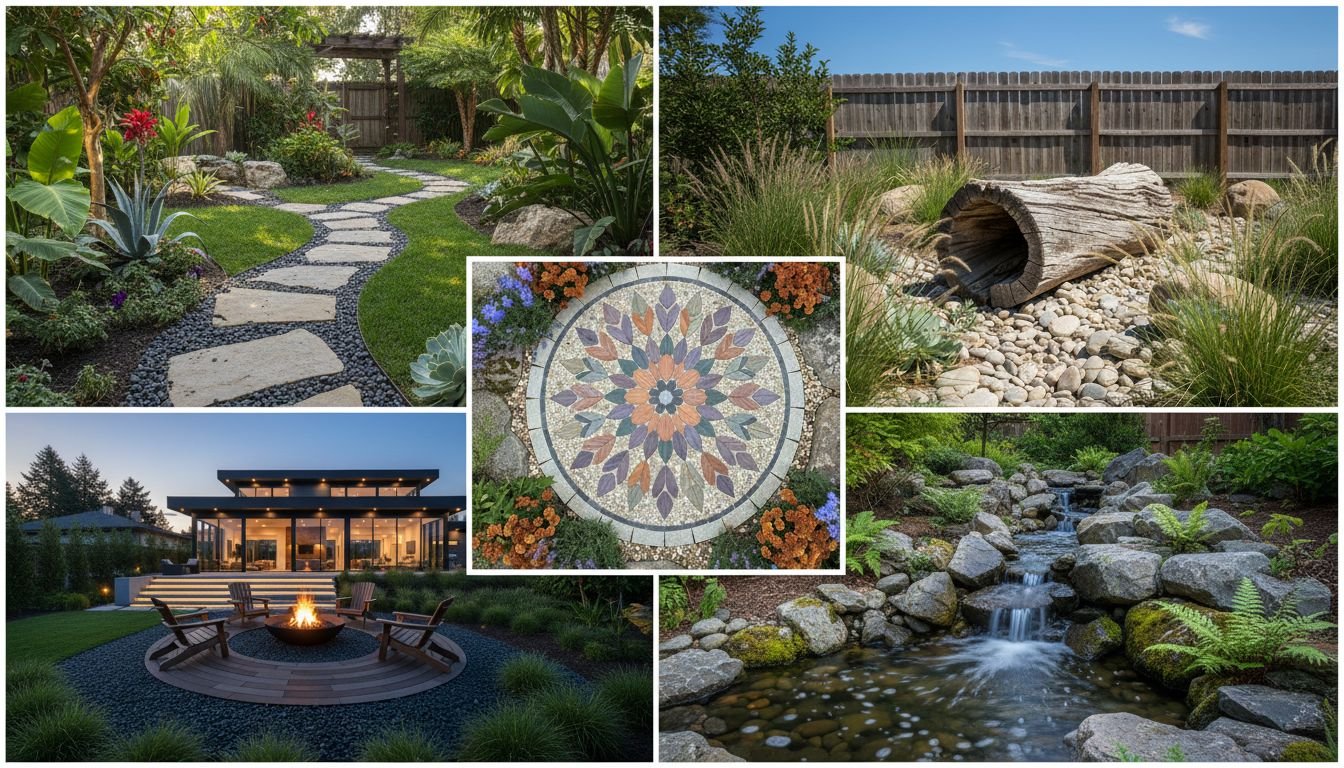
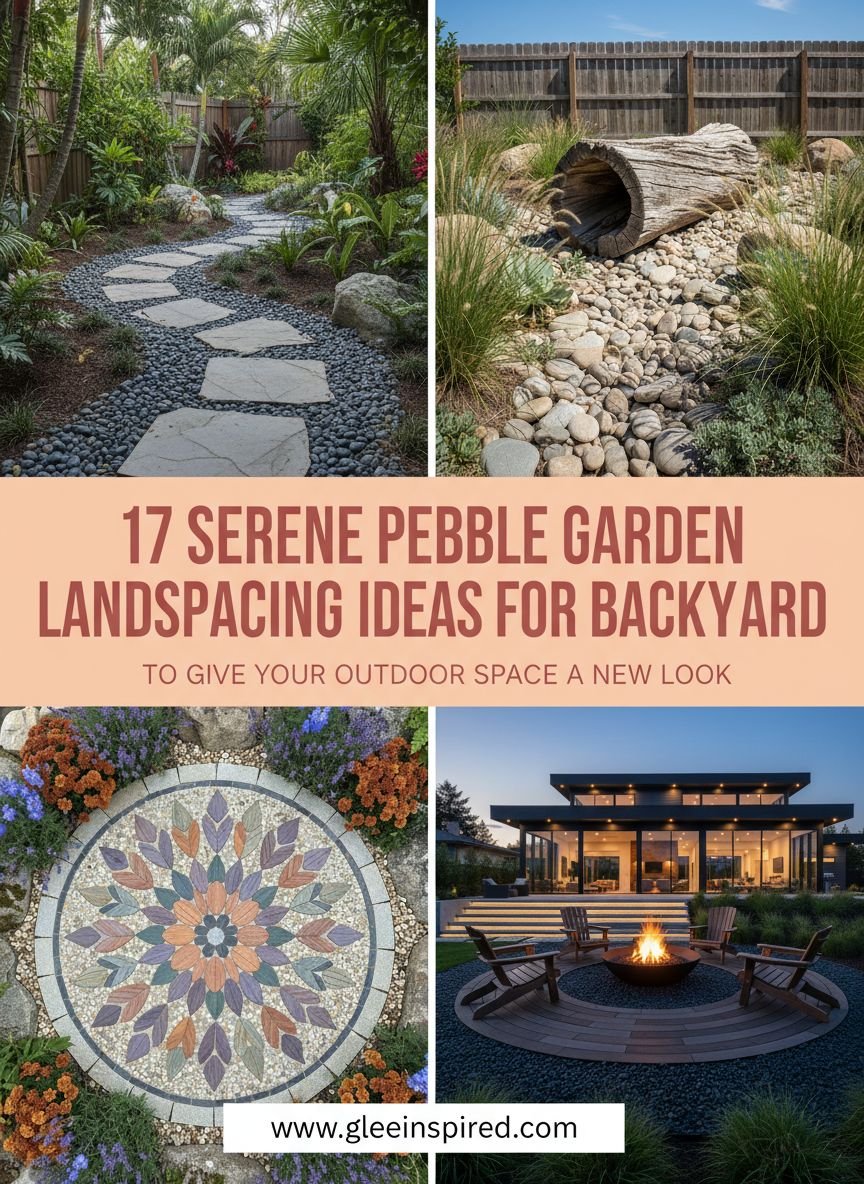
If you are tired of mowing, watering, and fighting an endless battle against weeds in your backyard, you are not alone. Traditional lawns are high-maintenance and often struggle in extreme weather. The rising trend of pebble garden landscaping ideas for backyard spaces is the perfect solution for homeowners who want high style with low effort.
A pebble garden offers a sophisticated, drought-tolerant alternative that instantly elevates your home’s exterior. Whether you have a tiny courtyard or a sprawling lawn, incorporating river rocks, gravel, and smooth stones can solve drainage issues while creating a serene, spa-like atmosphere. This guide explores 17 specific, actionable designs that blend texture, color, and functionality to give you the outdoor sanctuary you deserve.
Key Takeaways
- Drastically Reduce Maintenance: Pebble gardens eliminate the need for mowing and significantly reduce watering requirements.
- Improve Drainage naturally: Permeable stone layers prevent waterlogging and protect your home’s foundation.
- Versatile Design Aesthetics: From Zen minimalism to rustic cottage vibes, pebbles adapt to any architectural style.
- Budget-Friendly Options: Using local gravel and river rocks can be far cheaper than maintaining a lush green lawn.
Table of Contents
- Curved Pebble Path with Stepping Stones
- Dry Riverbed with Mixed Pebbles and Driftwood
- Pebble Mosaic Centerpiece
- Modern Fire Pit with Pebble Base
- Relaxing Hammock Retreat with Pebble Flooring
- Clean and Colorful Pebble Border
- Sleek & Soothing Pampas Border
- Colorful Wildflower Border with Smooth River Pebbles
- Polished Pebble Drainage Channel
- Sculptural Focal Point with Layered Pebble Base
- Potted Herb Garden with Pebble Base
- Modern Minimalist Courtyard with Pebble Accents
- Elegant Two-Tone Pebble Border
- Modern Zen Corner with Charcoal Pebble Grounding
- Contemporary Terrace with Illuminated Pebble Borders
- Rustic Pebble Walkway with Terracotta Planters
- Functional Garden Beds Using Pebble Grounding
- Popular Asked Questions
- Conclusion
Curved Pebble Path with Stepping Stones
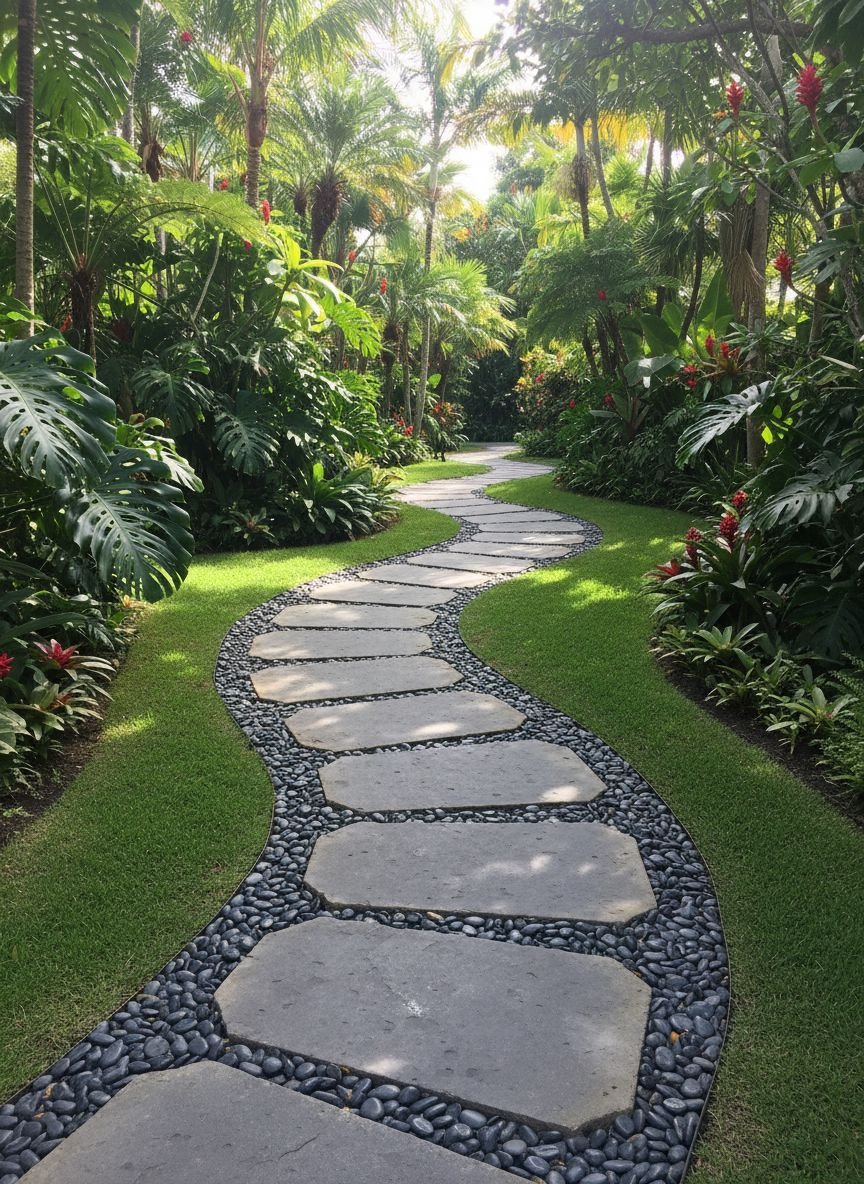
A curved pebble path introduces a sense of mystery and flow to your backyard. Unlike straight concrete walkways, a winding path invites you to slow down and enjoy the journey through your garden. Visually, the contrast between smooth, dark slate stepping stones and lighter pea gravel creates a dynamic texture that catches the eye. The curve softens the hard lines of fences and house walls, making the entire space feel more organic and spacious.
To implement this look, start by outlining your path with a flexible garden hose to get the perfect curve. Excavate the area to a depth of about 4 inches and lay down a weed barrier. Fill the base with crushed stone for stability, then top with your chosen aesthetic pebbles. Place large flagstones or pavers on top, ensuring they are level and spaced comfortably for an average stride. This design works exceptionally well in shaded areas where grass struggles to grow.
Pro Tip: Use metal or composite edging along the sides of the path to keep the small pebbles from migrating into your flower beds or lawn.
Dry Riverbed with Mixed Pebbles and Driftwood
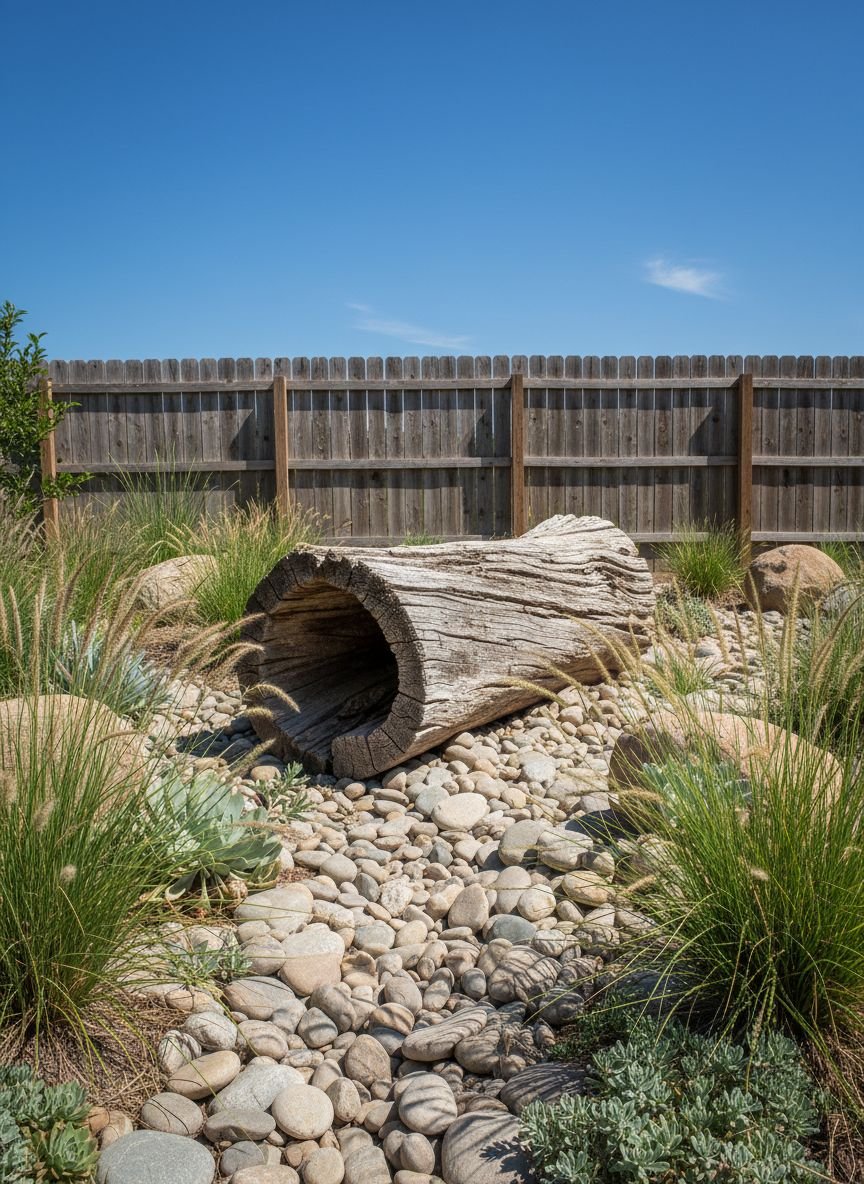
If your backyard suffers from poor drainage or has a natural slope, a dry riverbed is both a practical solution and a stunning visual feature. This design mimics the look of a dried-up stream, using stones of various sizes to guide water away from your home during heavy rains. The aesthetic rely on the interplay of grey river rocks, larger boulders, and weathered driftwood, creating a rugged, naturalistic vibe that looks beautiful even when bone dry.
Design this feature by digging a shallow trench that meanders through your yard. Line it with landscape fabric and place the largest boulders at the “bends” of the river to simulate natural erosion patterns. Fill the center with medium-sized river rocks and the edges with smaller gravel. Integrating driftwood adds an artistic, sculptural element that breaks up the stone texture. This is a perfect strategy for xeriscaping, as it requires zero water to maintain its look.
Pro Tip: Plant ornamental grasses like Blue Fescue or sedges along the “banks” of your dry riverbed to soften the rocky edges and enhance the illusion of a water feature.
Pebble Mosaic Centerpiece
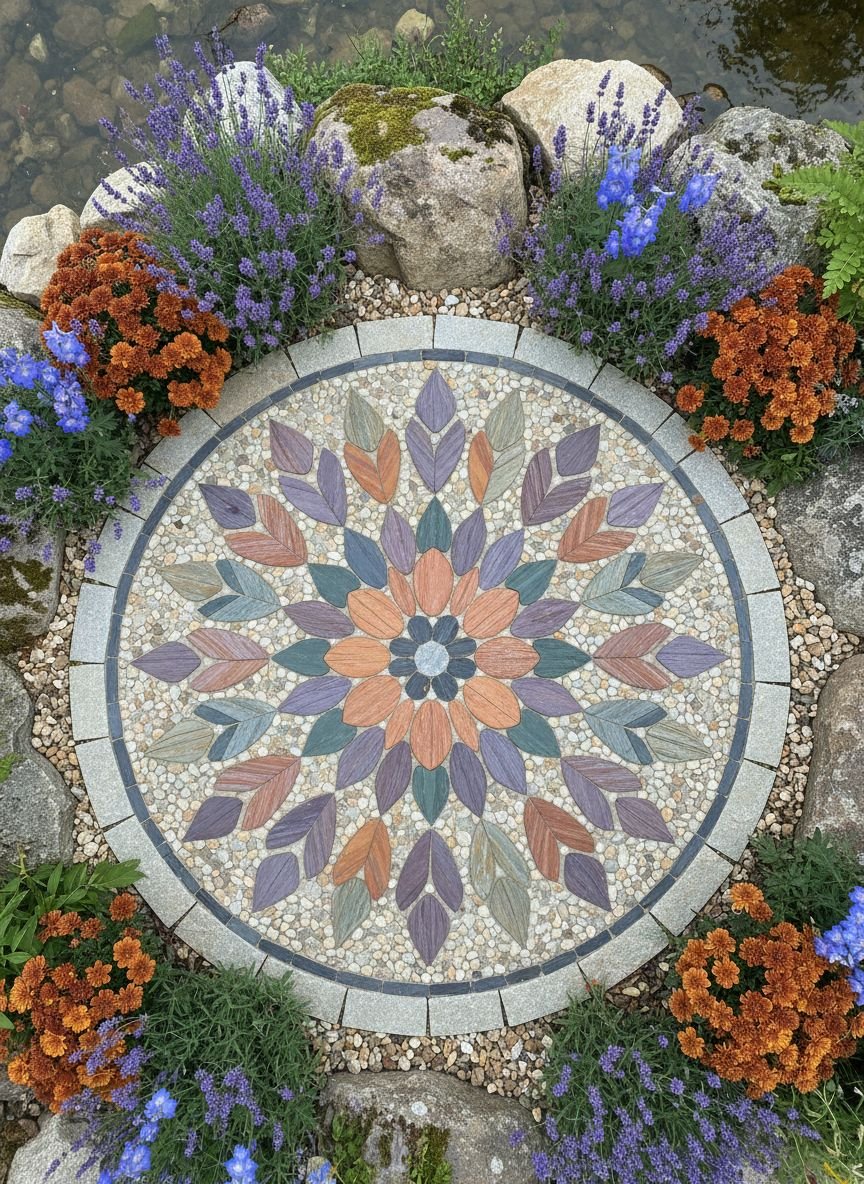
Transform a plain patch of ground into a work of art with a pebble mosaic centerpiece. This idea focuses on using stones of different colors—typically black, white, and terracotta—to create intricate patterns like spirals, flowers, or geometric mandalas. The visual impact is immediate and powerful, serving as a permanent rug for your outdoor living space. It adds a handcrafted, artisan touch that feels luxurious and bespoke.
Creating a mosaic requires patience but is a rewarding DIY project. You will need to sort your pebbles by size and color before you begin. Prepare a base of dry mortar mix (sand and cement) and press the pebbles into it while it is dry. Once your design is complete, mist it with water to set the mortar. This technique ensures the stones stay fixed in place. A mosaic works beautifully as a landing pad at the bottom of patio steps or as a focal point in a courtyard.
Pro Tip: Select flat, oval stones for the best results. Standing them on their edge rather than laying them flat allows for tighter packing and a more durable surface.
Modern Fire Pit with Pebble Base
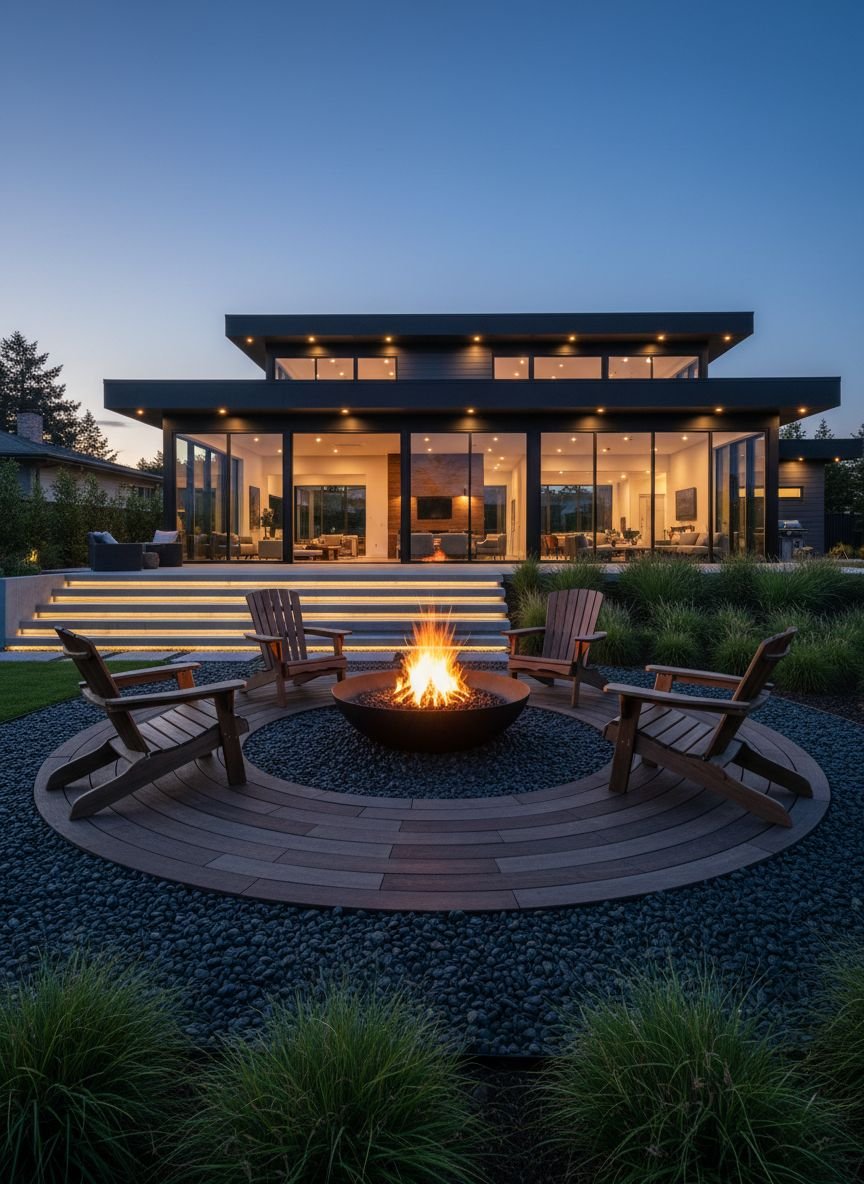
A modern fire pit area grounded by pebbles defines a cozy social zone without the need for pouring a concrete slab. The crunch of gravel underfoot adds an acoustic element that feels rustic yet refined. Visually, a base of crushed granite or pea gravel provides a neutral, fire-safe perimeter that makes the fire pit itself pop. The porous nature of the pebbles also ensures that rainwater drains away quickly, so your seating area is never muddy.
To set this up, choose a location away from low-hanging trees. Clear the grass and level the ground, then install a heavy-duty weed membrane. Spread a 3-inch layer of angular gravel, which locks together better than round pea gravel and provides a stable surface for chairs. Place your fire bowl or build a stone fire ring in the center. The result is a dedicated “room” in your garden that feels intentional and inviting.
Pro Tip: Choose dark-colored gravel like basalt or charcoal slate for the base to hide ash and soot that might fall from the fire pit.
Relaxing Hammock Retreat with Pebble Flooring
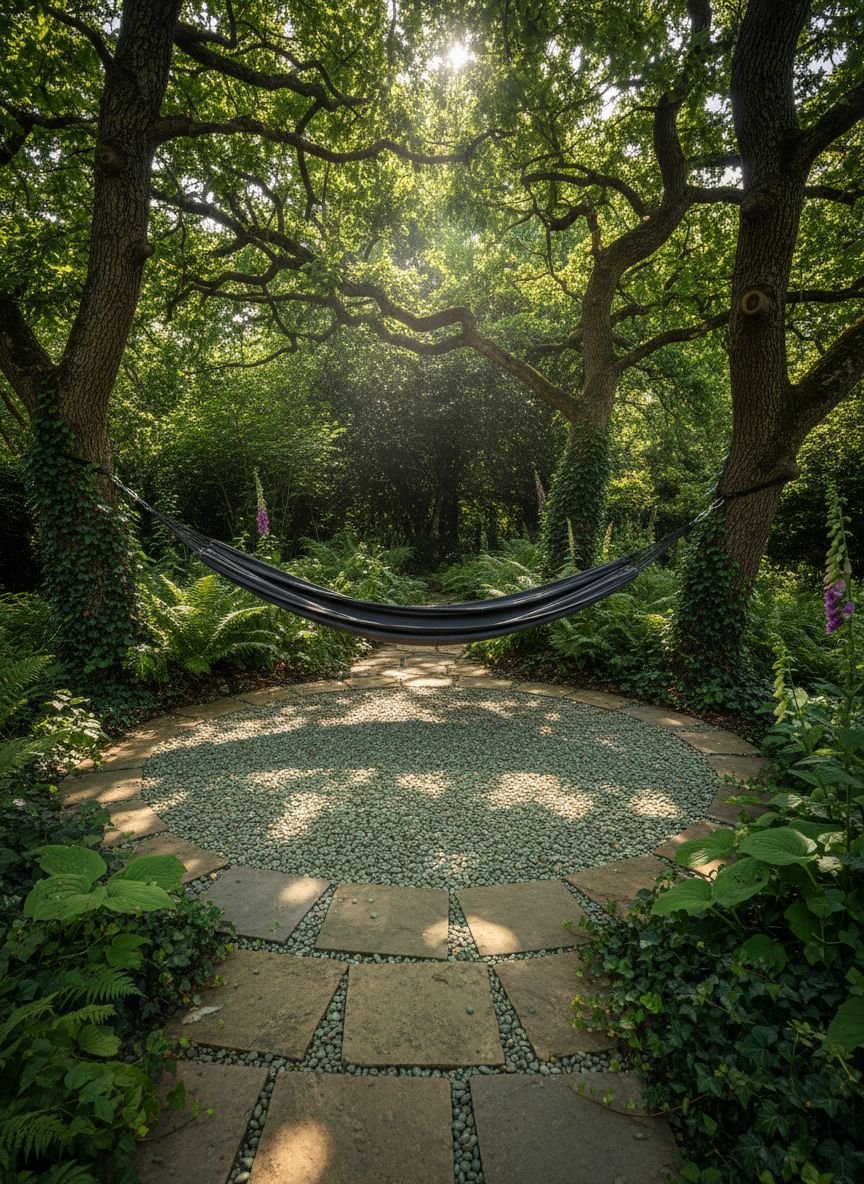
Create a dedicated relaxation zone by installing a hammock stand over a bed of smooth beach pebbles. This design choice separates the lounging area from the rest of the active yard, mentally signaling that this is a place for rest. The sensory experience of smooth stones is calming, and the visual uniformity of white or beige pebbles reflects light, making the space feel airy and bright. It is a simple upgrade that turns an unused corner into a private resort-style escape.
Implementation is straightforward. clear a rectangular area slightly larger than your hammock footprint. Install edging—timber sleepers work well for a rustic look, while steel edging suits modern tastes. Fill the area with rounded river stones or polished Mexican beach pebbles. These stones are comfortable enough to walk on barefoot. Add a few potted palms or ferns around the perimeter to increase privacy and add a splash of green.
Pro Tip: Save this idea to your Pinterest. If you use a hammock stand, place flat pavers under the stand’s feet effectively. This prevents the metal from sinking into the loose pebbles and keeps the hammock stable.
Comparison: Pebble Types for Backyard Landscaping
| Pebble Type | Best Use Case | Pros | Cons |
|---|---|---|---|
| Pea Gravel | Pathways, Patios | Cheap, comfortable to walk on | Migrates easily, needs edging |
| River Rock | Dry Riverbeds, Borders | Excellent drainage, natural look | Hard to walk on, heavy |
| Polished Pebbles | Planters, Accents | High-end aesthetic, shiny when wet | Expensive, slippery |
| Crushed Granite | Fire Pit Bases, Driveways | Stable, packs down firm | Sharp edges, can be gritty |
| Slate Chips | Modern Borders, Mulch | Flat, contemporary color | Can be brittle, sharp |
Clean and Colorful Pebble Border
A clean pebble border is the ultimate trick for neatening up messy garden edges. By creating a buffer zone between your lawn and your fence or house wall, you eliminate the need for tricky trimming and weed whacking. Visually, a band of multi-colored river stones adds a finished, deliberate look to the landscape. The variety of colors—tans, greys, and creams—ties together different elements of your exterior, such as brickwork and paving.
To achieve this, dig a trench about 6 inches wide and 3 inches deep along your fence line. Install a rigid plastic or metal edging strip to separate the grass from the rocks. Lay down landscape fabric to prevent weeds from growing through. Fill the trench with 1-2 inch river rocks. This not only looks tidy but also prevents mud from splashing onto your siding during rainstorms.
Pro Tip: Avoid using very small gravel for borders next to a lawn, as the stones can easily get kicked into the grass and become dangerous projectiles when you mow.
Sleek & Soothing Pampas Border
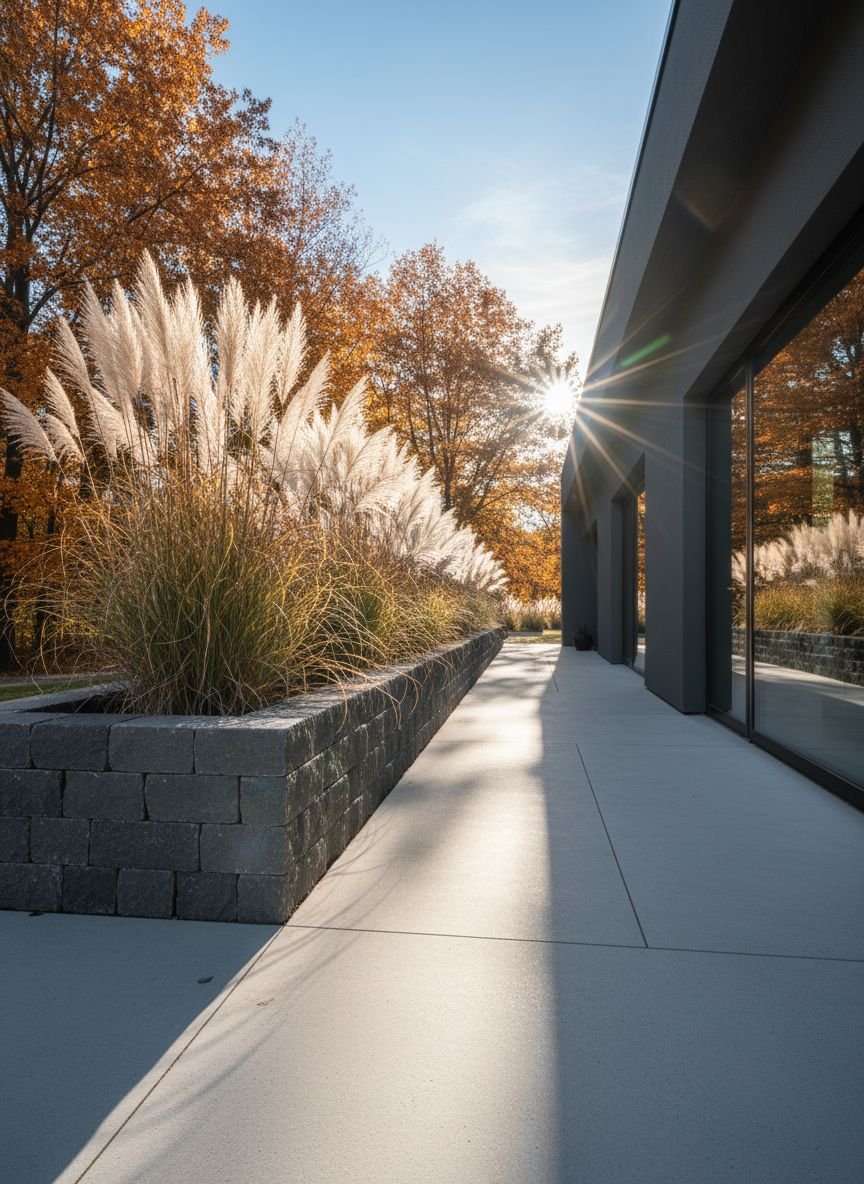
Combining the soft, feathery texture of Pampas grass with the hard, smooth surface of grey pebbles creates a stunning study in contrast. This design is perfect for modern or coastal-themed gardens. The neutral palette of the grey stones allows the dramatic height and fluffiness of the Pampas grass to take center stage. It is a minimalist approach that delivers maximum impact with very few plants.
Plant your Pampas grass (or a non-invasive ornamental grass alternative) at regular intervals along a wall or fence. Surround the base of the plants with a thick layer of medium-sized grey slate chips or river stones. The stones act as a mulch, retaining soil moisture for the grass while suppressing weeds. This low-maintenance setup looks good year-round, with the dried grasses adding winter interest against the stone.
Pro Tip: Pampas grass can be sharp and fast-growing. Ensure you plant it far enough away from walkways so the blades do not brush against people walking by.
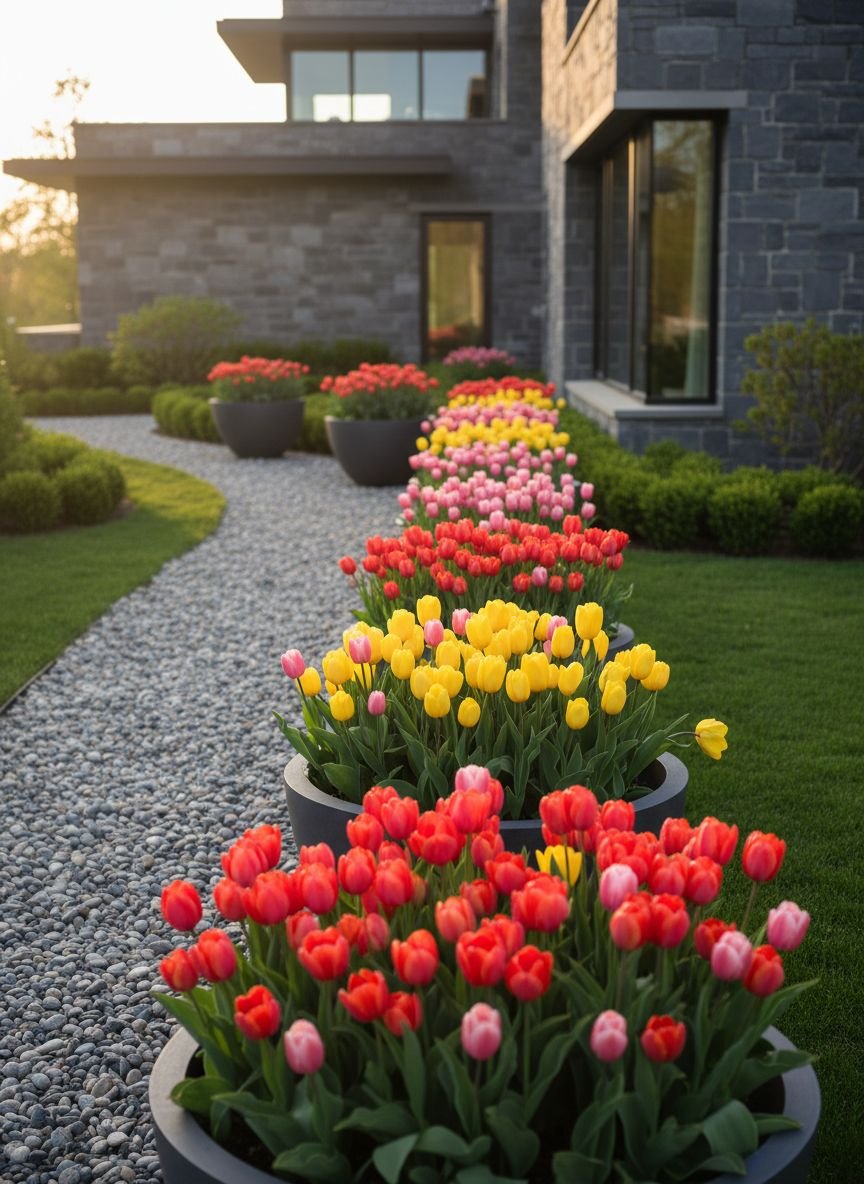
Colorful Wildflower Border with Smooth River Pebbles
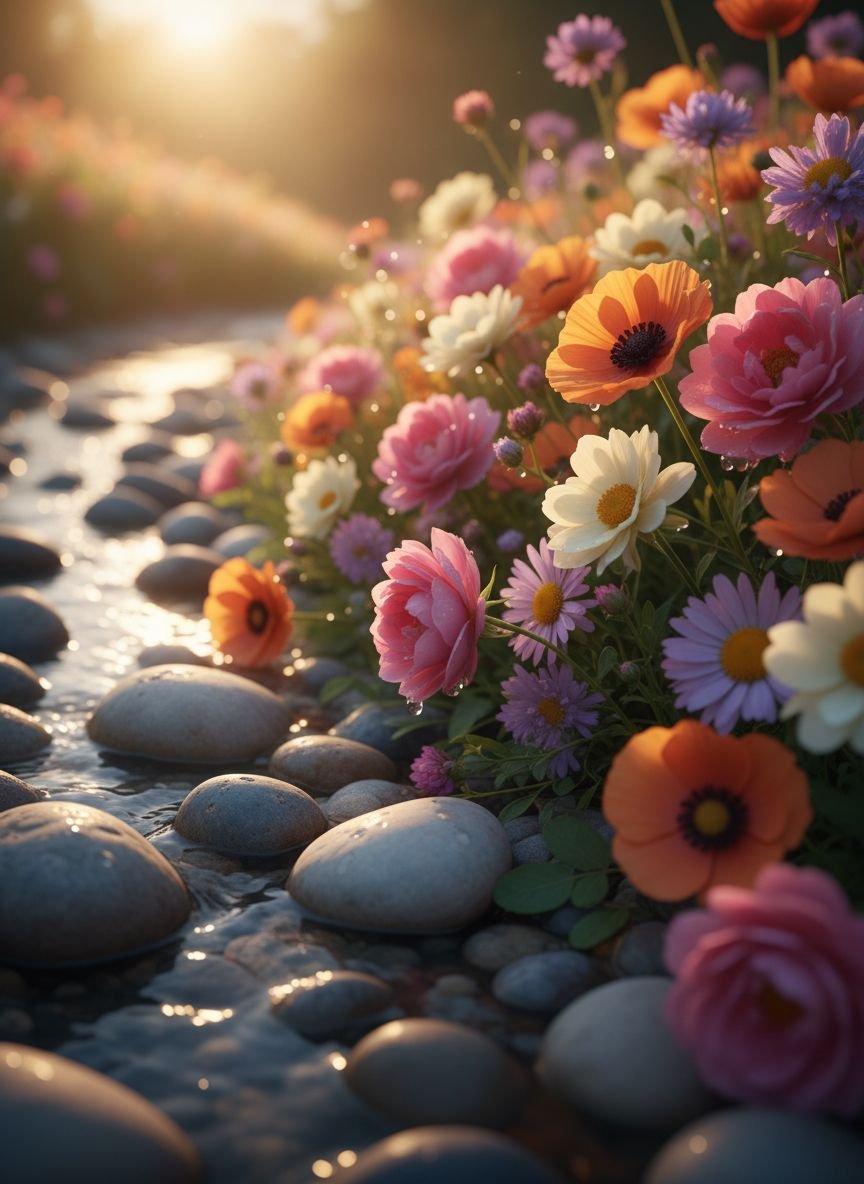
For a cottage-garden feel without the high maintenance, pair vibrant wildflowers with smooth river pebbles. The stones provide a clean, organized backdrop that prevents the wildflowers from looking like a messy weed patch. The cool tones of the rock make the reds, purples, and yellows of the flowers pop intensely. This design supports local pollinators while maintaining a structured appearance that keeps homeowners associations happy.
Prepare your bed by removing sod and amending the soil. Plant native wildflower seeds or plugs in clusters rather than rows for a natural look. Once the plants are established, spread a layer of smooth river stones around them. The stones help keep the roots cool in summer and reduce water evaporation. As the flowers grow, they will spill over the rocks, creating a lovely softening effect.
Pro Tip: Choose “drought-tolerant” wildflower mixes native to your specific region to ensure they thrive with the same low-water conditions as the rock garden.
Polished Pebble Drainage Channel
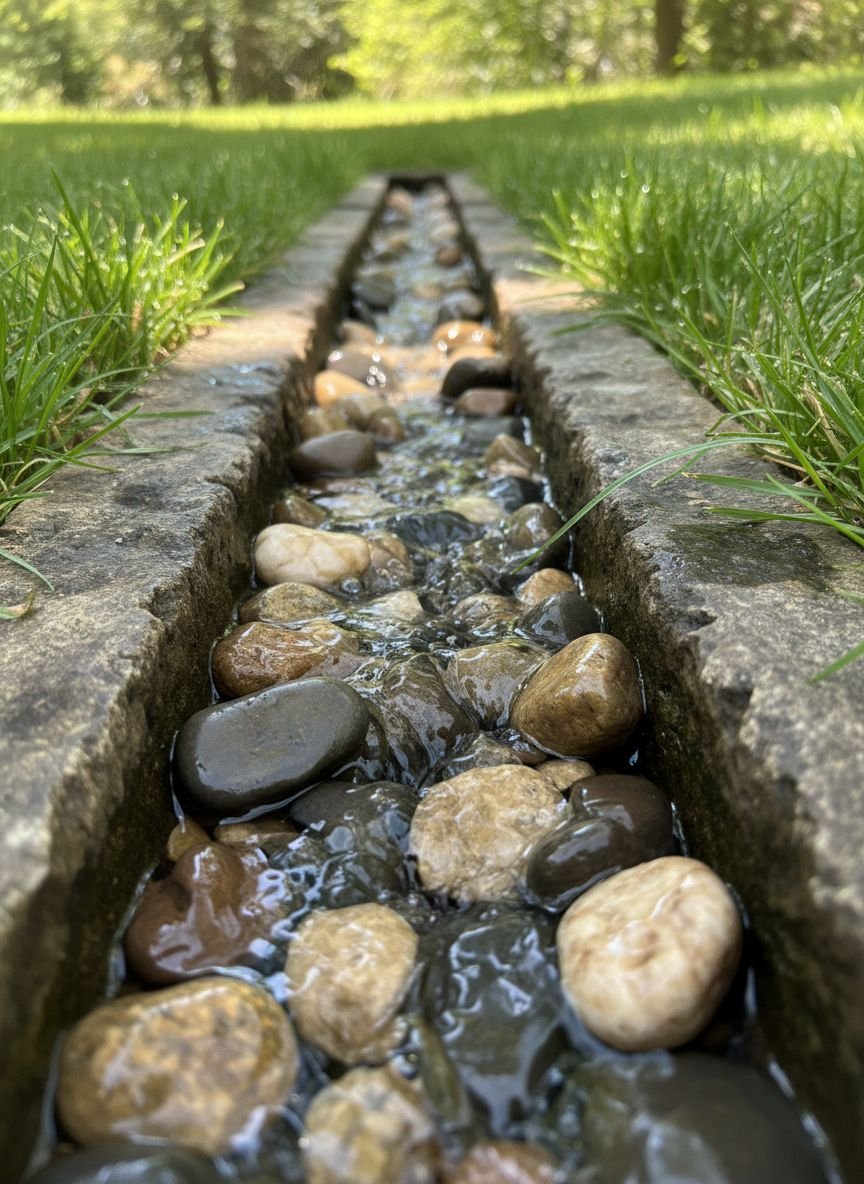
Functional drainage does not have to be ugly. A polished pebble drainage channel turns a necessary utility into a sleek design feature. Instead of a hidden plastic pipe or a muddy ditch, this idea uses high-gloss black or white polished stones to guide water runoff. The shiny surface of the stones looks particularly striking when wet, turning a rainy day feature into a visual asset. This is ideal for modern homes with sharp architectural lines.
Identify where water naturally flows or pools in your yard. Dig a trench along this line, sloping it away from your house. Install a perforated drain pipe at the bottom if the water volume is high, then cover it with gravel. Top the final 3 inches with high-quality polished pebbles. Ensure the level of the pebbles is slightly lower than the surrounding patio or lawn to catch the runoff effectively.
Pro Tip: Polished pebbles can lose their sheen over several years due to sun exposure. Applying a stone sealer every two years will keep them looking glossy and wet.
Sculptural Focal Point with Layered Pebble Base
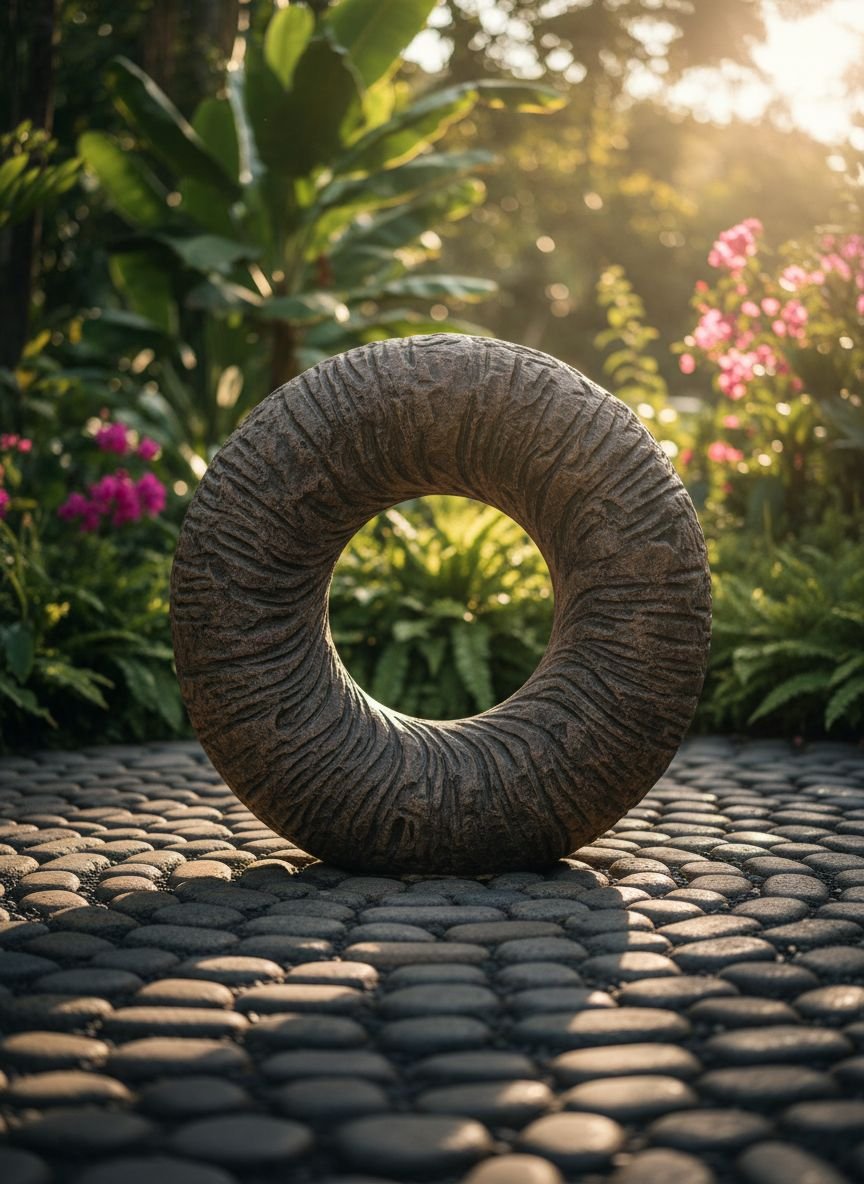
Elevate a garden statue, a large urn, or a modern sculpture by placing it on a dedicated pebble base. This technique, known as “grounding,” gives the object visual weight and importance. By using concentric circles of different colored pebbles—for example, a ring of black stones surrounded by a ring of white—you draw the eye directly to the focal point. It acts like a frame for your art, turning a random object into a curated exhibit.
Select your focal point first. Clear a circular area around it and install edging to define the shape. Use a dark stone directly under the object to create a shadow effect, and a lighter stone for the outer ring to highlight it. This layering adds depth and complexity to the design. It is a simple way to add a “designer touch” to your garden without expensive landscaping.
Pro Tip: If your sculpture is heavy, ensure you place a concrete paver or a compacted crushed stone pad underneath the pebbles to support the weight and prevent it from tipping.
Get The Look: Pebble Garden Essentials
To recreate these styles, you will need a few key materials.
- Landscape Fabric: Heavy-duty, non-woven geotextile is best to stop weeds but let water through.
- Edging: Steel edging for modern looks, plastic for curves, or timber for rustic vibes.
- The Stone:
- Mexican Beach Pebbles: For the smooth, dark, high-end look.
- Pea Gravel: For budget-friendly, walkable paths.
- White Marble Chips: For high contrast and brightening dark corners.
Related posts :
- 16 Stunning White Stone Garden Ideas to Rock Your Landscape for a Low-Maintenance Oasis
- 20 Breathtaking Dream Garden Ideas for Your Ultimate Backyard Oasis That Redefine Outdoor Luxury
- 13 Best Pergola Design Ideas That Transform Your Backyard Into a Luxury Oasis
Potted Herb Garden with Pebble Base
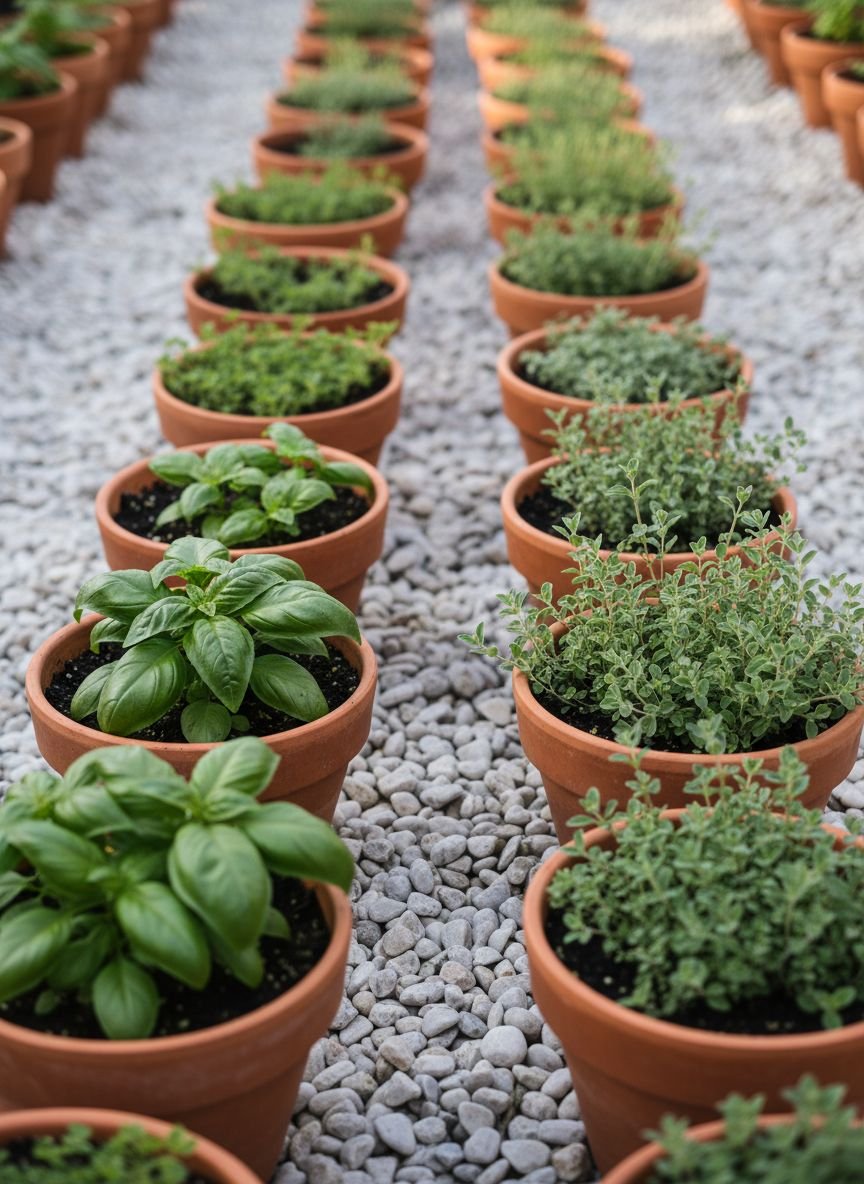
Potted herb gardens often look cluttered when placed directly on a patio or deck. Creating a dedicated “station” with a pebble base organizes the pots and aids in drainage. The pebbles catch the water that drains from the pots, preventing stains on your concrete or wood decking. Visually, the texture of the stone complements the foliage of herbs like rosemary, basil, and thyme, creating a charming kitchen garden vignette.
Build a simple timber frame or use existing pavers to define a rectangular area near your kitchen door. Fill it with pea gravel or small river stones. Arrange your terracotta or ceramic pots on top of the gravel. You can bury the pots slightly into the gravel for extra stability against the wind. This setup also creates a humid microclimate around the herbs as the water evaporates from the stones, which many plants love.
Pro Tip: Label your herbs with painted stones that match the gravel base for a cohesive and cute identification system.
Modern Minimalist Courtyard with Pebble Accents
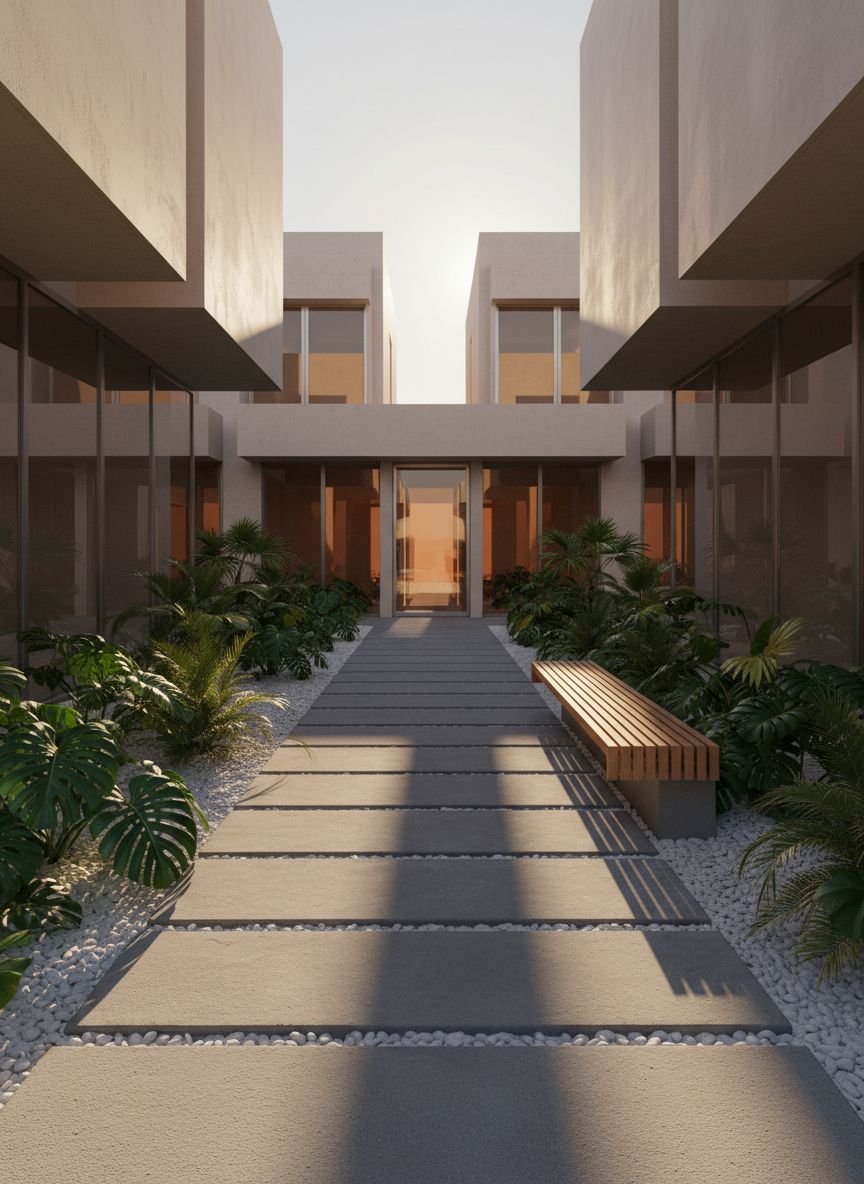
In a small courtyard, less is often more. A modern minimalist design uses large format pavers (like 24×24 inch concrete slabs) separated by wide bands of pebbles. This “grid” layout makes a small space feel larger and more open. The geometric precision creates a clean, architectural look that is very popular in contemporary urban design. The pebbles allow for drainage between the slabs, making it an eco-friendly hardscaping option.
Lay out your pavers in a grid pattern, leaving a 4-6 inch gap between each one. Fill these gaps with angular grey gravel or black basalt chips. The key is to keep the stone level slightly below the paver surface to prevent stones from being kicked onto the walking area. This design is extremely low maintenance and provides a stable, flat surface for outdoor furniture.
Pro Tip: Use a “stabilizer” or gravel binder product in the gaps. This glue-like liquid holds the stones together so they don’t scatter, but still allows water to drain through.
Elegant Two-Tone Pebble Border
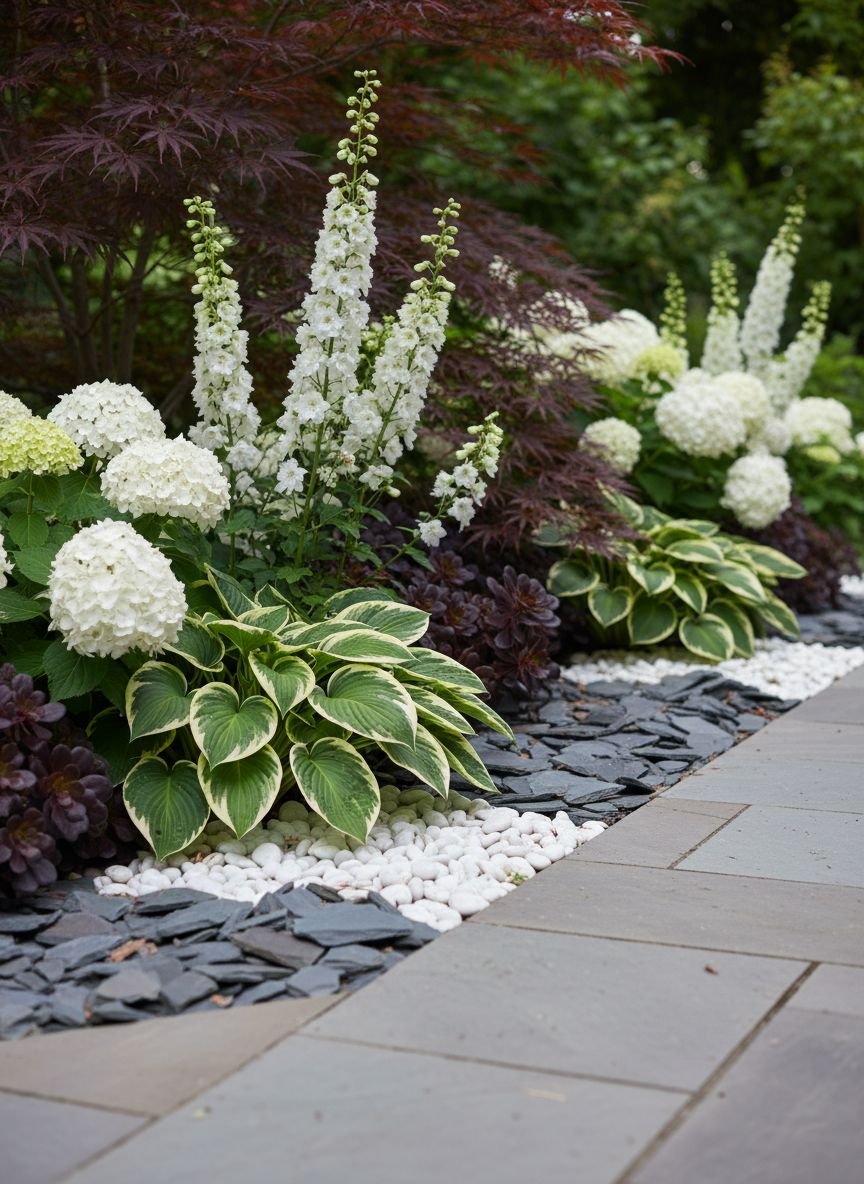
Why settle for one color when you can have two? A two-tone pebble border adds sophistication and visual interest to simple garden beds. By laying a strip of white marble chips next to a strip of dark grey slate, you create a sharp, high-contrast stripe that frames your lawn or patio. This technique is often used in high-end resort landscaping to define spaces and add a touch of luxury.
You will need to install a physical divider between the two stone colors to keep the line crisp. A thin strip of metal edging or even a line of bricks works well. Fill the inner section (closest to the plants) with the darker stone to hide soil spills, and the outer section (closest to the path) with the lighter stone for brightness. This striped effect draws the eye along the length of the garden, making it appear longer.
Pro Tip: Save this idea to your Pinterest. Ensure both stone types are roughly the same size. If one is much smaller, it will eventually migrate into the larger stones and ruin the clean line.
Modern Zen Corner with Charcoal Pebble Grounding
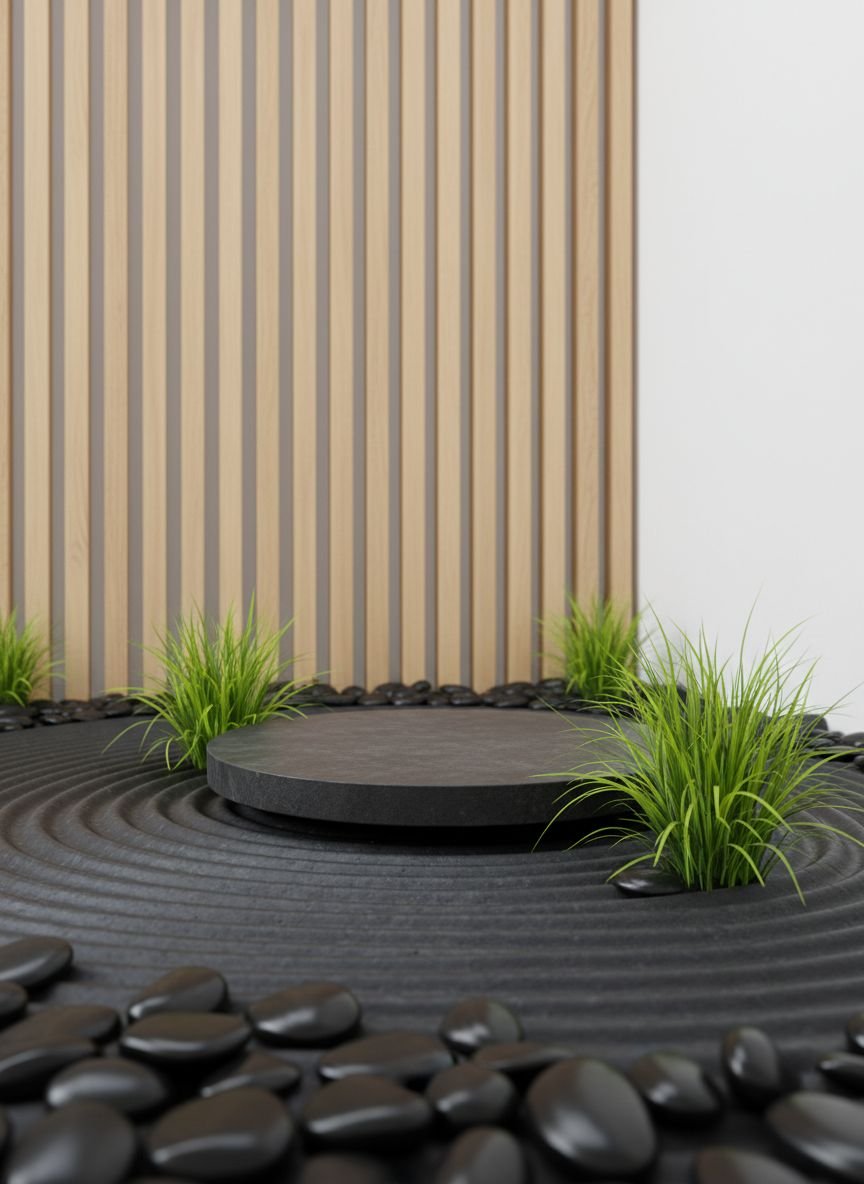
A Zen corner is a sanctuary for mindfulness, and charcoal pebbles are the perfect grounding element. The dark, matte finish of charcoal stones absorbs light, creating a restful and quiet atmosphere. Combined with a simple stone lantern, a bamboo water spout, or a single specimen maple tree, this design evokes the peace of a Japanese temple garden. It is an ideal solution for a shady, unused corner of the yard.
Start by clearing the corner and laying a weed barrier. Spread a thick layer of charcoal grey pebbles or black lava rocks. Place three large rocks (an odd number is traditional in Zen design) in a triangular arrangement. Keep the planting minimal—perhaps just some moss or a single fern. The goal is emptiness and simplicity, allowing the texture of the dark stones to be the main feature.
Pro Tip: Rake the pebbles occasionally. Even if you don’t have sand to make patterns, the act of raking the stones smooth is a meditative practice that keeps the garden looking pristine.
Contemporary Terrace with Illuminated Pebble Borders
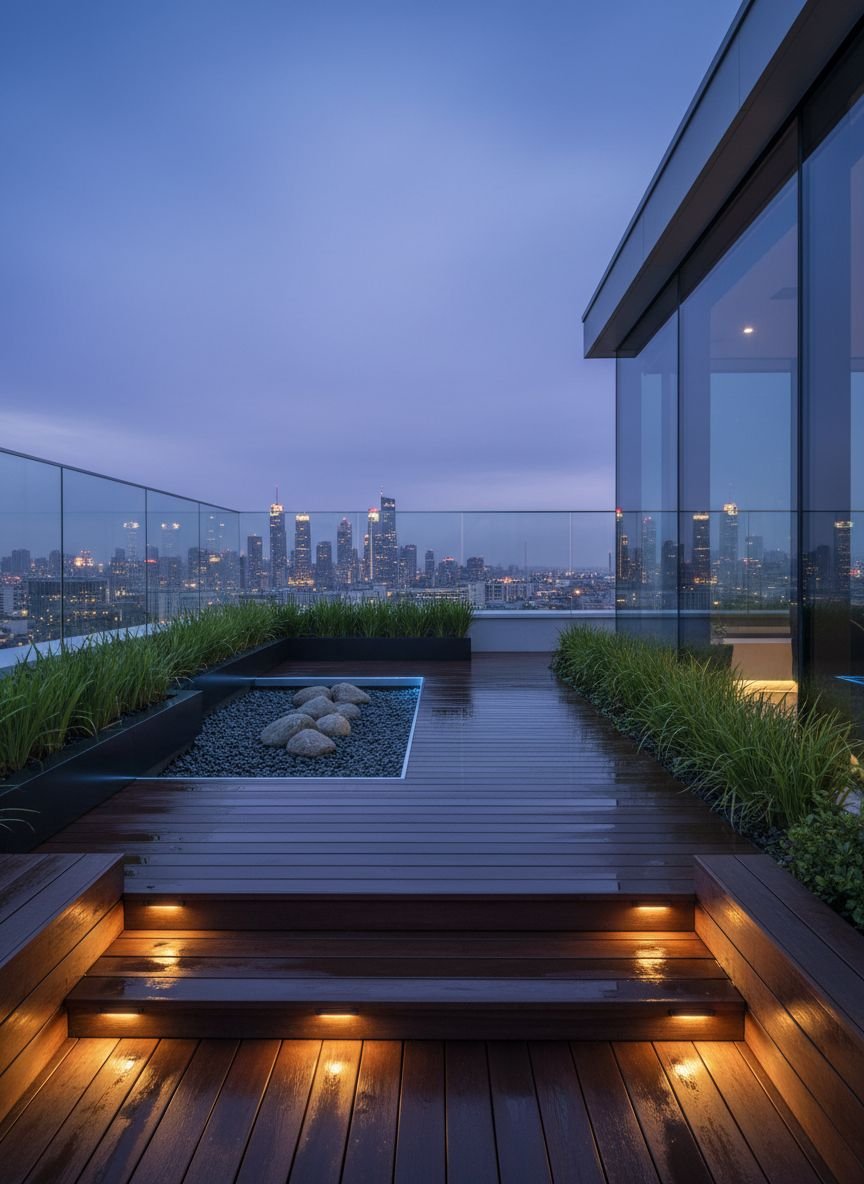
Lighting can transform a pebble garden from day to night. Integrating LED strip lighting or small solar puck lights into a pebble border creates a magical, glowing perimeter. The light reflects off the facets of the stones, creating a textured, ambient glow that outlines your terrace or deck. This is not only beautiful but also improves safety by highlighting the edge of the paved area.
Install waterproof LED channel lighting along the edge of your patio or deck. Cover the channel with a layer of translucent or light-colored pebbles, such as white quartz or glass rocks. The light will diffuse through the stones, creating a “hidden source” effect. Alternatively, nestle solar rock lights directly into the gravel for a wire-free solution. This creates a high-tech, lounge-like vibe perfect for evening entertaining.
Pro Tip: Use “warm white” (2700K-3000K) LEDs for a cozy, inviting atmosphere. Cool white or blue light can feel too harsh and clinical for a relaxing backyard.
Rustic Pebble Walkway with Terracotta Planters
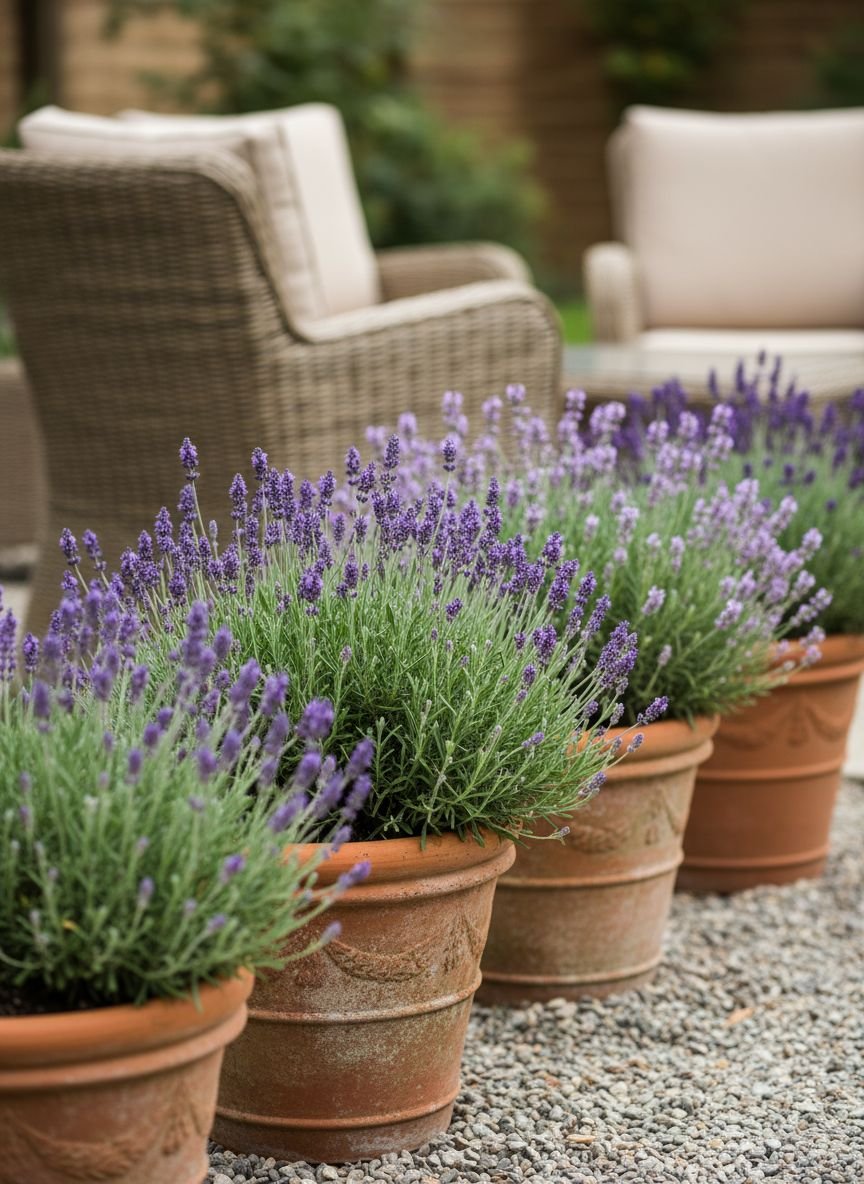
For a warm, Mediterranean feel, combine warm-toned pea gravel with terracotta accents. This style embraces imperfection—the path doesn’t need to be straight, and the stones can be a mix of tans, browns, and golds. Lining the walkway with terracotta pots filled with geraniums or lavender adds height and color. The crunch of the gravel and the warmth of the clay pots transport you to a villa in Tuscany.
Excavate the path area and fill it with “Jersey Gold” or similar warm-colored gravel. Unlike the modern grey designs, this look welcomes a bit of mixing. Let the gravel spill slightly into the beds for a soft edge. Place large terracotta planters directly on the gravel at irregular intervals. The porous nature of both the pots and the path ensures excellent drainage for your plants.
Pro Tip: If your path is on a slope, mix “stone dust” or “fines” into the gravel. This helps the mixture compact and harden slightly, preventing the stones from rolling downhill underfoot.
Functional Garden Beds Using Pebble Grounding
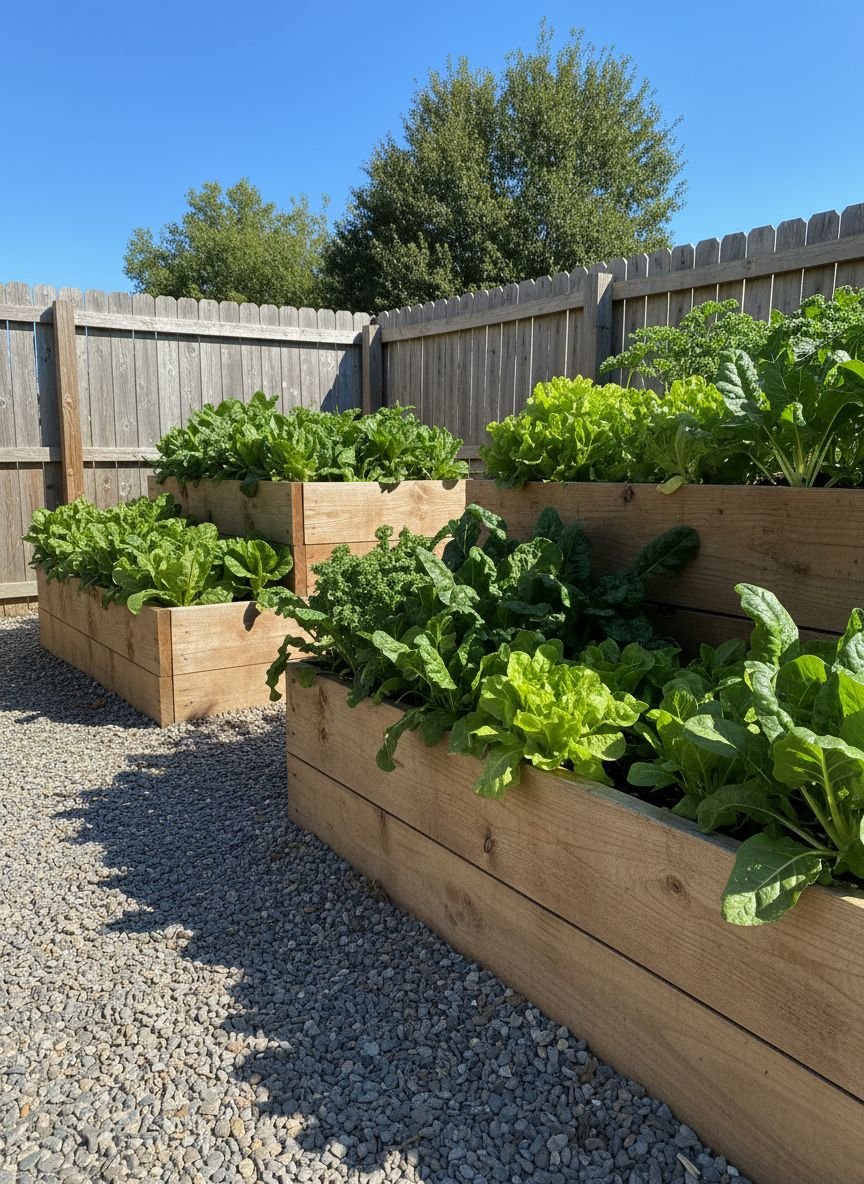
Using pebbles as mulch in your functional garden beds (where you grow shrubs or perennials) is a smart long-term investment. Unlike wood mulch, which breaks down and needs replacing every year, pebbles last forever. They effectively suppress weeds, retain soil moisture, and regulate soil temperature. This “pebble grounding” creates a clean, unified look across your entire landscape.
Remove all weeds and old mulch from your beds. Lay down a high-quality, permeable landscape fabric. Cut X-shapes in the fabric where your plants are. Spread a 2-inch layer of river rocks or decorative gravel over the fabric. This method is particularly effective for heat-loving plants, as the stones absorb heat during the day and radiate it back at night.
Pro Tip: Be careful using dark stones around delicate plants in very hot climates, as the stones can get hot enough to scorch shallow roots or lower leaves. Light-colored stones are safer for heat-sensitive plants.
Popular Asked Questions
Do pebble gardens require maintenance?
Yes, but much less than a lawn. The main tasks are removing leaves and debris. If leaves fall onto the pebbles, they can rot and create soil for weeds. Using a leaf blower on a low setting is the easiest way to keep your pebbles clean. You may also need to do occasional spot-weeding if seeds land on top of the rocks.
How do you stop weeds growing in pebbles?
The best defense is a double layer of protection. First, install a high-quality, non-woven landscape fabric (geotextile) underneath the stones. This stops weeds from growing up from the soil. Second, keep the pebbles clean of debris so weeds don’t grow in the pebbles. For stubborn weeds, a quick spray of vinegar or hand-pulling after rain works well.
What do you put under pebbles in a garden?
You should put a layer of landscape fabric (weed barrier) over the soil. For areas that will be walked on, like a path or patio, you should also add a base layer of “crushed stone” or “road base” underneath the fabric. This compacts down to create a hard, stable surface so your decorative pebbles don’t sink into the mud.
Are pebble gardens good for drainage?
Absolutely. Pebble gardens are “permeable,” meaning water flows right through them into the ground. This is much better for your home than concrete or asphalt, which cause water to run off and pool. They are an excellent solution for areas of the yard that tend to get muddy or waterlogged.
What plants grow best in pebble gardens?
Plants that love good drainage thrive in pebble gardens. Succulents, ornamental grasses, lavender, thyme, and yucca are fantastic choices. These plants hate having “wet feet,” so the quick-draining nature of a rock garden keeps them healthy and happy.
Conclusion
Pebble garden landscaping ideas for backyard spaces offer the perfect blend of form and function. They solve common problems like poor drainage and high maintenance while providing a canvas for endless creativity. Whether you choose a sleek modern path or a rustic dry riverbed, adding stone to your landscape is an investment that pays off in both curb appeal and free time.


Leave a Comment