
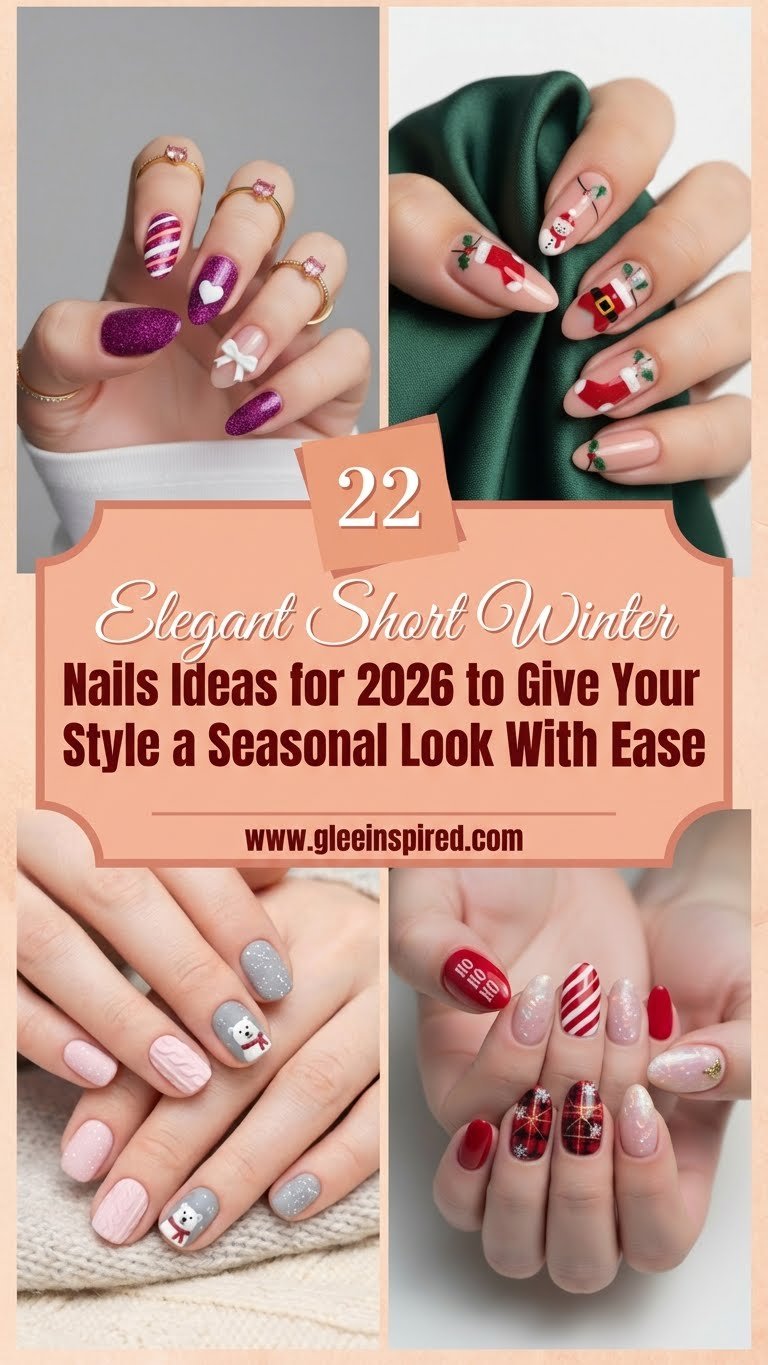
Short nails are dominating the beauty trends for Winter 2026. You might think long acrylics hold all the power, but practical, shorter lengths are having a massive moment. This shift focuses on “quiet luxury” and functional beauty. You no longer need claws to make a statement. The current season brings deep forest greens, icy blues, and minimalist gold accents that work perfectly on natural nail beds.
Many people struggle to find designs that look good on shorter shapes. Intricate art often feels cluttered on a small canvas. This guide solves that problem. We curated 22 specific designs tailored for short square, squoval, and round shapes. These ideas maximize your space without overwhelming it. You will find styles ranging from easy DIY minimalist dots to professional-grade festive art.
Check out our related guide on [Minimalist Winter Wardrobe Essentials]
Key Takeaways
- Practicality meets style: Short nails offer lower maintenance while staying on-trend for 2026.
- Color palette shift: Expect to see less neon and more deep burgundy, emerald green, and sheer “milk bath” white.
- Minimalist art wins: Negative space and micro-french tips make short nails appear longer and more elegant.
- Texture plays a role: Velvet finishes and sweater-knit textures add depth without needing extra length.
Table of Contents
- Cozy Winter Cat Nail Art
- 26 Swirly French Tips with Rhinestone Accents
- 25 Festive Green and Gold Stars
- Frosty White and Crystal Glam
- Festive Red and Black Floral Accents
- Cozy Pink and Grey Knit Design
- Classic Red and Green Christmas Design
- Luxe Green with Gold Accents
- Festive Christmas Lights Nail Art
- Festive Red and White Holiday Nails
- Frosty Blue Snowflake Nails
- Iridescent Shimmer Nails
- Elegant White Snowflake Tips
- Festive Green and String Light Nails
- Burgundy and Glitter Snowflake Accent
- Winter Ski Adventure Nails
- Frosty Snowman French Tips
- Snowy Polar Bear Nails
- Black and White Winter Fireworks
- Sparkling Pink Gift Wrap Nails
- Green and Gold Elegance
- Festive Christmas Stocking Nails
- Popular Asked Questions
- Conclusion
Cozy Winter Cat Nail Art
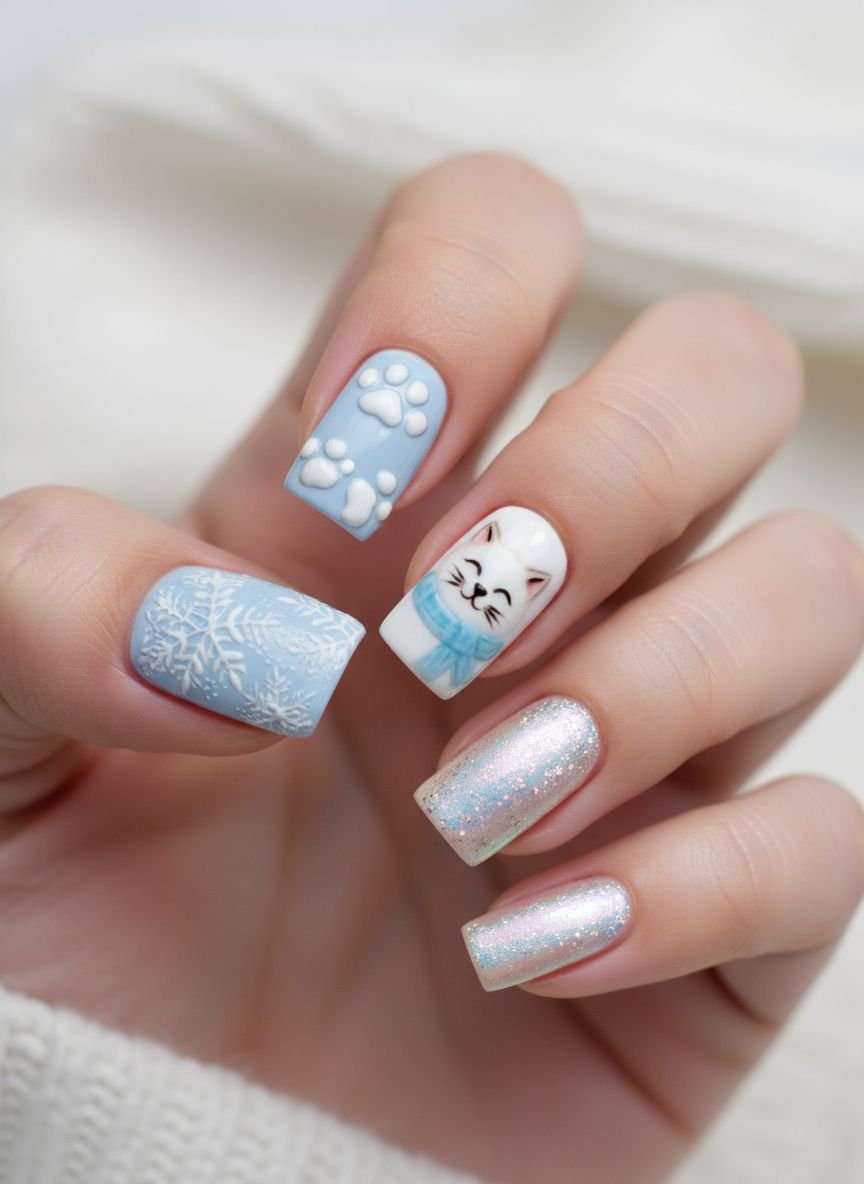
Animal lovers will adore this subtle nod to feline friends. The design uses a soft, milky white base to keep the look clean and bright. Small, minimalist cat silhouettes painted in charcoal grey or soft black sit on the accent nails. The remaining nails feature tiny paw prints or simple whiskers. This approach keeps the art from looking childish. It stays sophisticated enough for work but fun enough for a holiday party. The contrast between the pale base and the dark art creates a sharp focal point.
You can achieve this look at home with a fine-point dotting tool. Start with two coats of a sheer nude polish. Allow it to dry completely. Dip your dotting tool into black polish to create the round head of the cat. Use a thin striping brush to pull out two small triangles for ears. Seal everything with a matte top coat. The matte finish mimics the soft texture of fur and makes the design feel warmer for winter.
Pro Tip: If you have shaky hands, use a cat-themed nail sticker and seal it under a thick layer of glossy top coat to melt the edges.
Swirly French Tips with Rhinestone Accents
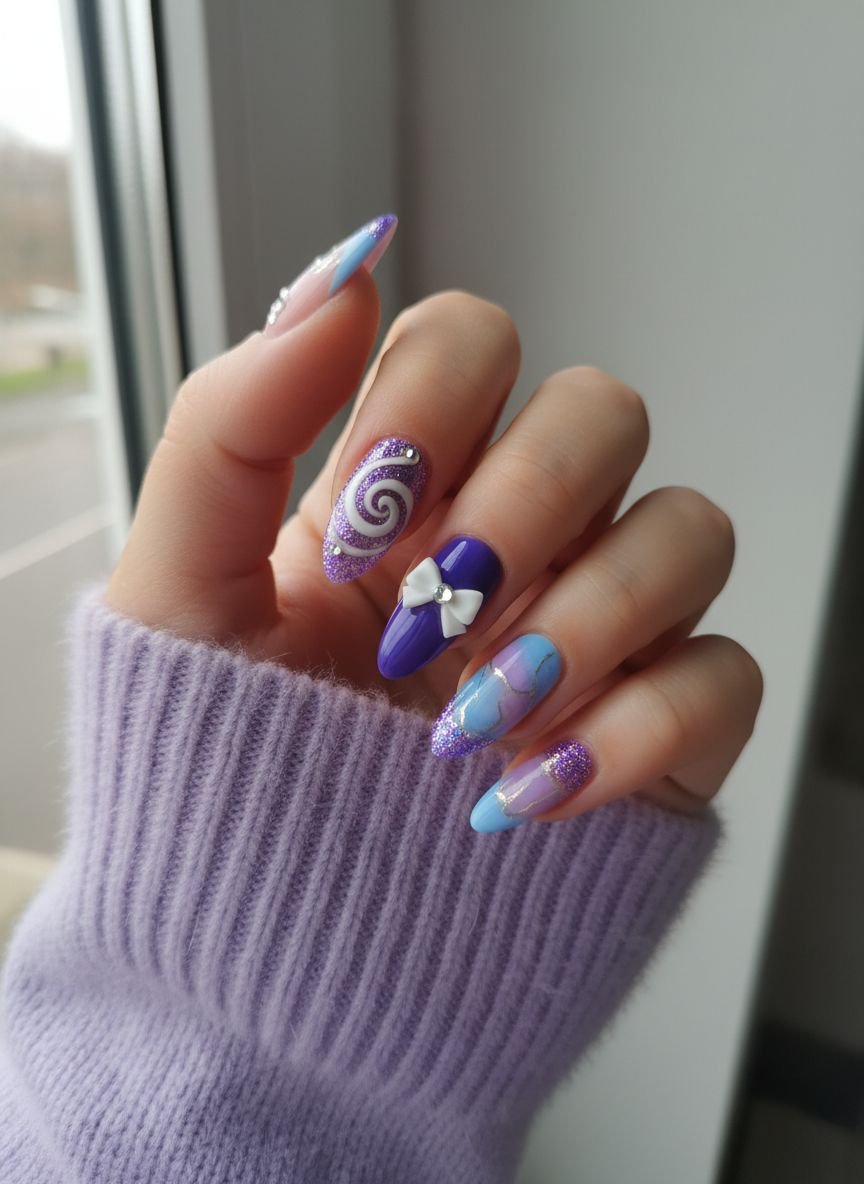
The classic French manicure gets a modern update here. Instead of a straight white line, this design features curved, organic swirls that dance across the tip of the nail. The white swirls elongate the nail bed visually. This is a massive benefit for short nails. To add winter glamour, tiny rhinestones sit at the base of the cuticle or in the curves of the white lines. The sparkle mimics falling snow catching the light.
Precision is key for this style. You need a high-quality liner brush with long bristles. The long bristles absorb hand tremors and create smoother curves. Paint the swirl in one continuous motion if possible. Place the rhinestones while the top coat is still wet to act as glue, or use professional nail glue for longer wear. The combination of negative space and sparkle makes this a top choice for New Year’s Eve parties where you want elegance without excessive length.
Pro Tip: Use a wax pencil to pick up the tiny rhinestones. It prevents smudging your wet polish.
Festive Green and Gold Stars
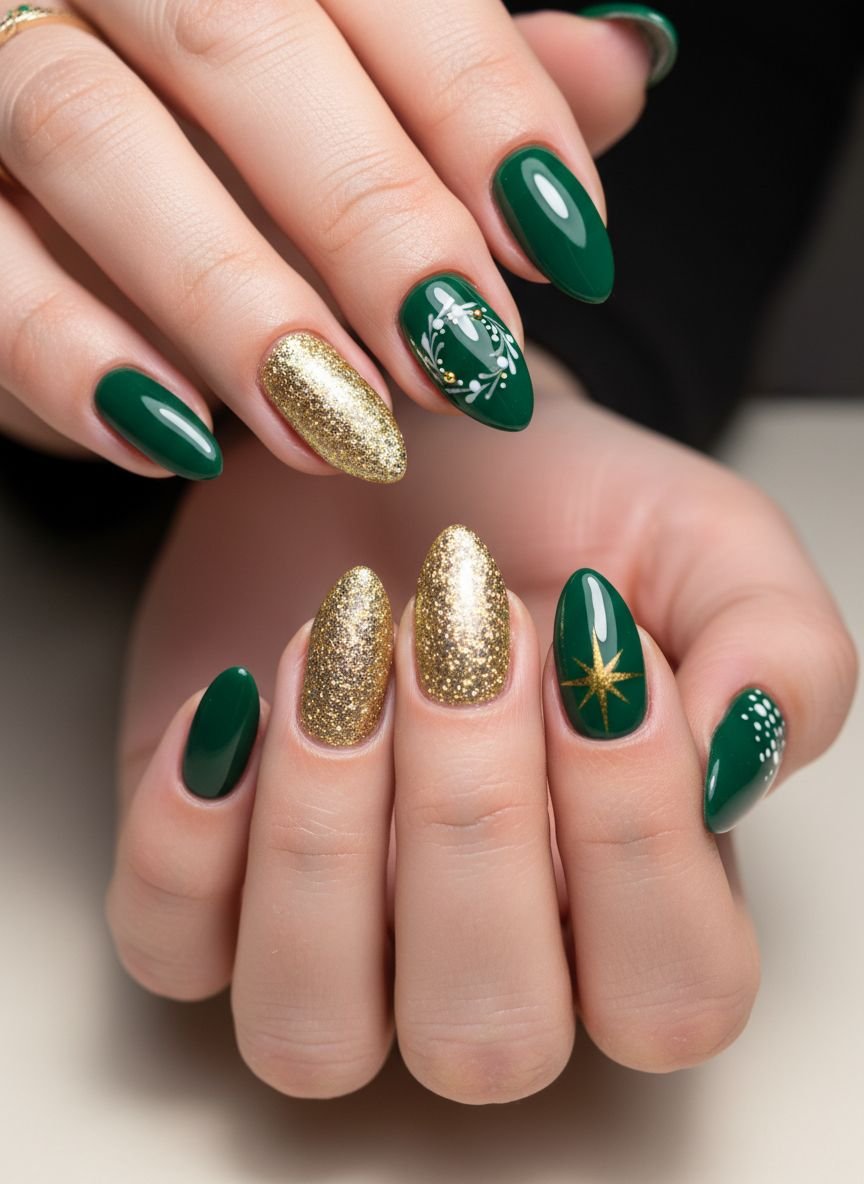
Deep emerald green serves as the perfect backdrop for this celestial design. Dark green is a major color trend for 2026. It feels grounded and luxurious. On top of this dark base, hand-painted gold stars or gold foil flakes add warmth. The metallic gold pops against the dark green, creating high contrast. This look mimics the clear winter night sky. It works exceptionally well on short, square nails because the dark color defines the shape sharply.
Application requires a steady hand or a good stencil. Apply two thin coats of the dark green polish. Dark colors can streak, so thin layers are better than one thick one. Once dry, use a gold stamping polish and a star plate to transfer the design. Alternatively, place small pieces of gold leaf randomly for an abstract, artistic vibe. Finish with a high-gloss top coat to make the green look like glass.
Pro Tip: Apply cuticle oil daily. Dark polishes highlight dry skin, so hydration keeps the manicure looking fresh.
Frosty White and Crystal Glam
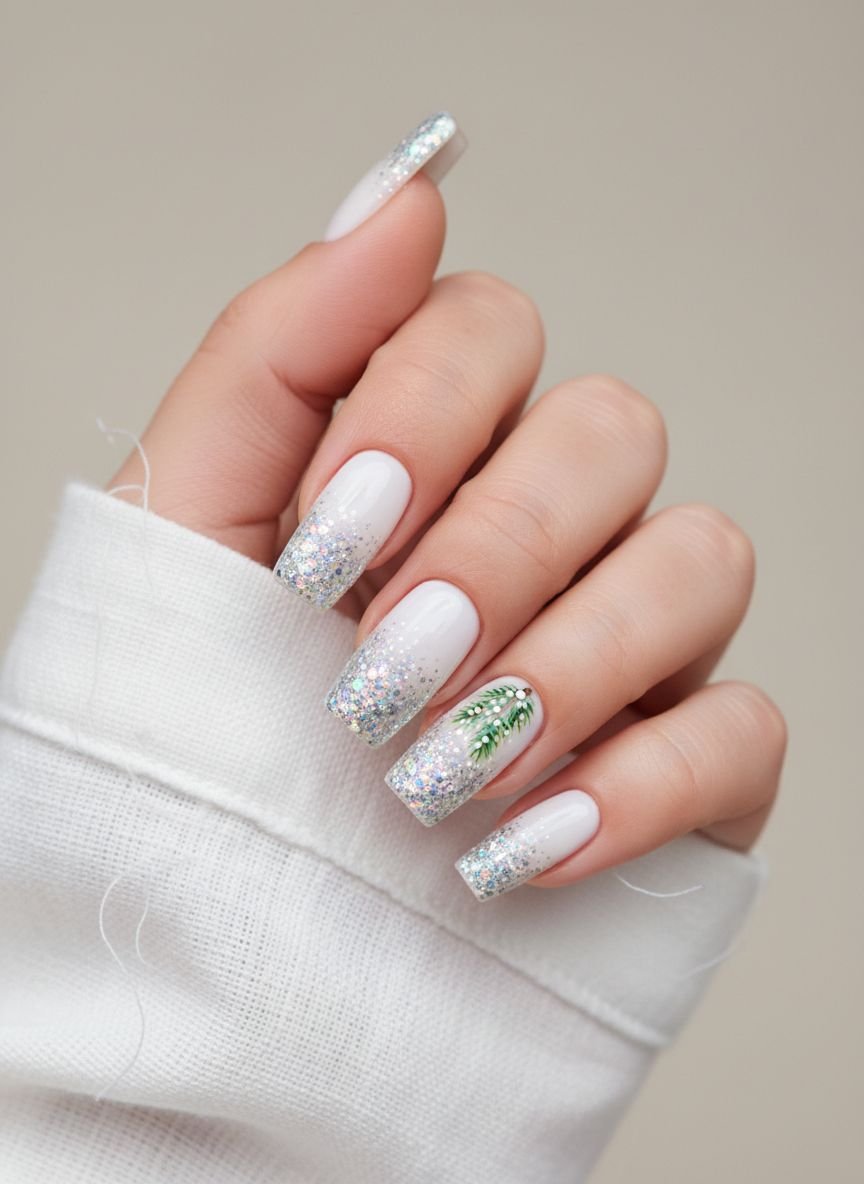
White nails are a winter staple. This version upgrades the standard white manicure with encrusted crystals. The base is an opaque, crisp white, resembling fresh snow. One or two accent nails on each hand are covered entirely in clear or iridescent Swarovski crystals. The texture difference between the smooth polish and the bumpy crystals adds interest. This is a high-impact look that requires zero drawing skills.
The key to this look is the quality of the white polish. Cheap white polish can look chalky or streaky. Choose a high-pigment formula. For the crystal nails, use a thick builder gel or a heavy-duty gem glue. Press the crystals into the glue close together to minimize gaps. The light refraction from the crystals will distract from the shortness of the nail, making them appear like expensive jewelry on your fingertips.
Pro Tip: Use an old makeup brush dipped in acetone to clean up the cuticle line for a crisp, professional edge.
Festive Red and Black Floral Accents
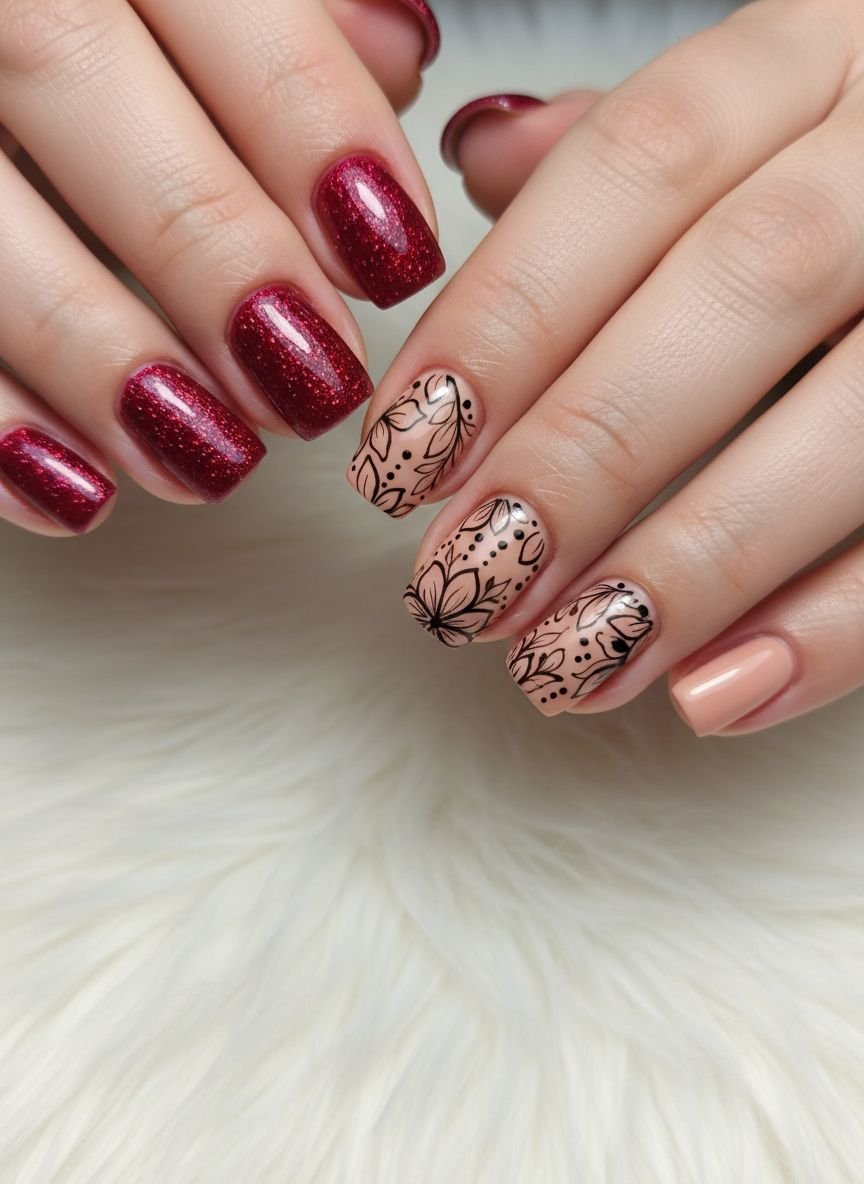
Winter florals are moody and romantic. This design pairs a vampire-red base with black floral outlines. It is a departure from the typical bright holiday reds. The deep burgundy and black combination feels gothic and chic. The flowers are usually placed on the ring finger and thumb. The dark tones recede, which can make wide nail beds appear narrower. This optical illusion is great for anyone self-conscious about their nail width.
To create the flowers, you do not need to be an artist. Start with the red base. Use a black stamping polish and a floral plate. Stamping gives you intricate lines that are impossible to hand-paint on a small surface. If you prefer hand-painting, create rough petal shapes with black polish and fill the centers with a touch of gold glitter. The imperfection adds to the moody, artistic feel. A glossy top coat unites the layers and smooths out the surface.
Pro Tip: Cap the free edge of your nail with polish to prevent the dark colors from chipping at the tips.
Comparisons: Gel vs. Regular Polish for Winter
| Feature | Gel Polish | Regular Polish |
|---|---|---|
| Durability | Lasts 2-3 weeks, resists winter glove friction. | Lasts 5-7 days, chips faster in cold weather. |
| Drying Time | Instant curing with UV/LED lamp. | Requires 20-30 minutes to fully set. |
| Removal | Requires soaking in acetone (can dry out skin). | Easy removal with standard remover. |
| Finish | Thicker, glass-like shine protects weak nails. | Thinner, more natural look. |
| Cost | Higher initial cost for lamp and supplies. | Low cost, easy to change weekly. |
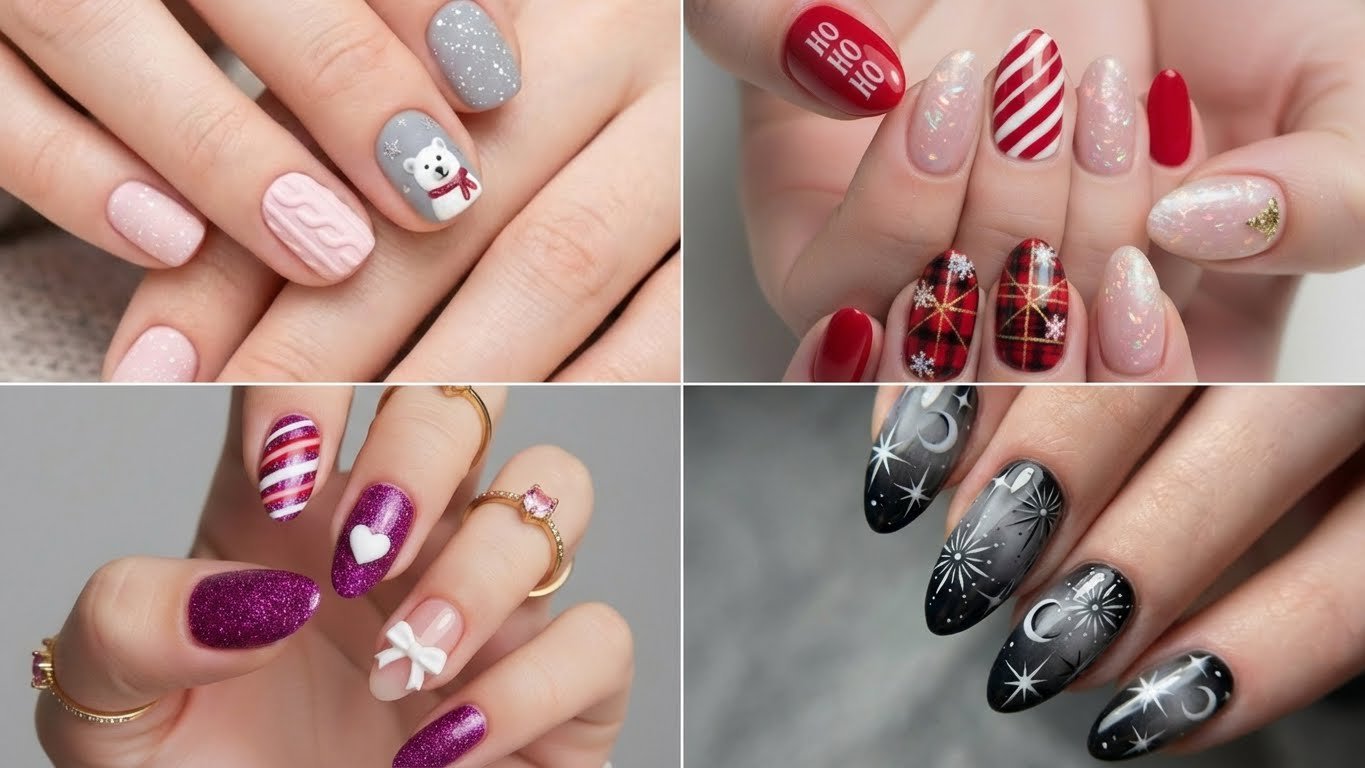
Cozy Pink and Grey Knit Design
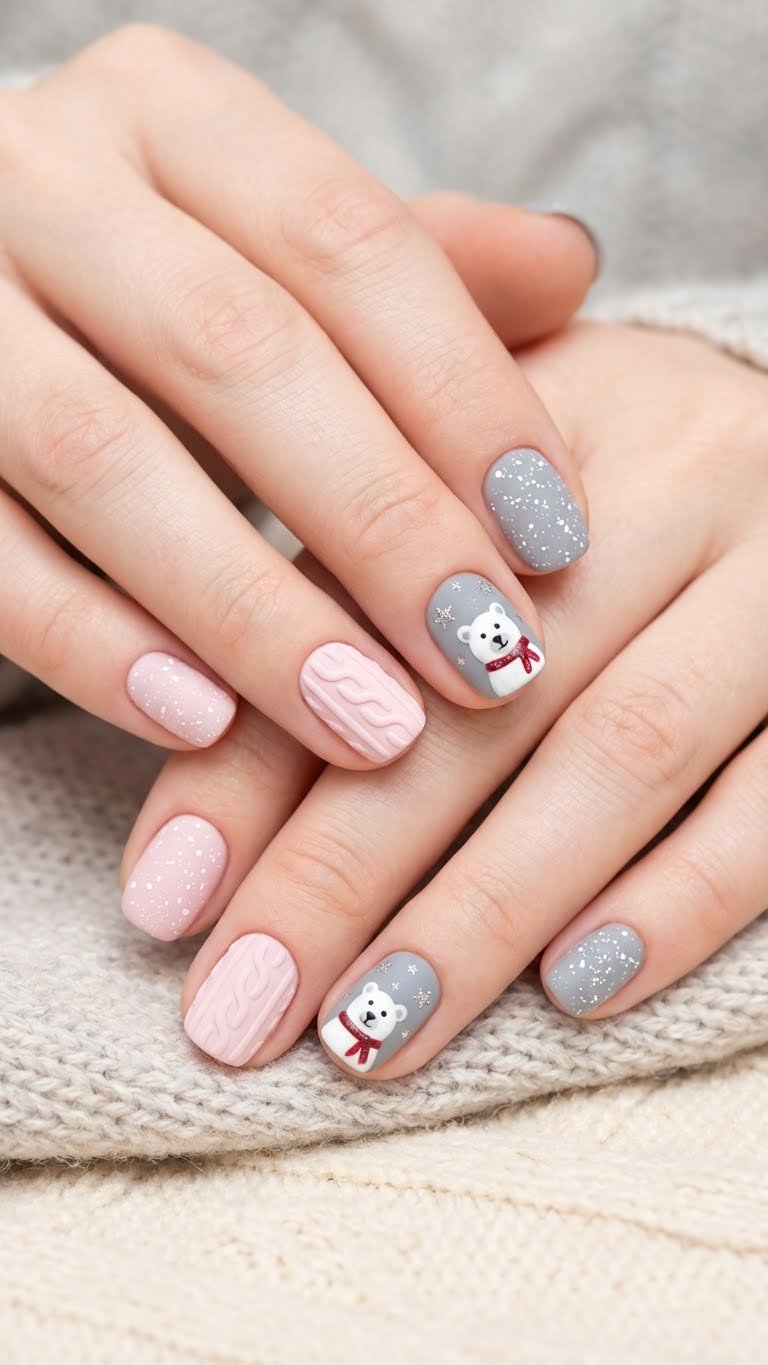
The “sweater nail” trend returns every winter because it adds incredible texture. This variation uses a soft pastel pink and a cool-toned grey. The 3D texture mimics the cable knit pattern of a wool sweater. It looks cozy and soft. The matte finish is mandatory here; a glossy top coat ruins the fabric effect. This style is tactile and visually interesting, proving you do not need bold colors to stand out.
You need 3D gel powder or clear acrylic powder for this. Paint your base color and cure it. Then, use a thin brush dipped in the same color mixed with a little thick gel to draw the cable knit lines. Do not cure yet. Sprinkle the clear powder over the wet gel lines. Then cure. Brush off the excess powder. The result is a raised, sugary texture that looks exactly like fabric. It is durable and unique.
Pro Tip: Keep hand cream away from the textured nails immediately after application to avoid clogging the 3D grooves.
Classic Red and Green Christmas Design
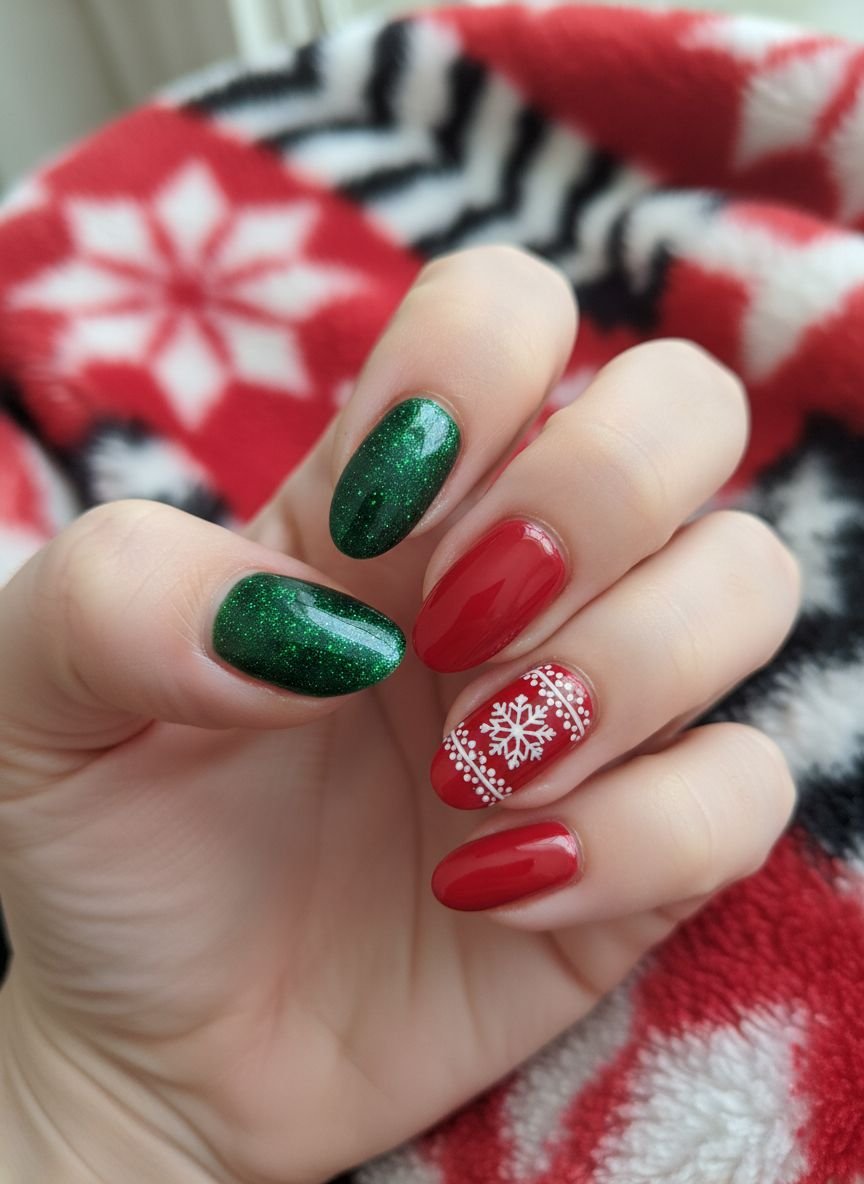
Sometimes tradition works best. This design embraces the iconic bright cherry red and forest green. To make it work for 2026, we use color blocking. Instead of painting one nail red and one green, paint geometric shapes of both colors on a single nail. Diagonal lines or half-moon shapes keep the look modern. Negative space (leaving part of the nail bare) breaks up the intense colors and keeps the design airy.
Use striping tape to get crisp lines. Apply your base coat, then place the tape in your desired geometric pattern. Paint the red in one section and the green in another. Peel the tape off immediately while the polish is wet. This ensures a sharp line. If you wait until it dries, the tape will pull up the polish. Finish with a clear top coat to seal the edges where the colors meet the bare nail.
Pro Tip: Save this idea to your Pinterest for when you need a reliable holiday look.
Luxe Green with Gold Accents
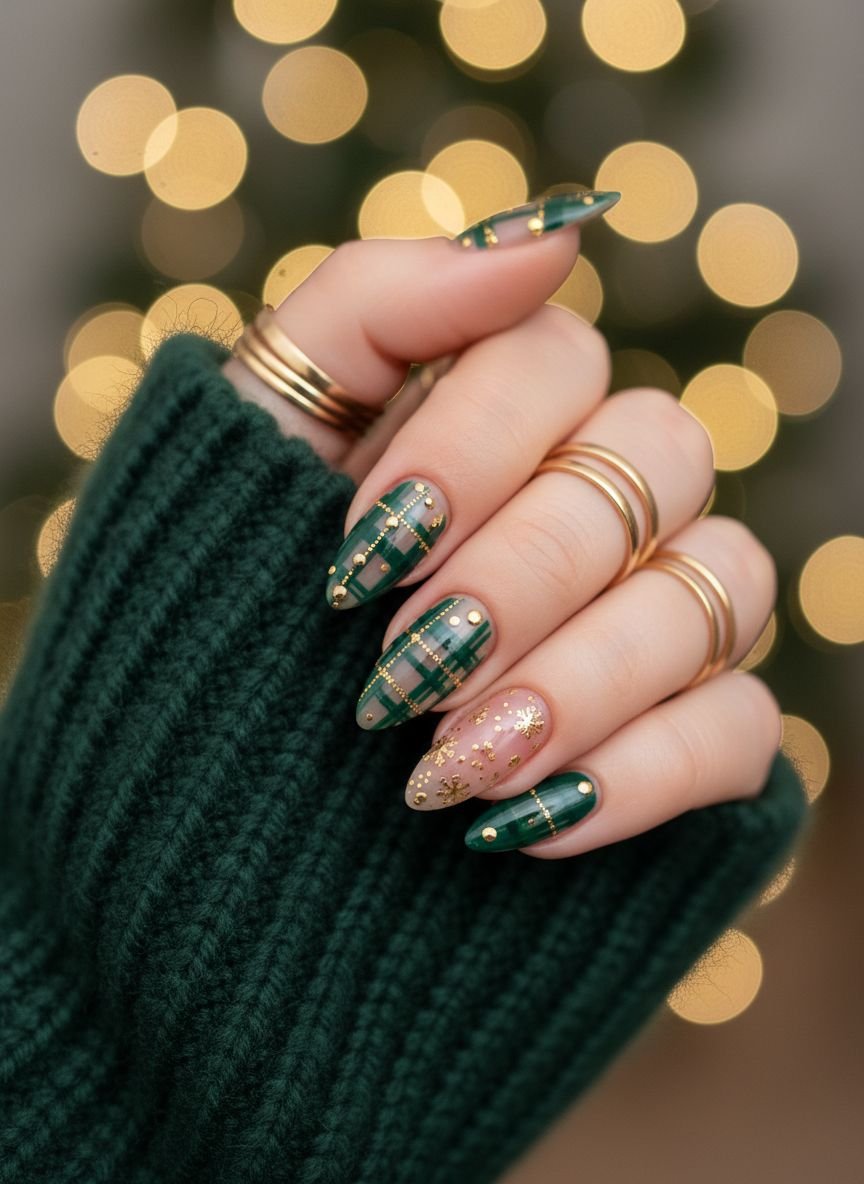
This design elevates the standard green manicure. We use a metallic or chrome green polish rather than a crème finish. The metallic sheen catches the light and looks like wrapping paper. Gold foil is applied randomly over the green. The two metallics clash in a beautiful, opulent way. It is a busy look, so it works best on very short, neatly filed nails. The shortness keeps it from looking tacky.
Application is fast. Apply two coats of metallic green. While the second coat is tacky (not wet, not dry), press a piece of transfer foil onto the nail and rip it off quickly. Small flecks of gold will stick to the polish. You have no control over the pattern, which makes every nail unique. Seal it with a water-based top coat first to prevent the foil from wrinkling, then follow with a regular top coat.
Pro Tip: Buff your nails smooth before applying metallic polish. Ridges show up 10x more under chrome finishes.
Festive Christmas Lights Nail Art
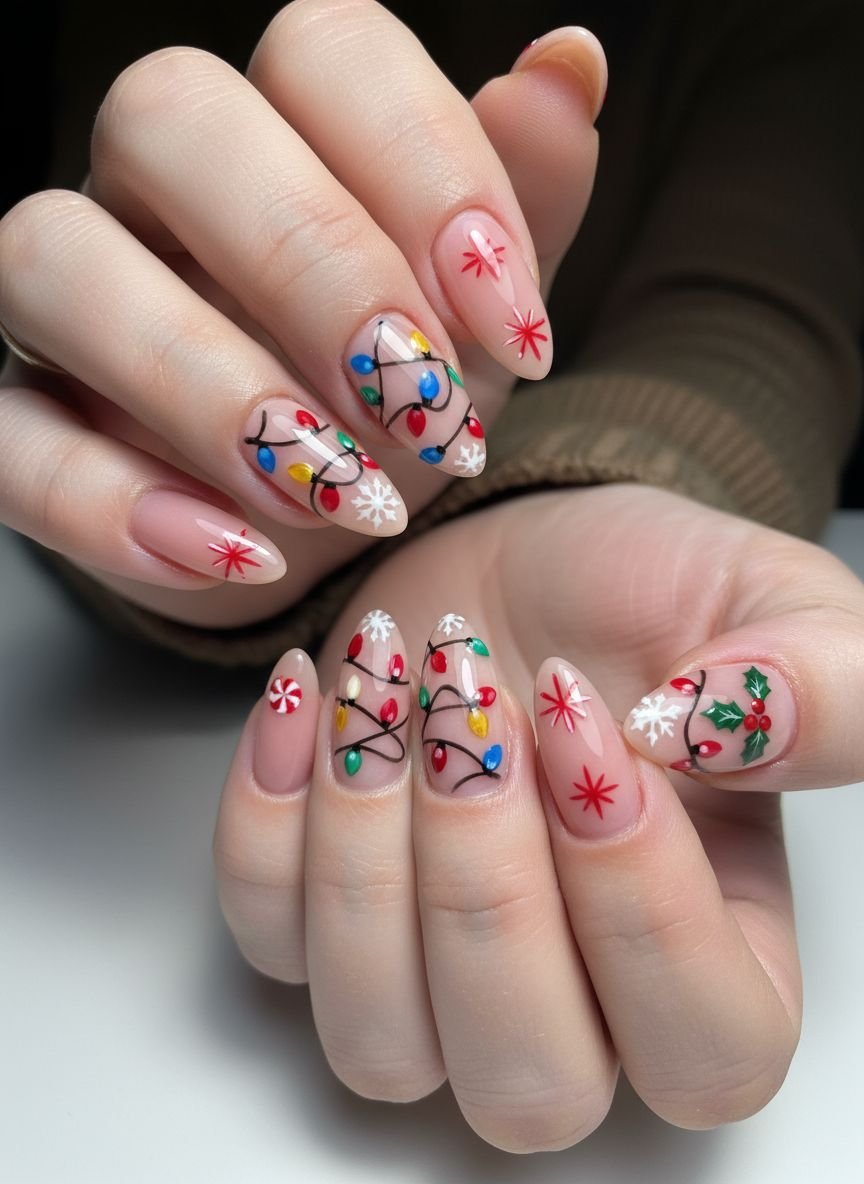
This playful design features a thin black wire painted across the nails, with tiny colored dots hanging from it to represent light bulbs. It is whimsical and nostalgic. The background should be a neutral beige or pale grey to let the colors pop. On short nails, loop the wire once or twice. Too many loops will look messy. The tiny bursts of red, blue, green, and yellow bring immediate joy to your manicure.
Use a very fine liner brush for the wire. It must be thin. For the bulbs, a small dotting tool is perfect. Dip it into your colored polishes and gently touch the wire line. To make the lights look like they are glowing, add a tiny white dot inside each colored bulb. This reflection point adds dimension. A glossy top coat makes the “glass” bulbs shine.
Pro Tip: Space the bulbs out. Crowding them makes the design hard to read on a short nail plate.
Festive Red and White Holiday Nails
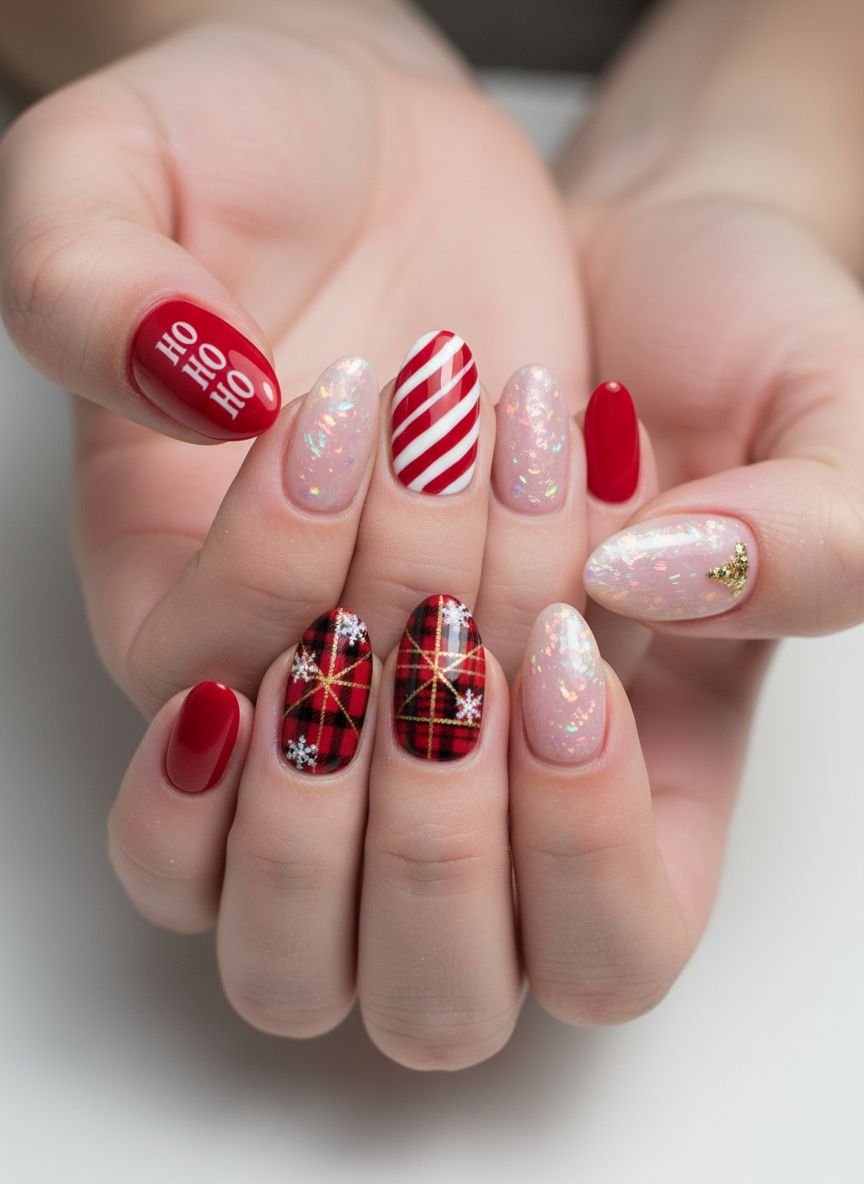
Candy cane vibes define this look. It uses bright red and pure white in alternating patterns. One nail might be solid red, the next solid white, and the accent nail features candy cane stripes. The stripes should be diagonal to elongate the nail. Vertical or horizontal stripes can make short nails look wider or stubby. The diagonal draw the eye upward.
To get perfect stripes, use striping tape or a steady hand with a striper brush. White pigment is heavy, so apply thin layers to avoid a lumpy finish. If you struggle with painting stripes, use nail vinyls. Stick the vinyl on, paint over it, and peel. It guarantees professional results at home. This is a high-energy look that pairs well with neutral winter clothing.
Get The Look: Essentials for DIY Manicures
- Base Coat: Orly Bonder (grips polish to the nail).
- Top Coat: Seche Vite (dries instantly, high shine).
- Tools: Double-ended dotting tool set and a cleanup brush.
- Care: Jojoba-based cuticle oil to prevent hangnails.
Frosty Blue Snowflake Nails
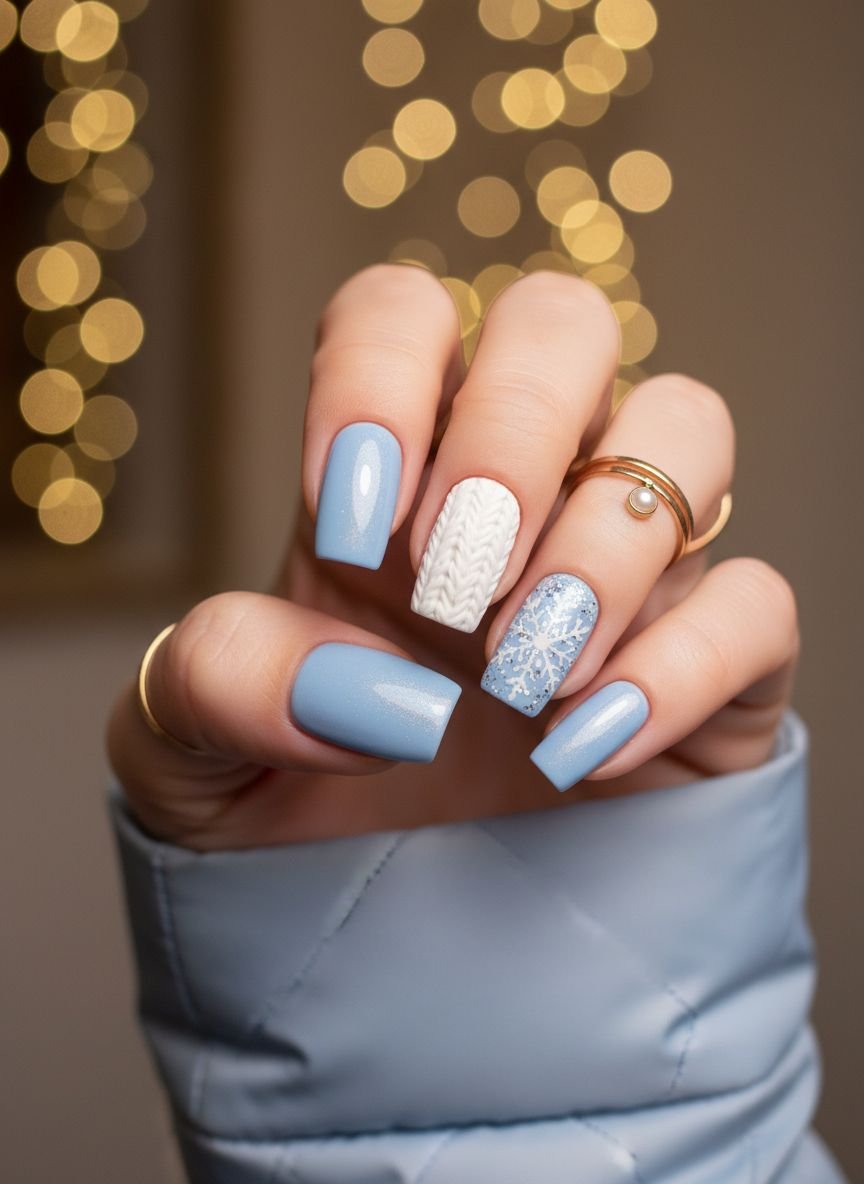
Ice blue is the alternative to red and green. A soft, pastel blue base evokes a frozen lake. White snowflakes are stamped or painted on top. The contrast is low, creating a subtle, dreamy effect. This is perfect for January when the Christmas festivities are over but winter remains. It looks clean and professional. The cool tones complement silver jewelry perfectly.
If you hand-paint the snowflakes, start with a simple cross. Then add an ‘X’ over the cross. Add tiny ‘V’ shapes to the ends of the lines. Keep the lines thin. Thick lines will make the snowflake look like a blob. If painting is too hard, snowflake stickers are widely available and look seamless under a good top coat. A matte top coat can make the nail look like frosted glass.
Pro Tip: Use a white polish with a shimmer for the snowflakes to mimic the way snow glistens.
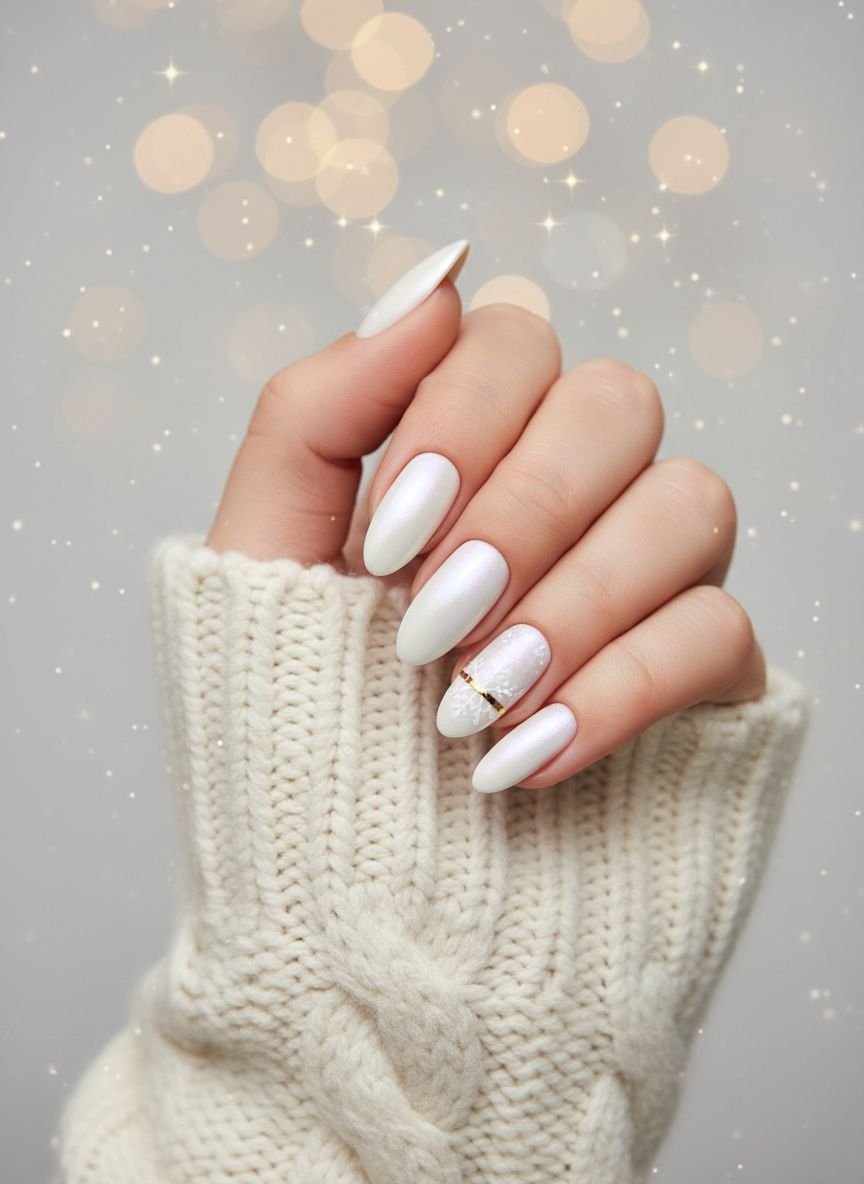
Iridescent Shimmer Nails

Sometimes the polish itself is the art. Iridescent polishes shift color depending on the angle of the light. They might look pink from one side and gold from another. This “glazed donut” or “aurora” effect is huge for 2026. It requires no nail art tools. It relies entirely on the special effect pigment in the bottle. It is ethereal and magical, fitting the winter mood without being literal.
You can achieve this with a chrome powder over a gel base, or a multi-chrome regular polish. If using powder, rub it onto a no-wipe top coat until it squeaks. The friction creates the mirror finish. If using regular polish, apply three thin coats to build up the opacity of the shimmer. This look is very forgiving of mistakes because the light reflection hides imperfections in the application.
Pro Tip: Apply a peel-off base coat if you use a glitter-heavy shimmer, as removal can be difficult.
Elegant White Snowflake Tips
This is a seasonal twist on the French manicure. Instead of a solid white line at the tip, the white tip is made of tiny snowflakes. The base remains sheer nude or pink. The snowflakes cluster at the free edge of the nail and fade out towards the middle. It is a gradient effect using shapes instead of color. This looks incredibly delicate and high-end.
You will need very small snowflake stickers or a stamping plate with tiny images. Place the snowflakes closer together at the tip and space them out as you move down. You can also use a sponge to dab white polish lightly at the tip for a “snowfall” base before adding the defined flake shapes. This creates depth. It is subtle nail art that passes strict office dress codes.
Pro Tip: Seal the free edge well. The stickers or paint at the very tip are prone to peeling if not capped with top coat.
Festive Green and String Light Nails
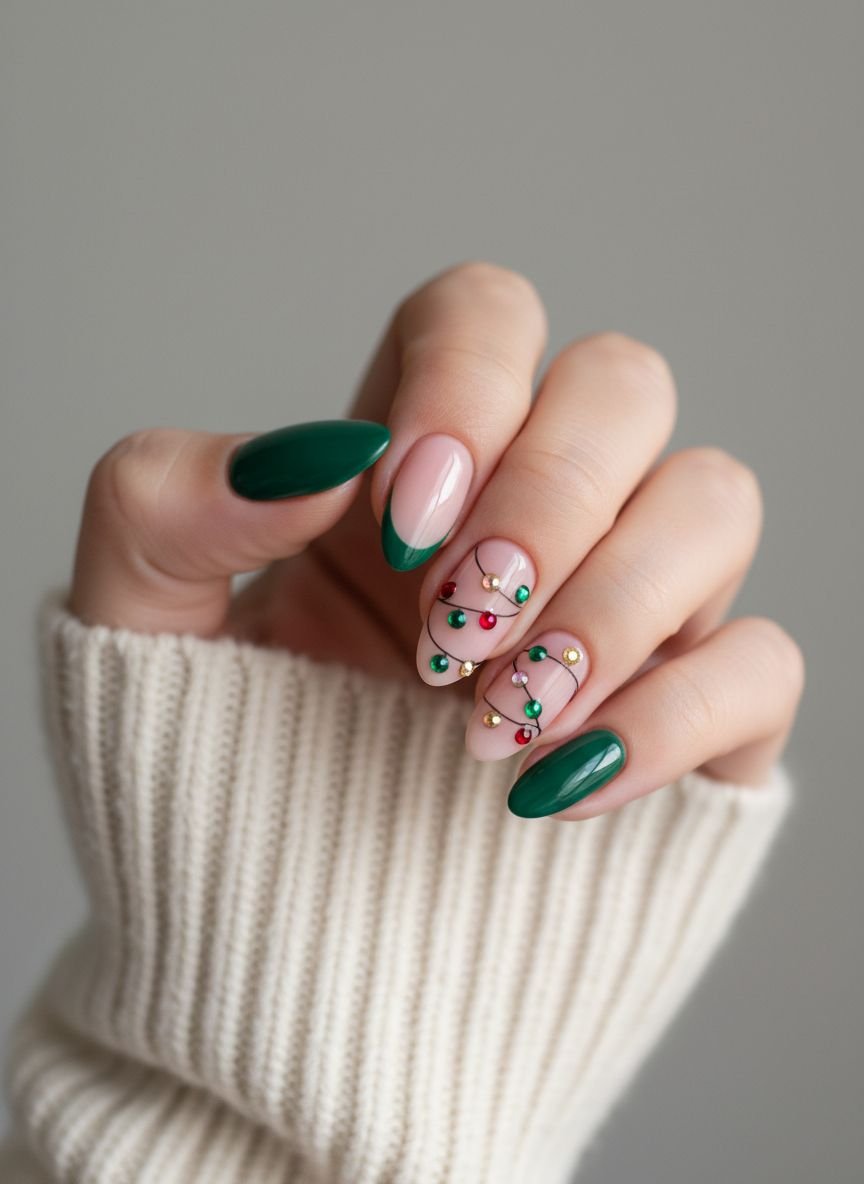
This design combines the deep green trend with the string light motif. The base is a dark, glossy forest green. The string lights are painted in gold or silver metallic polish rather than black. This looks more elegant and less cartoonish. The bulbs are small rhinestones glued onto the metallic wire. The 3D element of the rhinestones adds texture and luxury.
Paint the green base and let it dry fully. Use a metallic gel liner to draw the swags of wire. Cure or let dry. Then, use a tiny dot of glue to place multi-colored rhinestones along the wire. The dark green background makes the gems sparkle intensely. This is a jewelry-heavy look, so keep your actual rings simple to let the nails shine.
Pro Tip: Use a top coat around the gems, not over them. Polish over rhinestones dulls their facets and ruins the sparkle.
Burgundy and Glitter Snowflake Accent
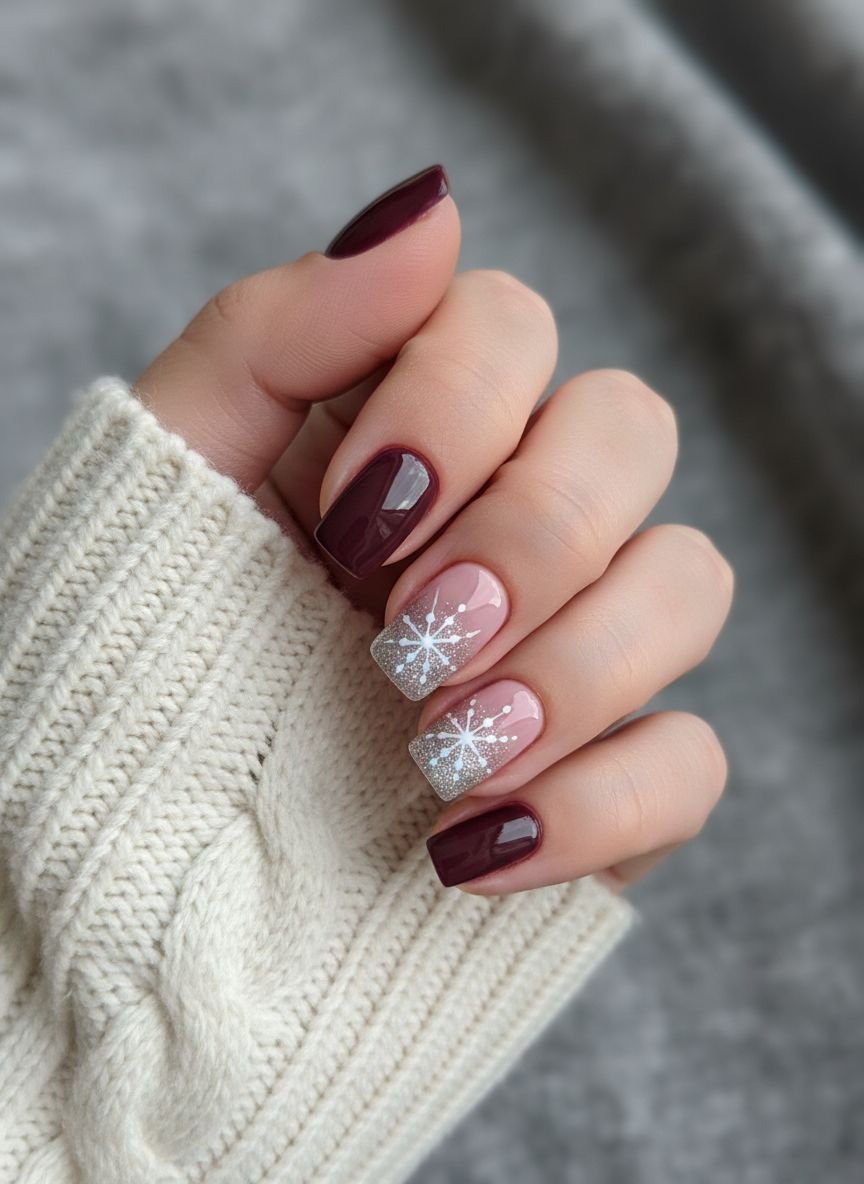
Burgundy is the color of winter warmth. It is universally flattering. Paint three nails in solid, deep burgundy. Paint the ring finger and thumb in a full-coverage silver or champagne glitter. On the burgundy nails, add a single, large snowflake in the same glitter color. This ties the look together. The mix of cream finish and glitter finish creates a balanced visual interest.
Choose a glitter polish that is opaque. You do not want to see the nail plate through it. You might need to sponge the glitter on to get full coverage. For the snowflake on the burgundy nail, use a thin brush dipped in the glitter polish. Glitter polish is thick, so drag the brush slowly to deposit the sparkles where you want them.
Pro Tip: Apply a peel-off base coat to the glitter nails only. It saves you from scrubbing with acetone later.
Winter Ski Adventure Nails
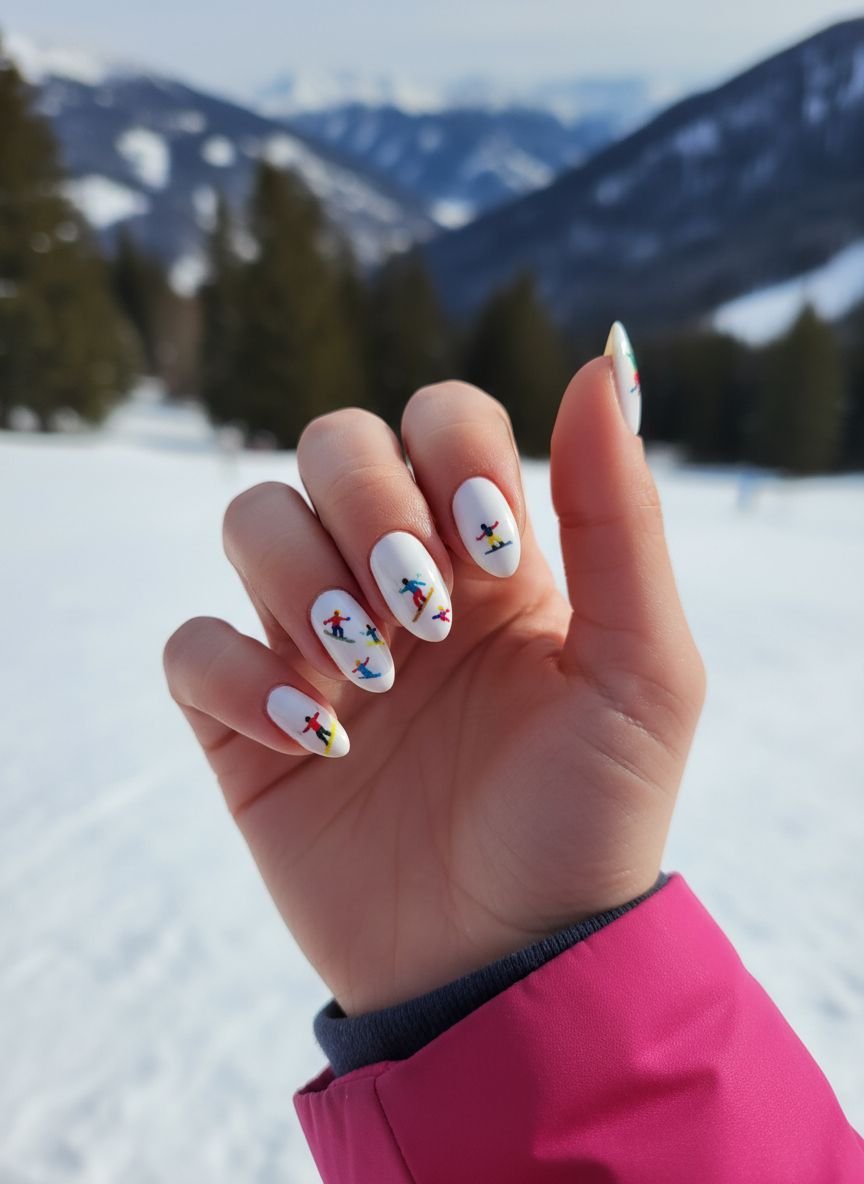
This theme is for the outdoor enthusiast. It features abstract mountain peaks. Use a pale blue base for the sky. Paint white triangles at the tips to represent snow-capped mountains. You can add a tiny skier silhouette or pine trees in dark green if you have the space. On short nails, just the mountain peaks are enough to convey the vibe. It is geometric and cool.
Use tape to block off the triangles. This ensures the mountain peaks are sharp and straight. You can vary the height of the peaks on different nails. Add a touch of silver glitter to the “snow” caps to make them glisten. This design looks sporty and fresh, perfect for a January trip to the slopes.
Pro Tip: Save this idea to your Pinterest board for your next winter vacation.
Frosty Snowman French Tips
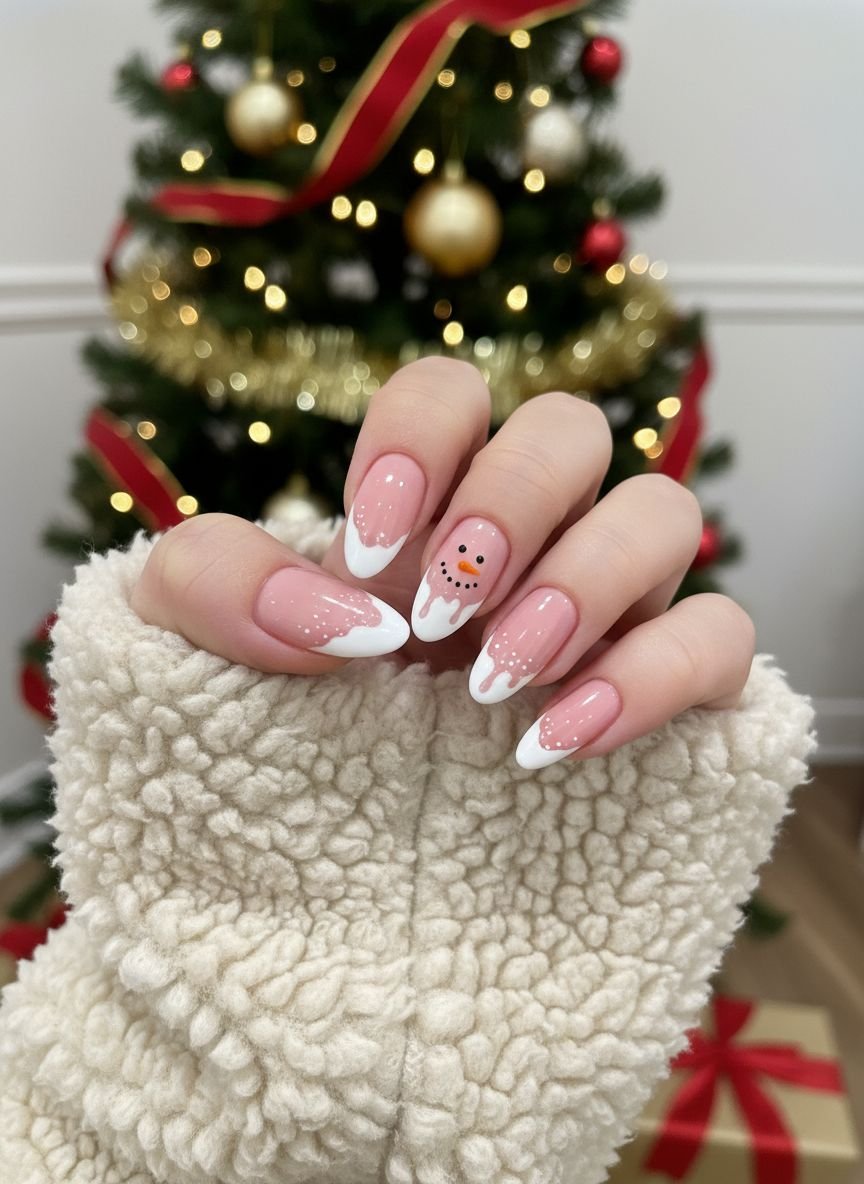
This is a cute character design that fits the French tip structure. The white tip of the nail becomes the face of the snowman. The rest of the nail is nude. Add two black dots for eyes, an orange dash for a nose, and a dotted smile right on the white tip. It is subtle because from a distance, it just looks like a French manicure. Up close, it is a snowman.
Placement is critical. Keep the face features small and near the center of the white tip. If you put them too high, they will be filed off if you shorten your nails. Use a very fine orange striper for the carrot nose. It adds a tiny pop of warm color to an otherwise cool-toned manicure.
Pro Tip: Wait for the white tip to be rock hard before drawing the face to prevent the colors from bleeding into the white.
Snowy Polar Bear Nails
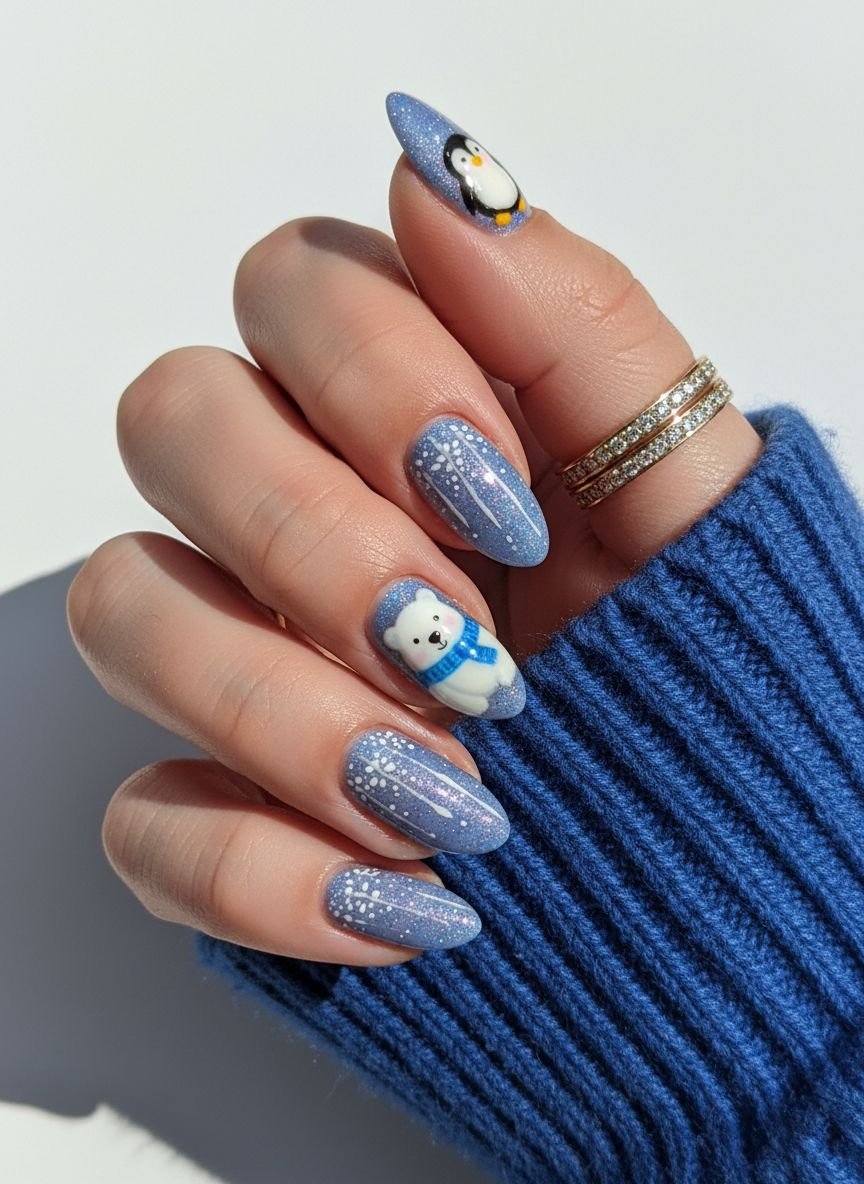
Similar to the cat design, this features a polar bear. The base is an icy blue. The bear is painted in white on the accent nail. You only need to paint the head and rounded ears peeking up from the bottom of the nail. It looks like the bear is popping up to say hello. It is adorable and fits the winter theme without being Christmas-specific.
Use a large dotting tool to make the head shape (a semi-circle) at the cuticle or the tip. Use a smaller tool for the ears. Add the facial features in black. The background blue should be light enough that the black stands out, but dark enough that the white bear is visible. A shimmer top coat over the blue background looks like falling snow.
Pro Tip: Keep the bear design simple. Too many details will muddy the look on a short nail.
Black and White Winter Fireworks
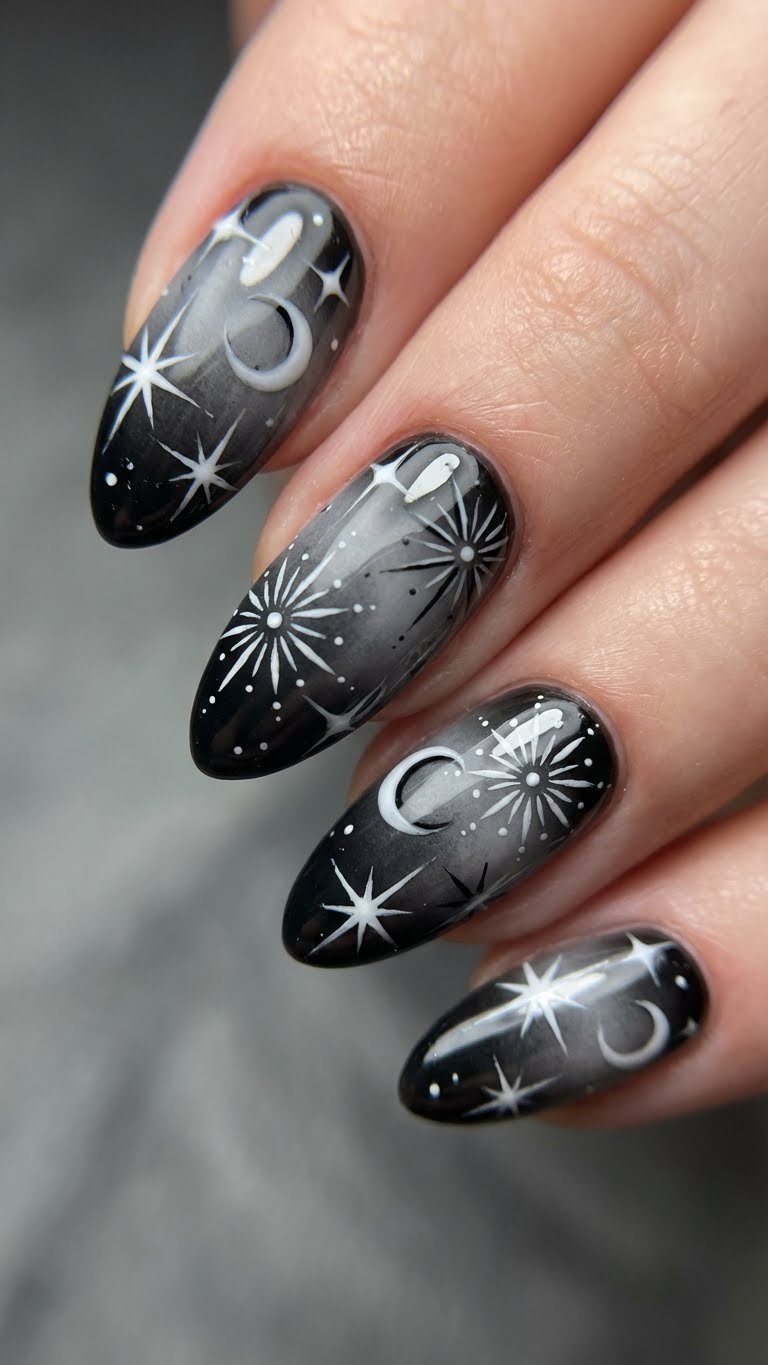
This is the ultimate New Year’s Eve look. Start with a solid black base. Use a white striper brush to paint exploding fireworks. Start from a center point and flick the brush outward in all directions. The high contrast of black and white is striking and modern. It looks like a chalkboard drawing. It is edgy and cool.
You can add a tiny rhinestone in the center of each firework explosion. This adds a physical focal point. Vary the size of the fireworks. Some can be large, some small. Partial fireworks coming from the side of the nail look dynamic. Matte black with glossy white fireworks is a texture combination that looks very high-fashion.
Pro Tip: Black polish stains cuticles easily. Apply liquid latex around your nail before painting to make cleanup easy.
Sparkling Pink Gift Wrap Nails
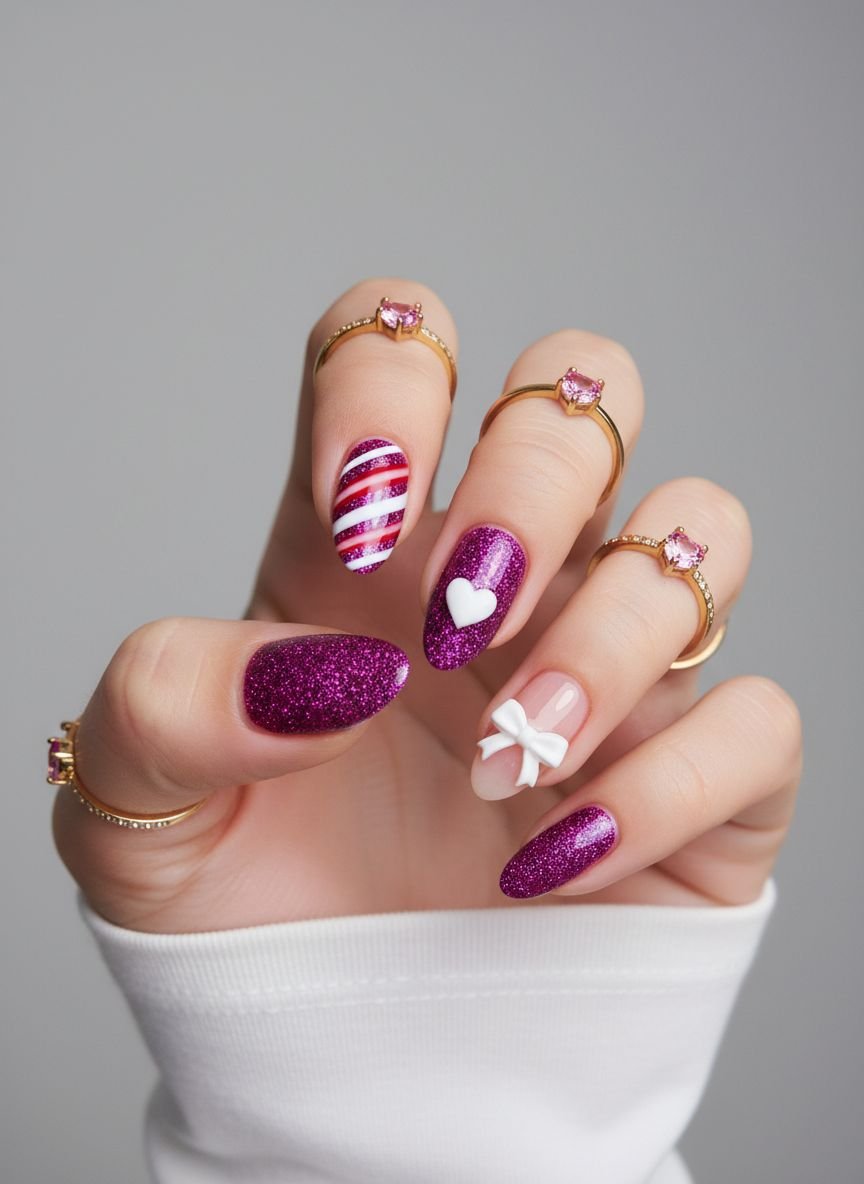
Pink is unexpected for winter, which makes it trendy. Choose a cool-toned, bubblegum pink. The design mimics a wrapped gift. Paint a cross shape in silver or gold glitter to represent the ribbon. Where the lines cross, add a small bow. This is feminine and playful. It brightens up the dark winter wardrobe palette.
The “ribbon” lines must be straight. Use striping tape. Paint the pink base, apply tape in a cross, paint the glitter over the open space, and remove the tape. You can use a 3D nail charm for the bow if you want extra drama, or just paint two loops with your glitter polish.
Pro Tip: A silver glitter ribbon looks best with cool pink; gold looks best with warm pink. Match the undertones.
Green and Gold Elegance
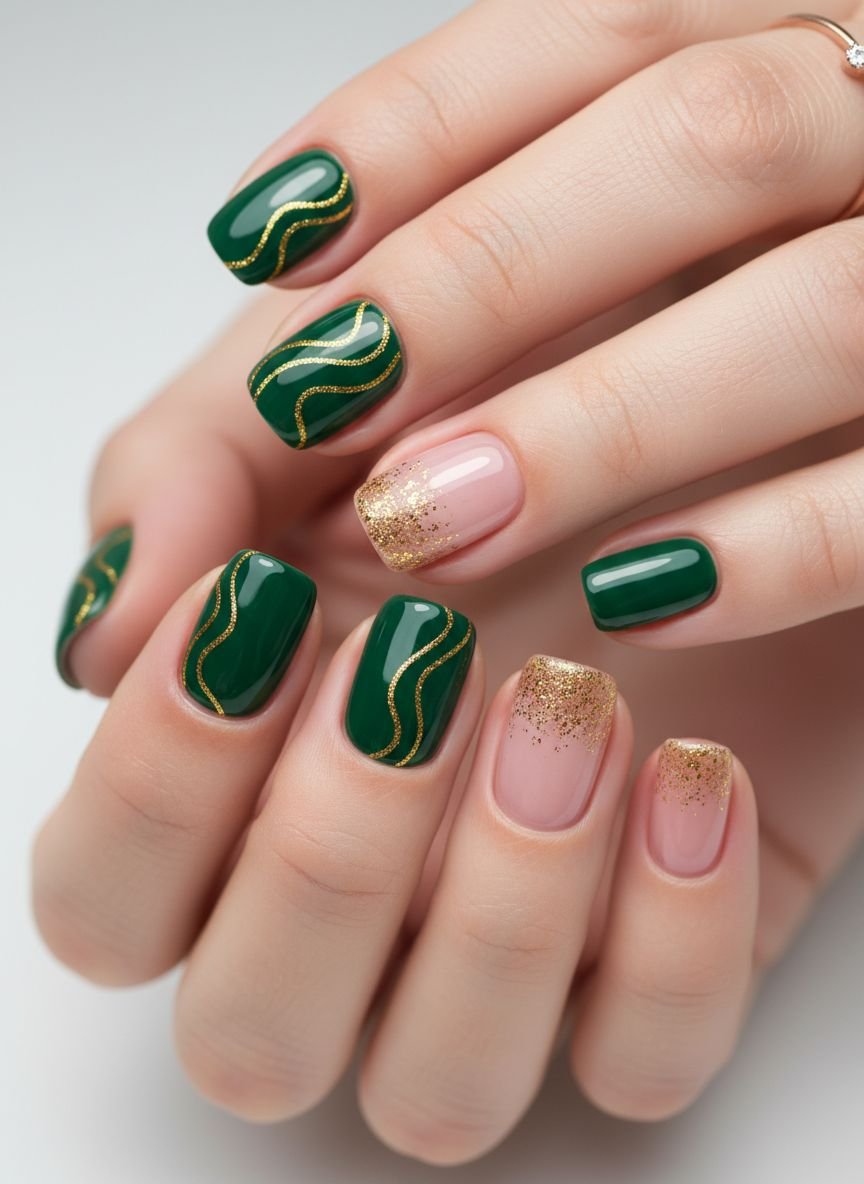
This is an abstract take on the holiday colors. Paint the nails a sheer nude. Use a dry brush technique to swipe dark green and gold polish randomly across the tips. It creates a distressed, artistic look. It is not perfect, which is the point. It looks like modern art. The gold catches the light, and the green grounds it.
Wipe most of the polish off your brush before touching the nail. You want scratchy, feather-like strokes, not globs of color. Layer the gold over the green. This design grows out gracefully because the base is nude. You can wear this for three weeks without the regrowth line being obvious.
Pro Tip: This is the easiest design for beginners because “messy” is the goal.
Festive Christmas Stocking Nails

Finish the collection with a cozy stocking design. The base is white or cream. On the accent nail, paint a red sock shape. Decorate the sock with white stripes or polka dots. It is a mini illustration on your finger. It feels traditional and homely. The red stocking pops against the neutral background.
Break the stocking down into shapes: a rectangle for the leg and an oval for the foot. Connect them. Add a white cuff at the top. Use a matte top coat to make the stocking look like fabric. This design pairs perfectly with holding a mug of hot cocoa.
Pro Tip: Use a red acrylic paint for the stocking instead of polish. If you mess up, you can wipe it off with water without ruining the base polish.
Popular Asked Questions
What is the nail trend for winter 2026?
The main trend is “quiet luxury.” This means short, natural shapes with deep, rich colors like emerald green, burgundy, and chocolate brown. Textures like velvet (magnetic polish) and sheer “milk bath” nails are also very popular.
What color nails for January 2026?
After the holidays, shift to “palate cleanser” shades. Icy blues, soft whites, cool greys, and silver chrome are trending. These colors reflect the frosty weather and feel fresh after the heavy reds and greens of December.
Are short nails in style for 2026?
Yes, absolutely. Short square and “squoval” (square with rounded corners) nails are the preferred shapes for 2026. They are practical for daily life and look very chic with dark, bold polish colors.
How to make short nails look good in winter?
Focus on cuticle care. Dry winter skin makes short nails look messy. Keep cuticles hydrated. Use vertical design elements (like stripes or swirls) to elongate the nail visually. Leave a tiny gap on the sides when painting to make the nail bed look narrower.
Conclusion
Winter 2026 is the season of the short nail. You do not need length to participate in the season’s best trends. From the deep luxury of emerald greens to the playful charm of snowman tips, these 22 ideas prove that style is not about size. It is about creativity and execution. Whether you choose the durability of gel or the ease of regular polish, keep your hands hydrated and your edges crisp.


Leave a Comment