
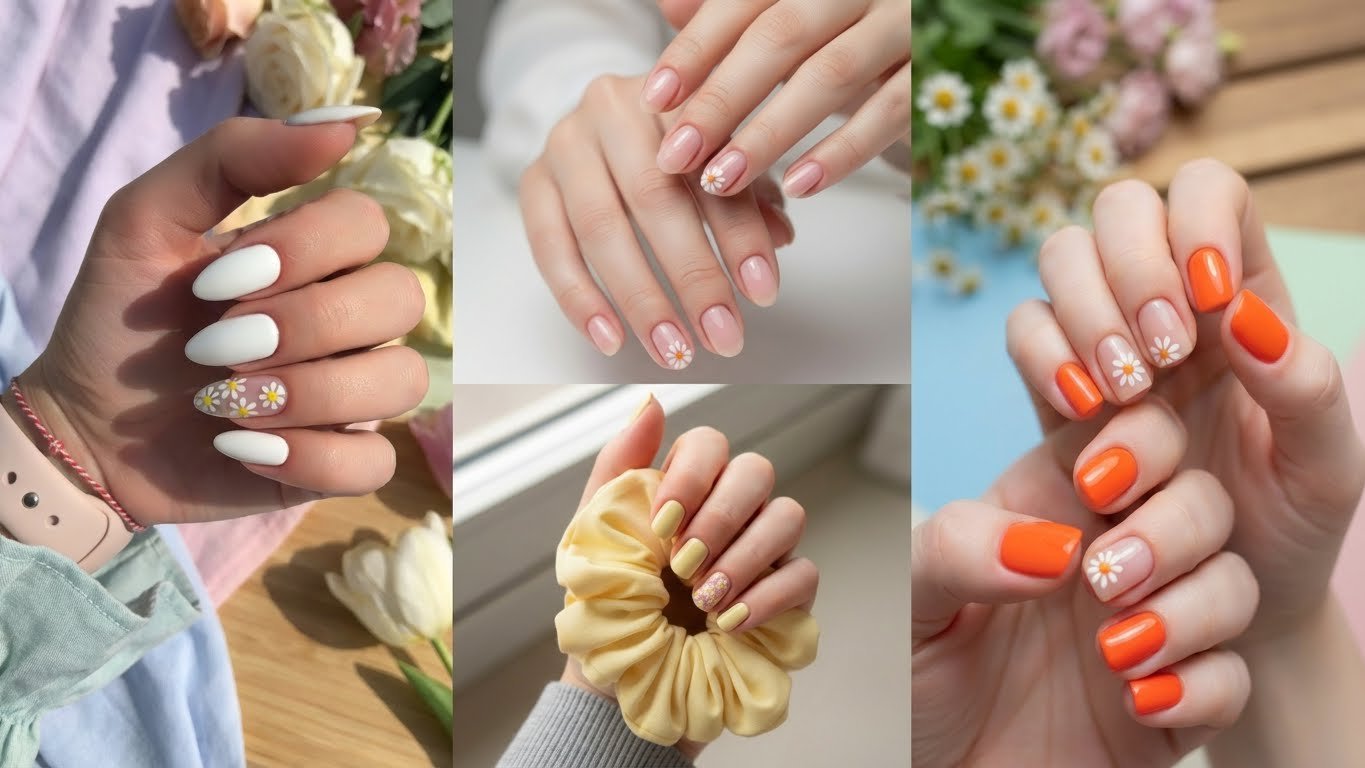
Spring brings a shift in wardrobe and beauty routines. Heavy winter coats get stored away. Dark manicures get swapped for something lighter. You might feel the urge to visit a salon for fresh seasonal art. That can get expensive quickly.
You can achieve high-end results at home. You do not need steady hands or expensive tools. Many trending looks rely on clever hacks and simple techniques. This guide focuses on achievable beauty. We prioritize designs that work on short nails and natural shapes. You will find styles here that take less than twenty minutes. Get ready to save money and enjoy your new manicure.
Key Takeaways
- Tools exist in your home: Bobby pins and toothpicks replace expensive dotting tools.
- Negative space is your friend: Clear base coats hide regrowth and make errors less visible.
- Pastels are the 2026 standard: Butter yellow, lilac, and soft sage green dominate this season.
- Stickers save time: High-quality decals mimic hand-painted art perfectly.
Table of Contents
- The Micro Daisy Minimalist
- Soft Lavender Sprigs
- Abstract Petal Tips
- The Single Stem Rose
- Butter Yellow French Twist
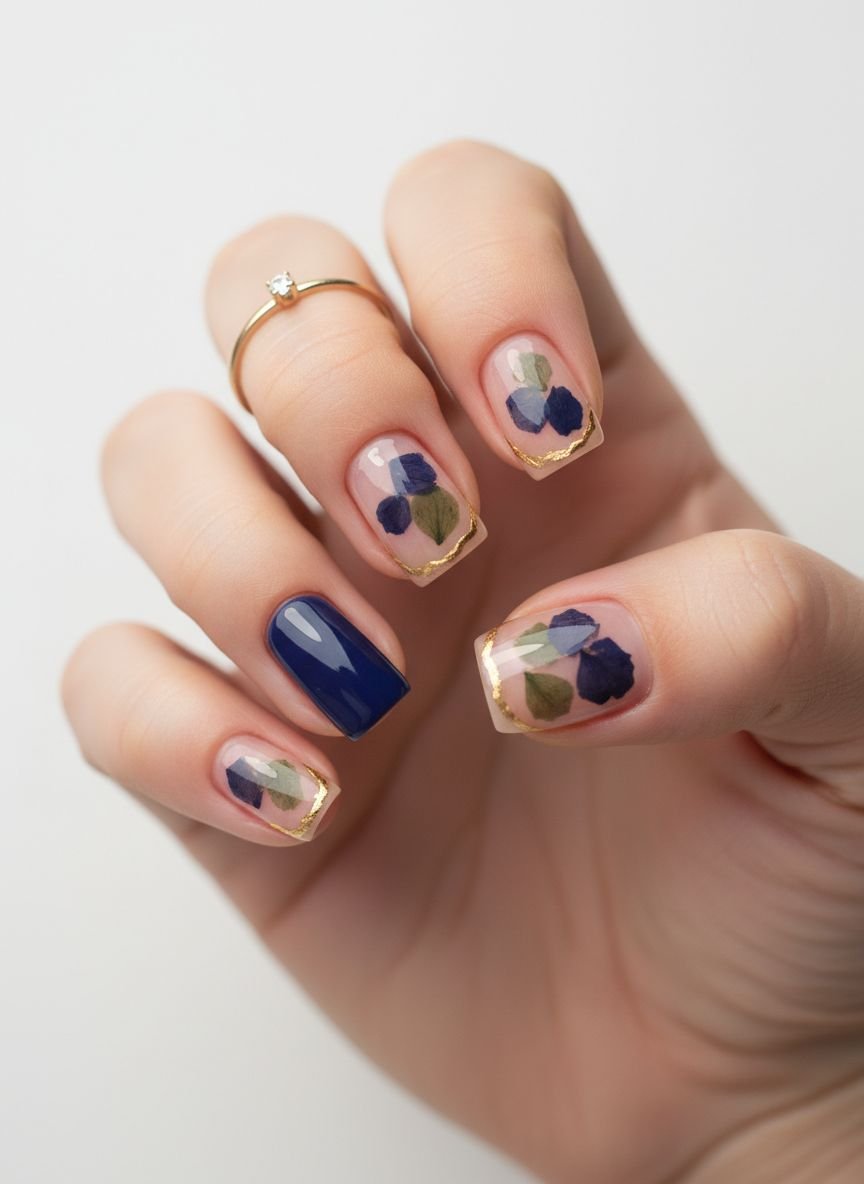
- Vintage Dried Press
- White Clouds and Blooms
- Negative Space Tulips
- Matte Finish Sunflowers
- Pastel Polka Dot Florals
- The Garden Party Mix
- Metallic Gold Accents
- Cherry Blossom Pink
- Mint Green Vines
- The 60s Mod Flower
- Sheer Milk Bath Nails
- Cornflower Blue Accents
- Textured 3D Petals
- Comparison: Tools vs Stickers
- Get The Look: Essentials
- Popular Asked Questions
- Conclusion
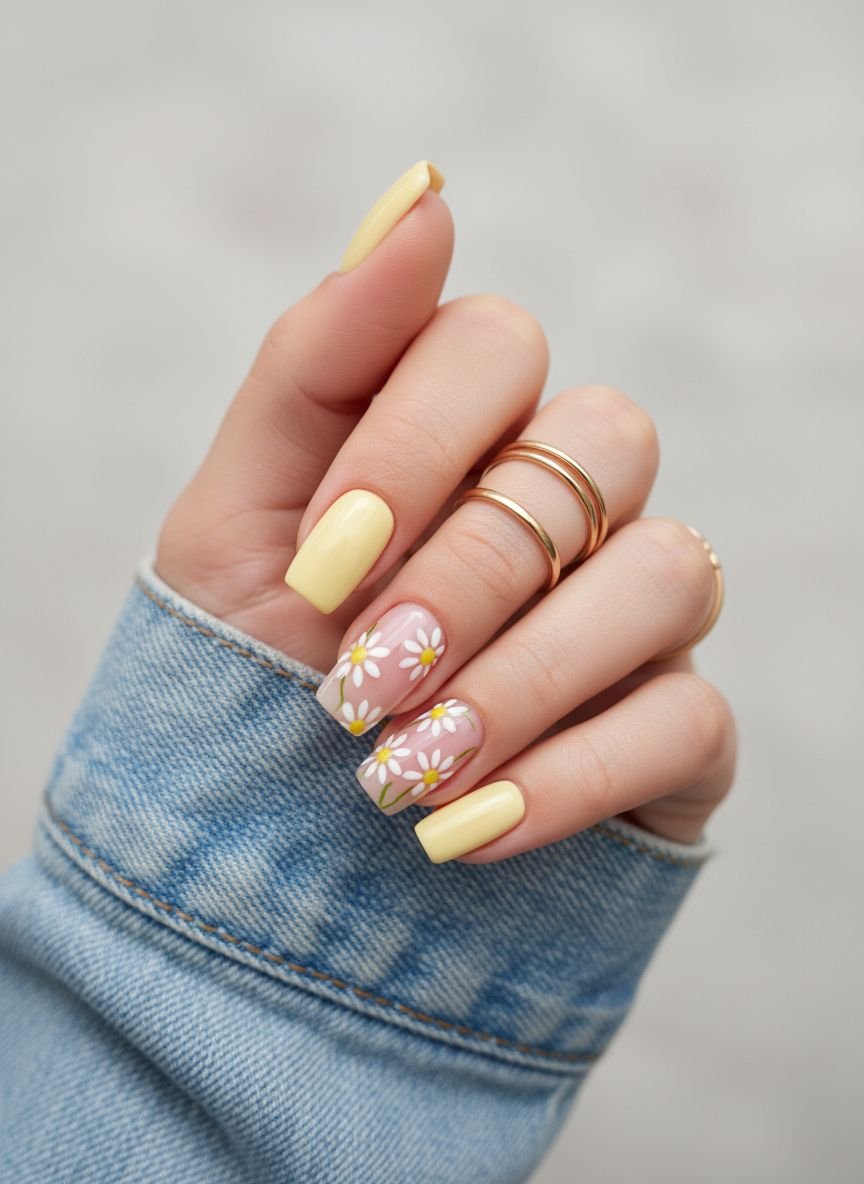
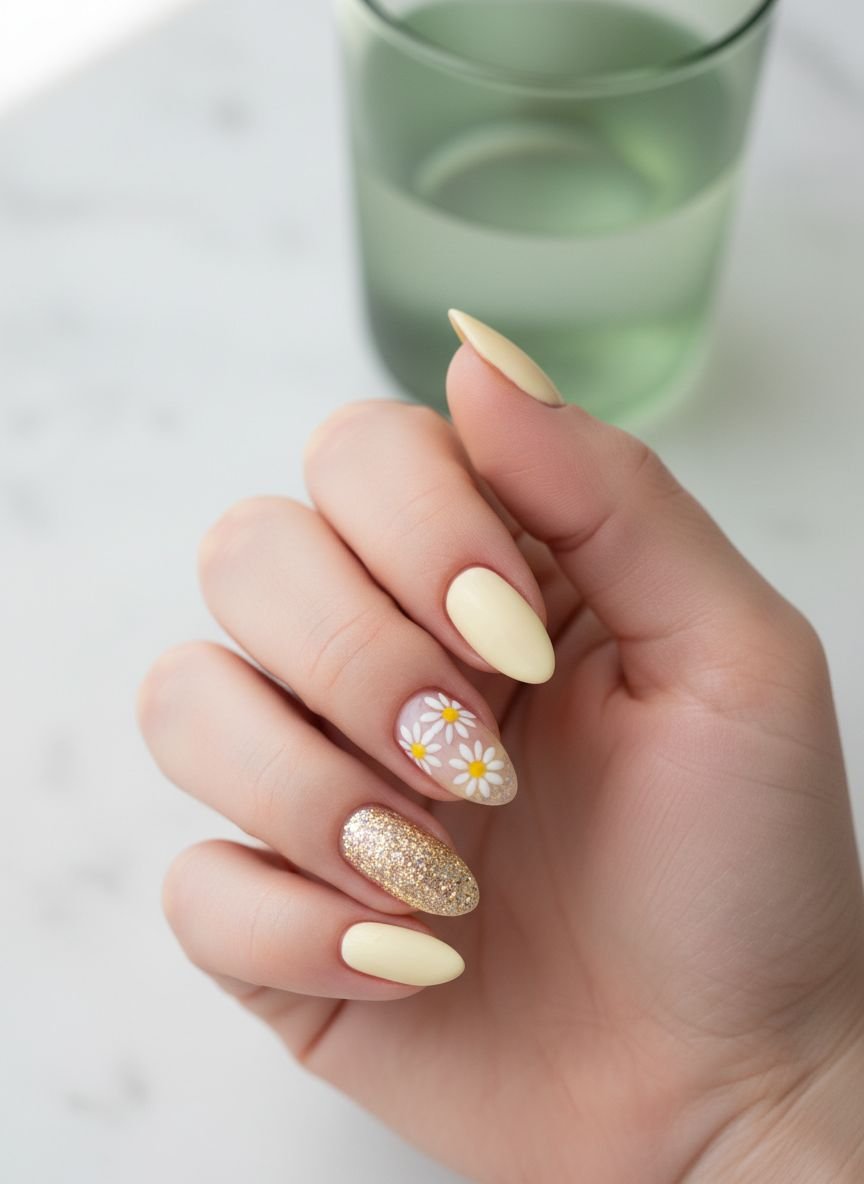
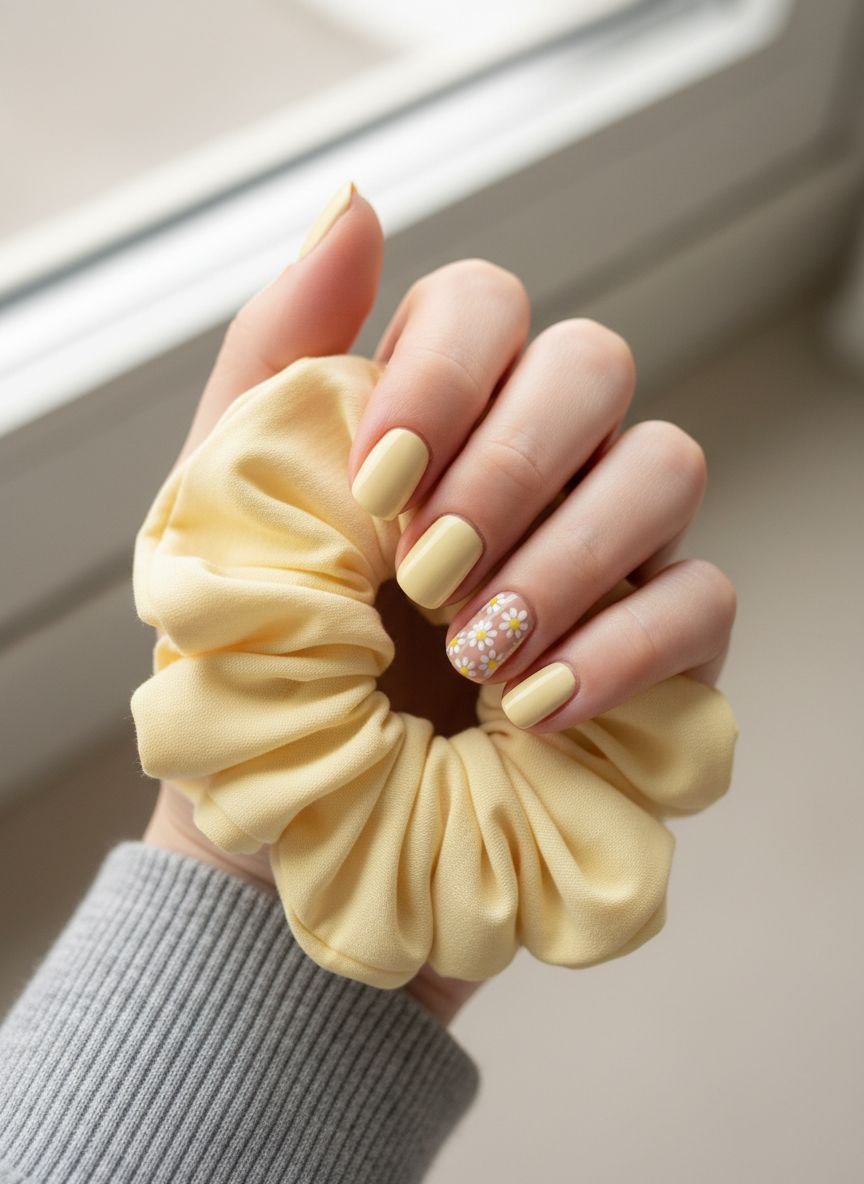
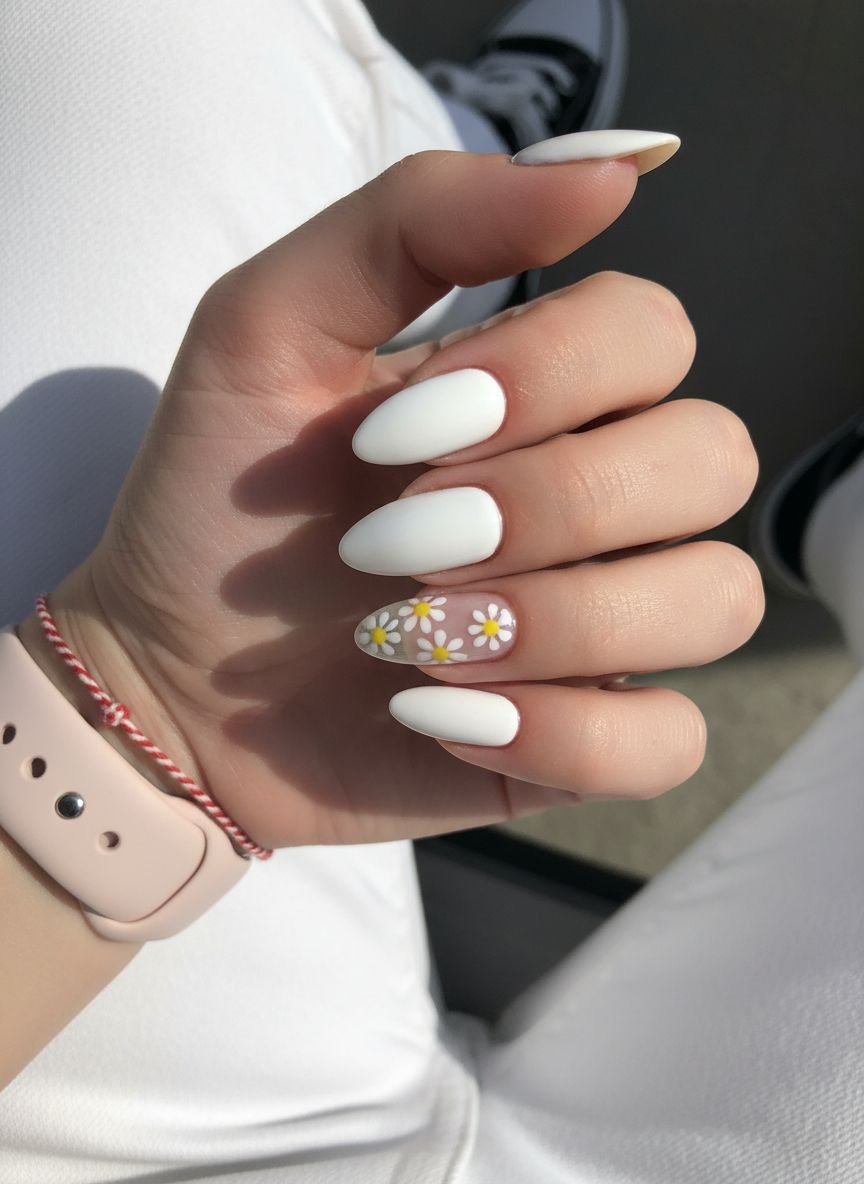
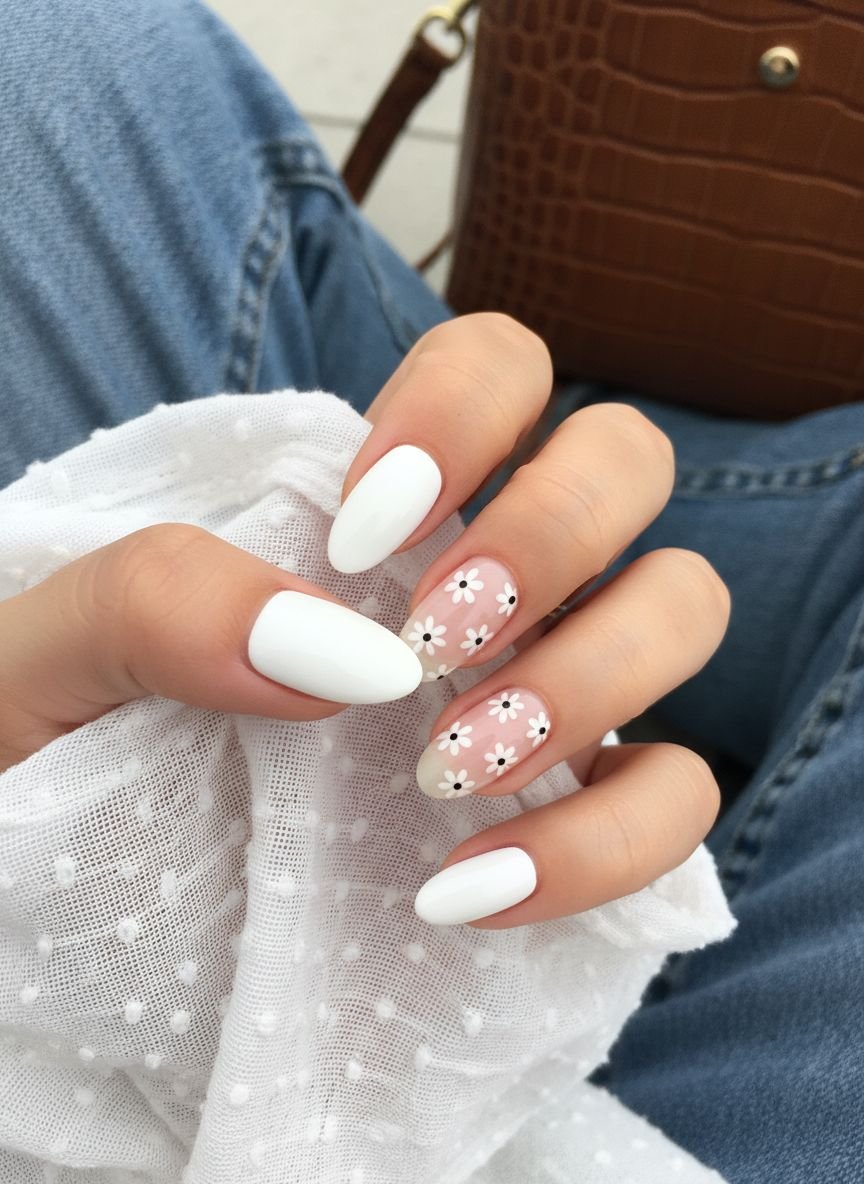
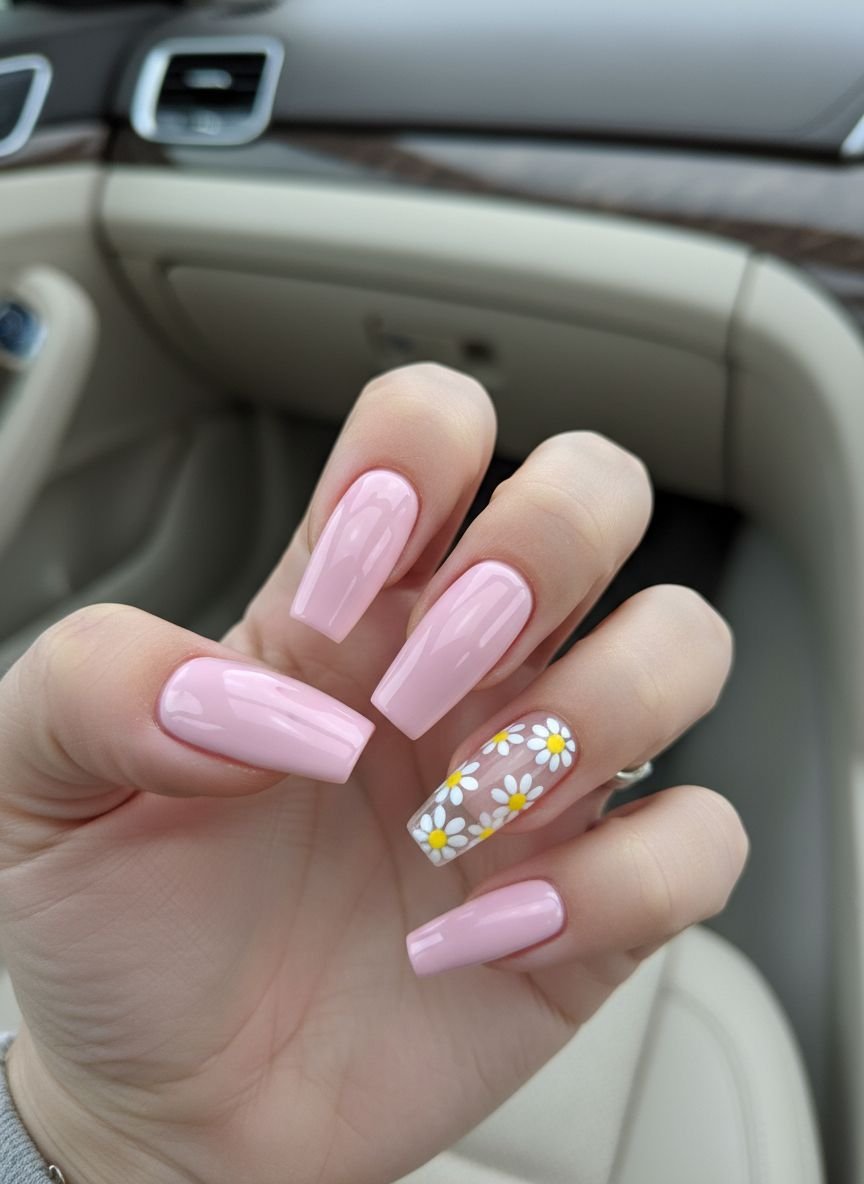
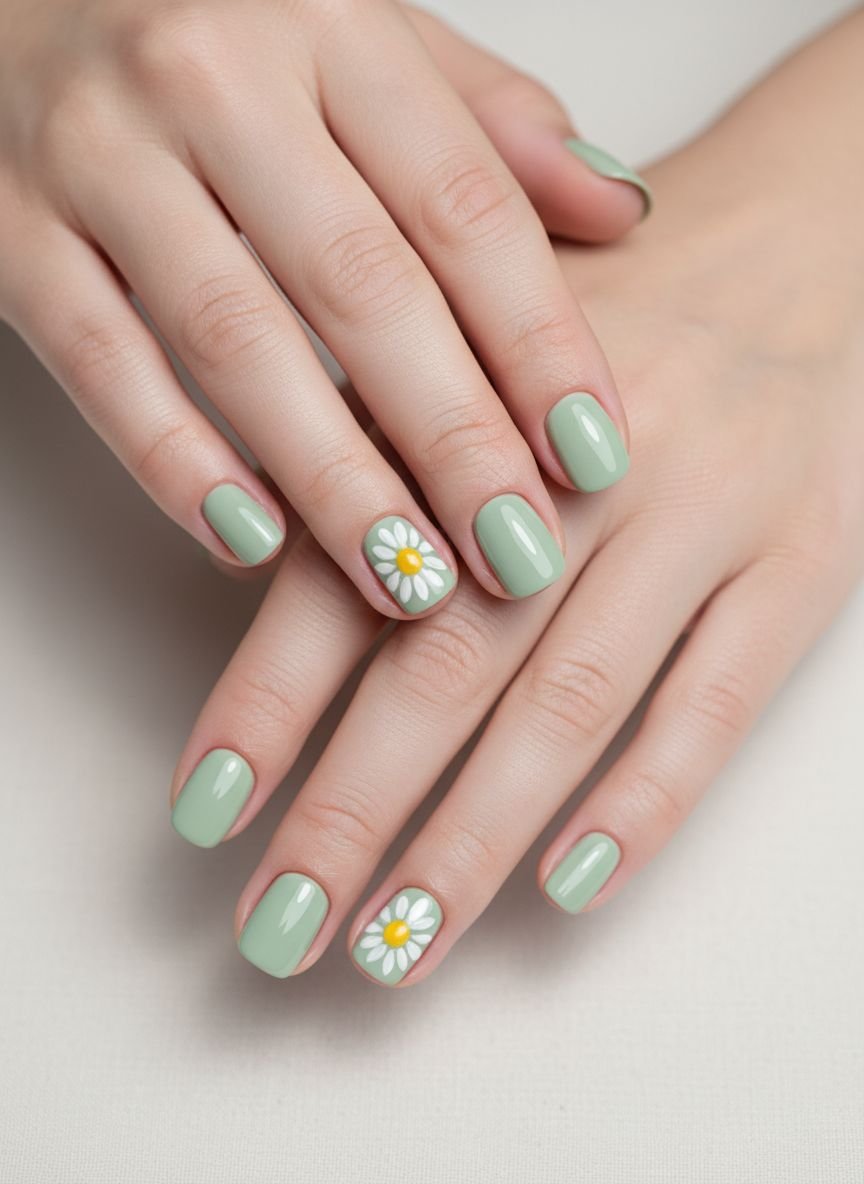
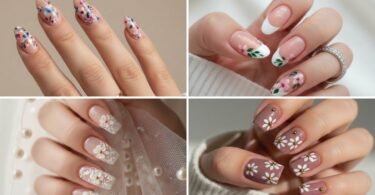
The Micro Daisy Minimalist
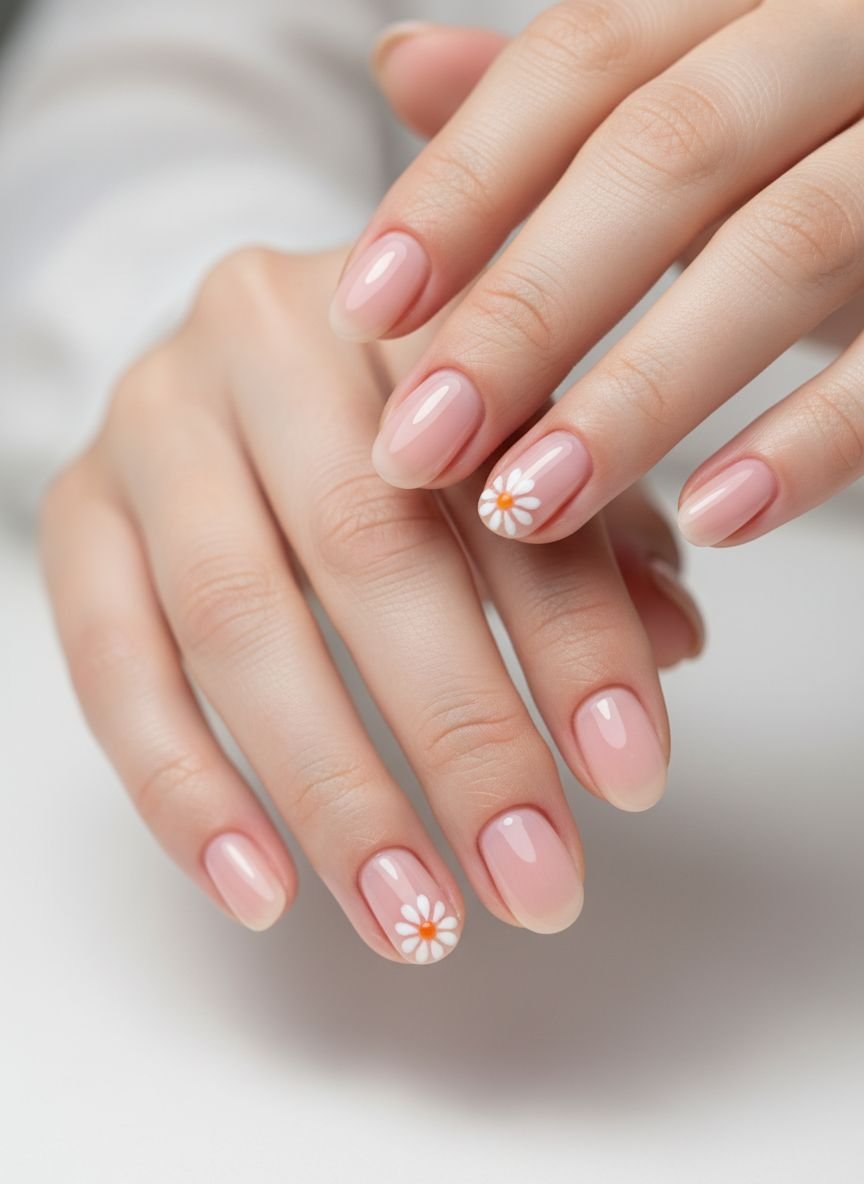
This design relies on the “less is more” philosophy. You start with a sheer nude or clear base coat. This keeps the nail looking healthy and clean. The focus remains entirely on the tiny blooms. You place one or two small daisies near the cuticle or the tip.
The technique is incredibly simple. You use a dotting tool or a bobby pin head. Dip it in white polish for five surrounding dots. Place a yellow dot in the center. The spacing allows your natural nail to shine through. This style works exceptionally well for office environments. It looks polished without being loud.
Pro Tip: Apply a glossy top coat immediately after the dots dry to smooth out the texture.
Soft Lavender Sprigs
Purple signals the arrival of spring. This design captures the essence of a lavender field. You need a steady hand or a thin striper brush. Paint thin, curved green lines starting from the bottom of the nail. These act as your stems.
The flowers are just tiny dabs of purple polish. You cluster them near the top of the green line. Vary the pressure to create different dot sizes. This mimics the organic shape of real lavender. A matte top coat transforms this look completely. It gives the manicure a soft, velvet-like finish.
Pro Tip: Mix white into your purple polish to create three different shades for depth.
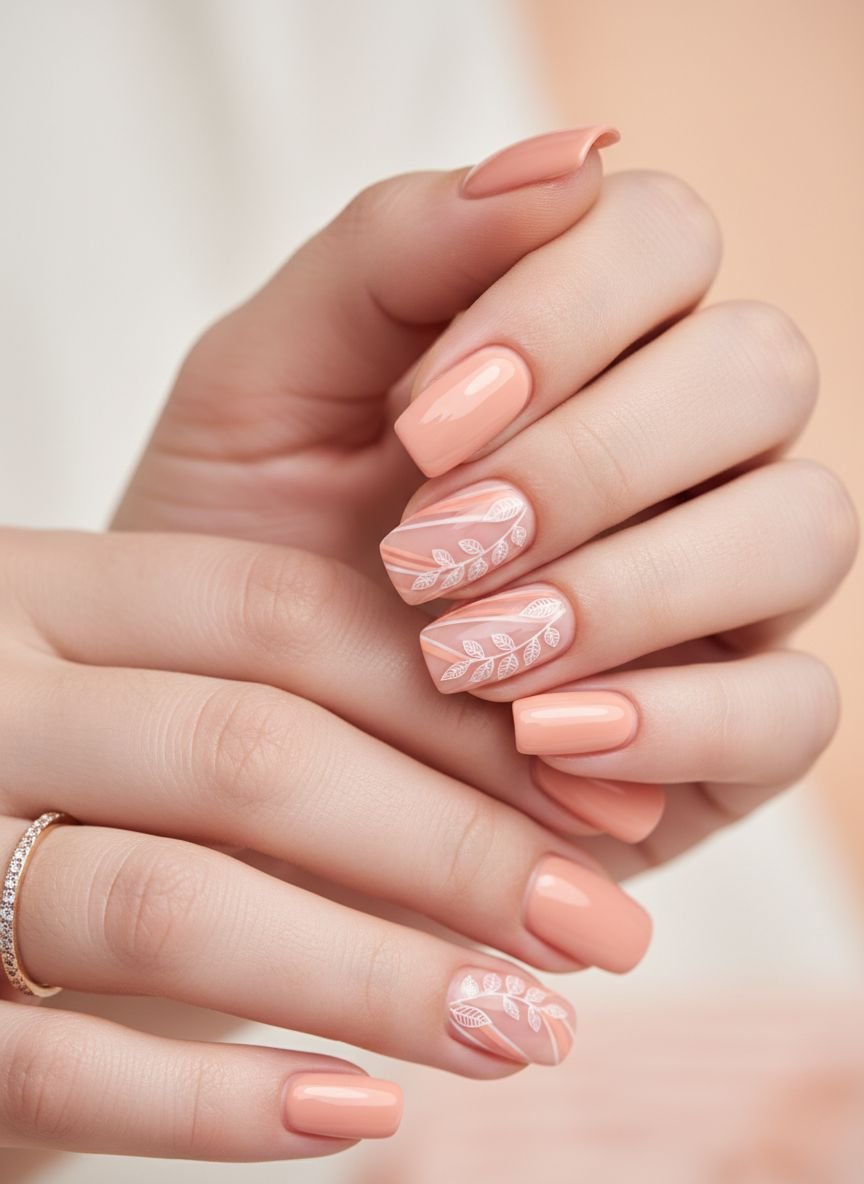
Abstract Petal Tips
French manicures evolved significantly this year. We no longer stick to the rigid white line. This version uses flower petals to define the nail tip. It softens the edge and adds color. You can choose a single color palette or go multicolored.
Paint small semi-circles along the free edge of your nail. These represent the tops of flower petals. Overlap them slightly. The center of the nail remains bare or nude. This design elongates short nails visually. It draws the eye upward.
Pro Tip: Use a makeup sponge to dab the petal colors if you want a softer, watercolor effect.
Save this idea to your Pinterest.
The Single Stem Rose
Romantic styles never fade. The single stem rose looks complicated but breaks down easily. You paint a thin vertical line in dark green. Add two small leaves near the middle. The rose itself is a swirl.
Use a red or pink polish. Place a blob at the top of the stem. Use a needle or toothpick to swirl white polish into the wet red paint. This creates the illusion of folded petals. You do not need to be precise. The abstract swirl reads as a rose from a distance.
Pro Tip: Flash cure your gel or wait for the stem to dry fully before starting the flower head to prevent smudging.
Butter Yellow French Twist
Butter yellow is the breakout color for Spring 2026. It feels sunny and optimistic. This design updates the classic French tip with this trending shade. You paint the tip yellow instead of white.
You add a single white daisy on the ring finger. Place it right on the smile line where the yellow meets the nude base. This bridges the gap between the two sections. It ties the look together. The yellow pops against all skin tones.
Pro Tip: If your yellow polish is streaky, apply a layer of white underneath the yellow tip first.
Vintage Dried Press

This look mimics pressed flowers in a book. You do not paint the flowers here. You use actual dried flowers or realistic decals. Start with a “milk bath” base color. This is a semi-sheer white or pink.
Place the dried flower into the second coat of wet polish. Press it down gently so it lies flat. Seal it with two thick layers of top coat. This encapsulates the flower. The result looks like custom resin jewelry. It feels earthy and natural.
Pro Tip: Use tweezers to place the dried flowers to avoid transferring oils from your fingers to the nail.
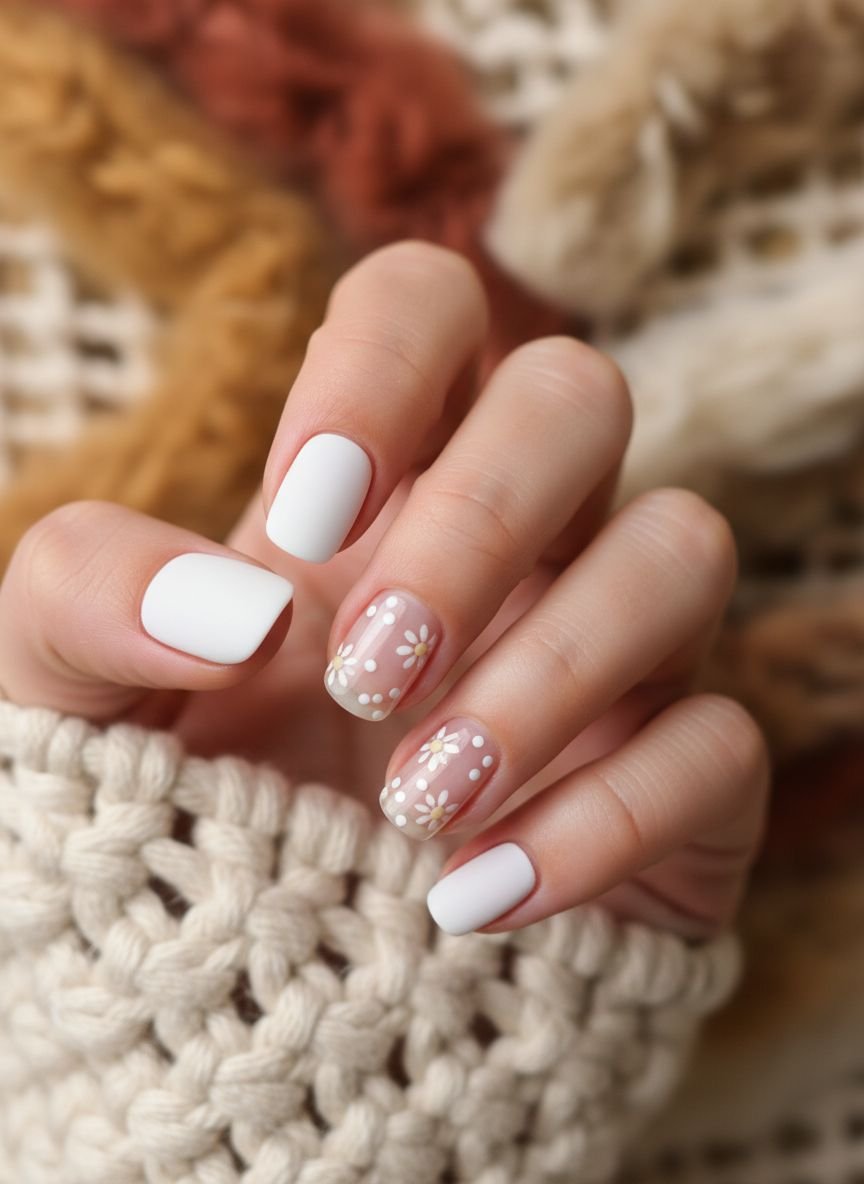
White Clouds and Blooms
Whimsical skies inspire this combination. You paint a sky blue base on all nails. Use a sponge to dab white shapes for clouds. Keep them fluffy and irregular.
Layer small flowers over the clouds or in the open blue spaces. The white-on-blue contrast is crisp. It feels like a sunny afternoon. You can add tiny silver dots to represent distant stars or dew. This design suits longer almond-shaped nails well.
Pro Tip: Thin out your white polish with acetone for the clouds to make them look wispy.
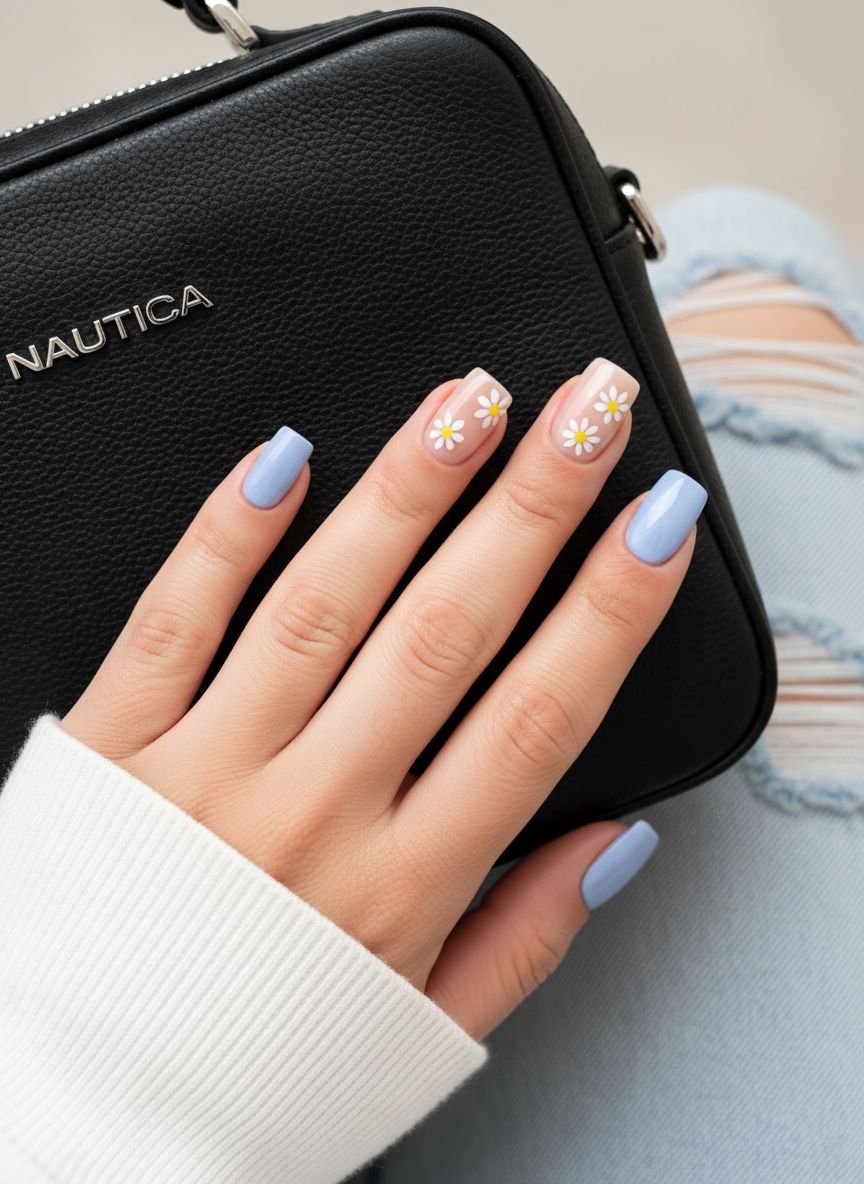
Negative Space Tulips
Tulips define the spring season. This design uses the negative space technique. Your natural nail color serves as the background. You paint only the tulip heads and stems.
Draw a “U” shape in pink or red. Add a “W” shape inside the top of the U to create petals. Add a simple green line for the stem. The lack of a base color makes the design pop. It also means chips are less noticeable.
Pro Tip: Keep the tulips near the sidewalls of the nail for a modern, asymmetrical composition.
Matte Finish Sunflowers
Sunflowers are bold and cheerful. They transition well from late spring to summer. You need a mustard yellow and a dark brown. Paint half-circles on the sides of your nails.
Add yellow petals radiating outward. The matte top coat is the secret weapon here. It removes the shine and makes the art look like a frantic drawing. It feels artistic and mature. Avoid neon yellow; stick to golden tones.
Pro Tip: Add small white highlights to the brown center to make the flower look 3D.
Save this idea to your Pinterest.
Pastel Polka Dot Florals
This combines two classic patterns. Pick five pastel shades. Paint each nail a different base color. Use a contrasting color for the dots.
Turn one dot on each nail into a flower center. Add petals around just that one dot. The rest remain simple circles. This breaks up the pattern. It adds a surprise element. It is playful and easy to execute.
Pro Tip: Ensure your dots are fully dry before applying the top coat to prevent dragging the color.
The Garden Party Mix
You do not have to choose just one flower. This design features a different bloom on each finger. Thumb is a rose. Index is a daisy. Middle is a tulip. Ring is a sunflower. Pinky is a violet.
Keep the background color consistent. White or nude works best. This unifies the mismatched flowers. It looks like a curated bouquet. It requires patience but the result is stunning.
Pro Tip: Plan your colors before painting to ensure the bouquet looks cohesive.
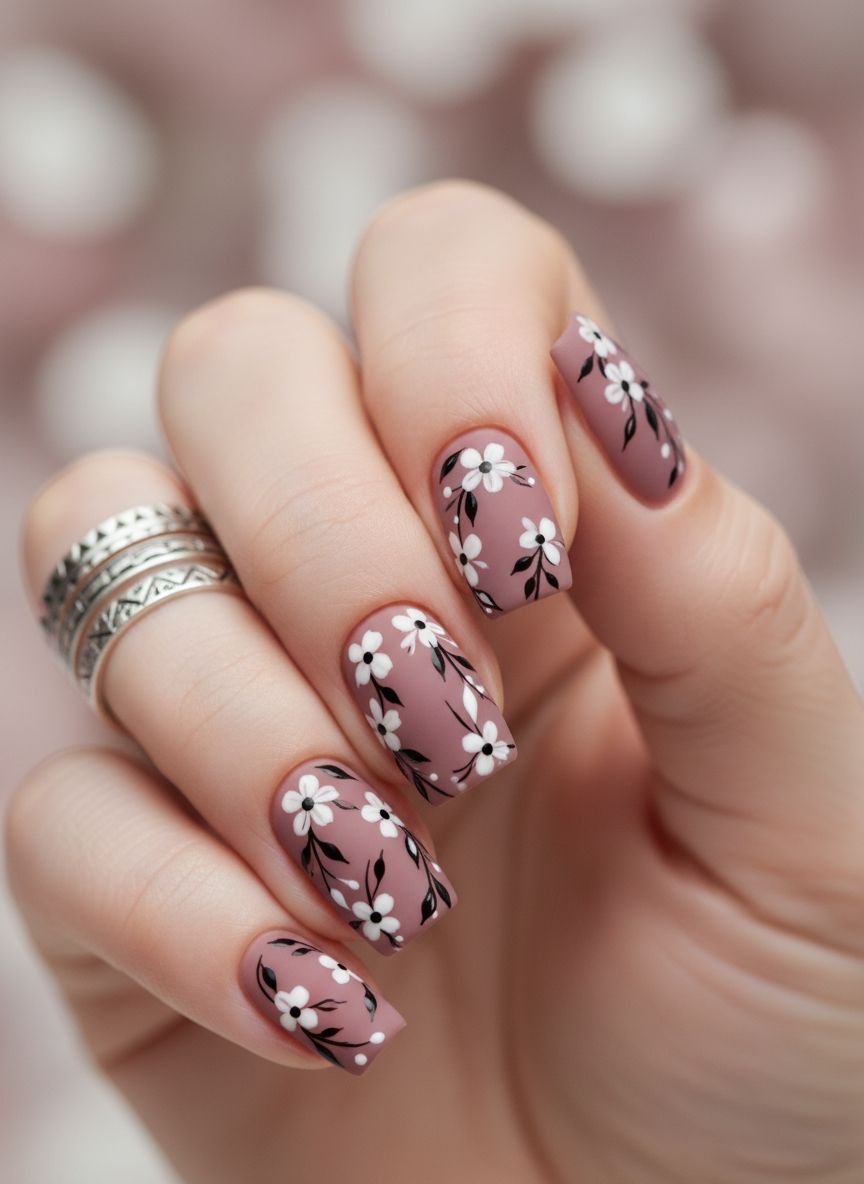
Metallic Gold Accents
Gold adds luxury to floral designs. Start with a blush pink base. Paint simple white five-petal flowers.
Instead of a polish center, use a gold stud or a drop of metallic gold polish. You can also trace the petals with a very fine gold line. This catches the light. It turns a simple manicure into evening wear.
Pro Tip: Use nail glue for gold studs to ensure they last longer than the polish.
Cherry Blossom Pink

Sakura season is fleeting and beautiful. Capture it on your nails. Use a pale pink base. Use a darker pink for the flowers.
These flowers do not need distinct petals. Dab small clusters of dark pink dots. Connect them with thin black or brown branches. The branches should look jagged, not straight. This mimics the cherry blossom tree structure.
Pro Tip: Sponge a tiny bit of white over the pink clusters to add volume.
Mint Green Vines
Mint green is fresh and cool. Paint your nails this solid color. Use white to draw winding vines across the nail.
Add tiny buds along the vine. You do not need full flowers. The suggestion of growth is enough. This design looks great on square nails. It softens the hard edges.
Pro Tip: Rotate your finger, not the brush, when painting curved vines.
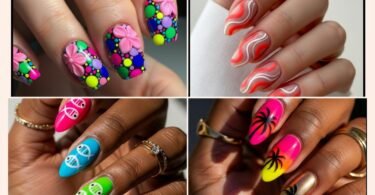
The 60s Mod Flower
Retro styles are back. This design uses bold shapes and bright colors. Think orange, hot pink, and teal. The flowers are large and cartoon-like.
Place one giant flower in the center of the nail. The petals should be round and distinct. Use a contrasting center. This is a statement look. It pairs well with denim.
Pro Tip: Use the rounded end of a makeup brush handle for larger dots.
Save this idea to your Pinterest.
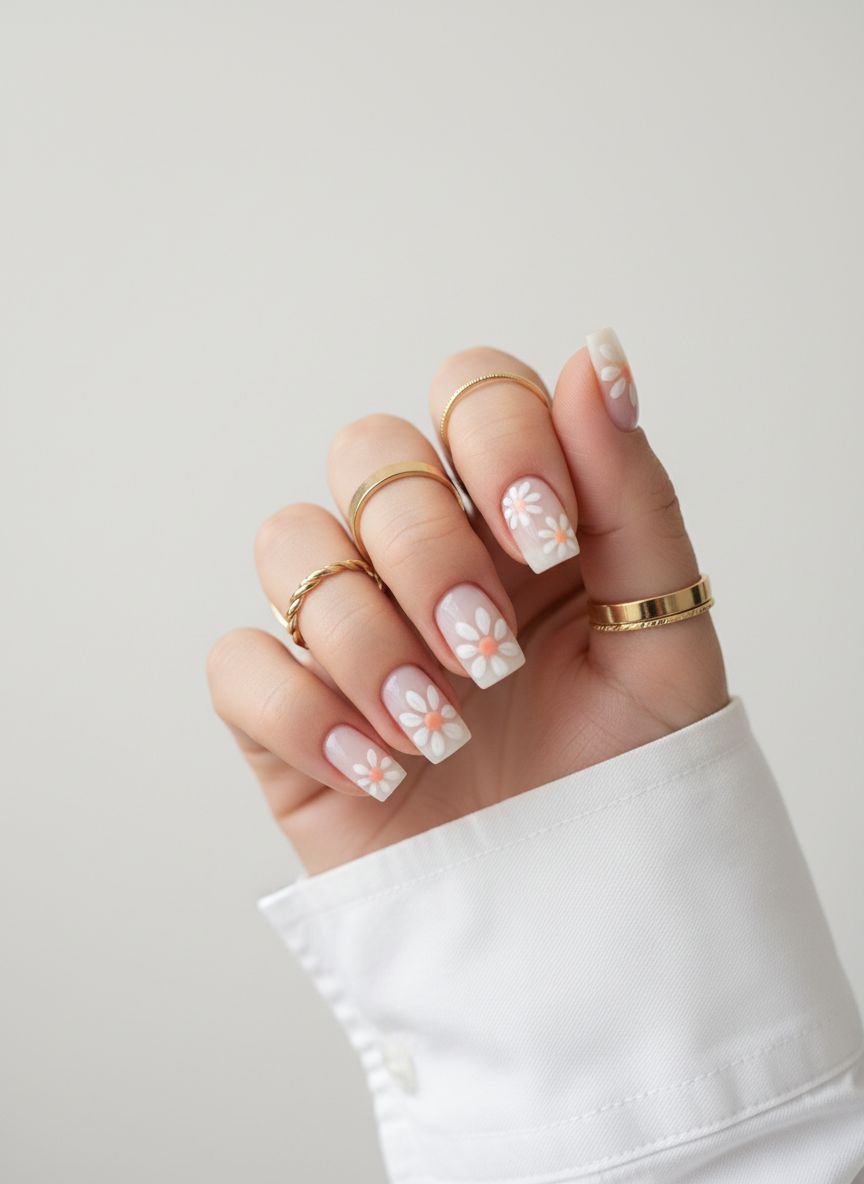
Sheer Milk Bath Nails

This is the ultimate clean girl aesthetic. You mix clear polish with a drop of white. This creates a milky, semi-transparent glaze.
Paint tiny, delicate flowers floating in this glaze. White or cream flowers work best. The look is ethereal. It is perfect for weddings or formal spring events. It looks expensive and understated.
Pro Tip: Apply one coat of milky polish, paint the flowers, then apply a second milky coat to sandwich the design.
Cornflower Blue Accents

Blue is an unexpected choice for florals. Cornflower blue is vibrant but soft. Use a nude base.
Paint blue flowers on the tips and near the cuticles. Leave the center empty. This frames the nail. The cool tone balances out warmer skin tones. It feels crisp and modern.
Pro Tip: Use a matte blue polish for the flowers against a glossy nude background for texture contrast.
Textured 3D Petals
Texture adds a new dimension. You use a thick builder gel or acrylic for this. If you only have regular polish, you can layer it.
Create the petals by building up drops of polish. Let each layer dry. The flower stands up off the nail. It is tactile. Keep the colors simple to let the texture shine.
Pro Tip: Do not apply top coat over the 3D element if you want to keep the sharp definition.
Comparison: Tools vs Stickers
| Feature | Hand-Painted (Tools) | Nail Stickers |
|---|---|---|
| Cost | Low (reuse household items) | Medium (recurring cost) |
| Time | High (15-20 mins per hand) | Low (5 mins per hand) |
| Skill Level | Moderate to High | Low (Beginner friendly) |
| Durability | Lasts as long as the polish | Can peel if not sealed well |
| Customization | Infinite possibilities | Limited to pack designs |
Get The Look: Essentials
To recreate these designs, you do not need a full salon kit. Here are the basics that get the job done.
- Double-Ended Dotting Tool: One end for large petals, one for tiny centers.
- Thin Striping Brush: Essential for stems and vines.
- Matte Top Coat: Instantly changes the vibe of any polish.
- Correcting Pen: Cleans up flooded cuticles instantly.
Popular Asked Questions
How do I do flower nails if I have shaky hands?
You should use the dotting method. It requires zero drawing skills. You just press the tool down to make dots. Arrange five dots in a circle and you have a flower. Alternatively, use nail stickers. They look professional and require no painting.
What is the most popular nail shape for Spring 2026?
The “Squoval” shape is trending. It combines the flat edge of a square with rounded corners. It is practical for typing and daily tasks. It also provides a wide canvas for floral art.
Can I use regular polish for these designs?
Yes. You do not need gel polish. Regular polish works fine. The key is patience. You must let the base layer dry completely before painting flowers on top. If the base is wet, the colors will bleed together.
How do I make my DIY manicure last longer?
Preparation is the secret. Wipe your nails with alcohol or nail polish remover before painting. This removes oils. Always “cap the free edge” by painting the very tip of your nail. Apply a fresh layer of top coat every two days to prevent chipping.
Conclusion
Spring offers the perfect excuse to experiment with your nails. These 18 simple flower nail designs prove that you do not need to be a professional artist. You can achieve salon-quality looks with basic tools and a bit of patience. Whether you prefer the minimalist micro daisy or the bold 60s mod flower, there is a style here for you.


Leave a Comment